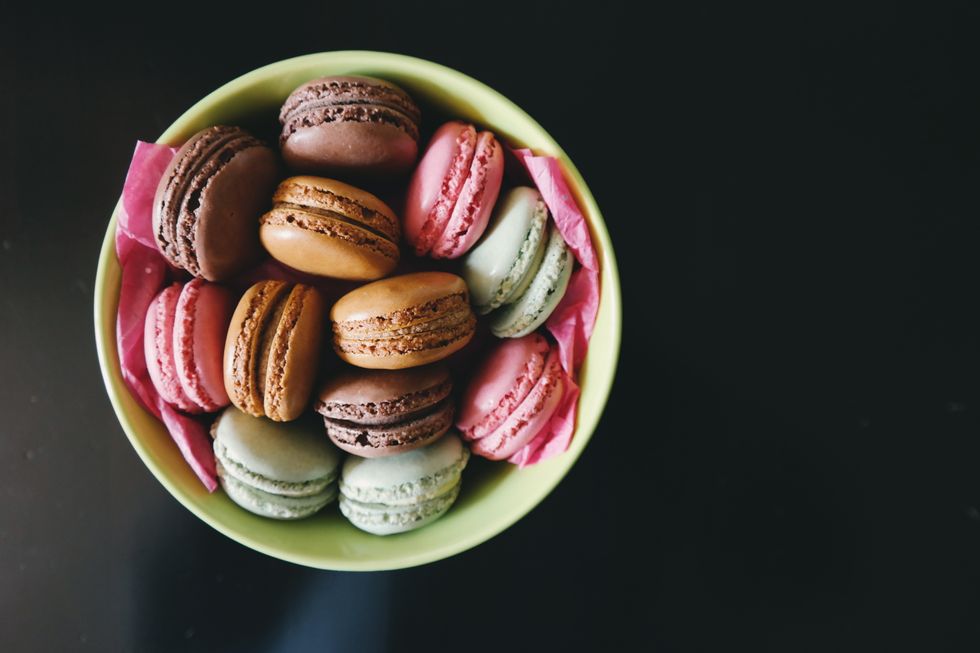
With the rise of sites such as Tumblr and Pinterest came the increased desire for aesthetics. Aesthetics are, put simply, a theme, and while there are an infinite amount of types, one kind has grown particularly popular: the pastel. And with the rise in pastels came the rise of anything pastel. This tends to include hair, florals, fabric type and French macarons. We've all seen these picturesque little sandwich cookies following a singular, pale color scheme, whether that be in multiple pictures in a row on extremely aesthetic Instagram feeds or in a bakery.
Unfortunately, these cookies are almost always sold alone at around $2 to 4 a piece, which, for something that generally amassing 100 grams, is borderline ridiculous. In fact, their exorbitant price has caused them to become an aesthetic status symbol of sorts. As a result, we crave them. So in 10 simple steps, here's an almost perfectly reliable methodology to making these without breaking the bank.
1. Gather the bare ingredients.
There are many variations of the macaron recipe, but as a general rule, all macarons have egg whites, fine almond powder, white sugar and powdered sugar. Besides that, many popular additives include (but are not limited to) gel food coloring, flavoring and vanilla extract. Do take note, however, that the classic macaron does not contain flour. This means that the classic macaron, if made the traditional way, is entirely gluten-free. So, don't let yourself be fooled by a "gluten-free" label as seen on some macarons sold in stores to make you pay a higher price.
2. Mix the dry ingredients.
Despite the name, don't pile all the dry ingredients into a bowl just yet. Sift the almond powder and the powdered sugar into a singular mixing bowl to ensure that everything is lump-free. Afterward, whisk the ingredients together to combine them. Then, set it all aside.
3. Make the meringue.
Add half the sugar, and whisk the egg whites until they look white and dense, not frothy or foamy. It's probably better to do this with a handheld beater or a kitchen mixer (unless, of course, you've got plenty of time to spare and arms of steel). If there are slight upward indentations when you lift the whisk, then you've reached the stage known as "soft peaks." Soft peaks are part of the optimum stage to add the other half of your white sugar and to color your meringue. Hard peaks is the stage where, when you lift the whisk, there are pronounced upward indentations and a pointy tip, and that is when the meringue is ready.
Once you reach hard peaks, stop whisking. Over-whisking the meringue will cause the proteins to separate from the liquids, make it unusable.
4. Mix the wet and dry ingredients!
Take the meringue, and fold half the powdery ingredients into it. Most chefs advise a gentle folding. Personally, I have found that folding then squishing the batter against one side of the bowl until the ingredients are adequately mixed and of a drippy consistencytis the best way to go. After the first half is mixed in, add the second half and then fold.
5. Make the macarons.
Transfer the macaron batter into a piping bag, then pipe it onto a piece of brand-new parchment paper. Don't do it on recycled parchment paper, as the paper is ruffled opposed to flat, and on such a surface, the macarons might come out flat. Also, don't do it on wax paper — the wax will melt onto the pan in the oven, and the whole removal experience will be very unpleasant. If you're not particularly good at making circles of equal size, lack a steady hand or have no idea exactly what size you want your macarons to be, I suggest macaron printouts that can easily be found online.
To pipe the macarons, start from the outside in, as if you were drawing a circle. When you fill in the middle, flick the bag upwards and move onto the next macaron. When refilling the bag, if you are using something like a sandwich or gallon bag, I suggest binder-clipping the bottom shut to minimize leaks. Also, if you are using a bag of some sort, know that cutting a smaller hole is much better than accidentally cutting a large one.
6. Wait for some time.
Some people skip this step entirely. However, I prefer resting them for 30 minutes before baking (give or take a few minutes, depending on the weather). If you can touch a macaron without getting any batter on your finger, then it's ready to bake.
7. Bake the macarons.
Follow the instructions from the recipe you're using, and place the macarons into the preheated oven for a designated amount of time. When they're finished baking, cool them on a rack for 20 minutes.
8. Make the filling. (Or don't.)
While the macarons are baking, make your filling. If you desire buttercream, chocolate ganache, cream cheese or whipped cream, now would be a good time to make it. If you plan on filling the macarons with something that is ready to use such as jam or peanut butter, now is the time to ensure that you actually have it.
9. Put them together!
When the macarons are nice and cooled and your filling is ready, fill the macarons with the filling. If you're filling them with something that is prone to melting such as ganache, whipped cream or cream cheese, make sure that the cookies are completely cool to the touch and not at all warm. We didn't come this far to have the filling melt all over the cookie! When filling them, keep in mind that they require less filling than you'd expect. Again, it's better to underill than overfill.
10. Enjoy!
Depending on the person, this can mean feasting on the new creations or feasting your eyes on the real-life aesthetic. Either way, enjoy the fruits of your hard work!


