About a week ago one of my old dance buddies contacted me asking if I could take some photos for his business portfolio. Of course, I was more than happy to help a friend out, but It was sorta last minute and we really didn’t have a good location, sooooo I decided to make a studio out of my living room! I'm writing about this because as I have said in previous blogs, taking professional photos doesn’t require a whole lot of fancy equipment. In this post, I will explain my own personal gear in detail because I want people to have a full understanding of how I made this studio work, but please understand that you can make a studio with almost any gear you have. All you need is a goal, space, lights, and a backdrop.
To start here's pictures of my living room before and after set-up was complete.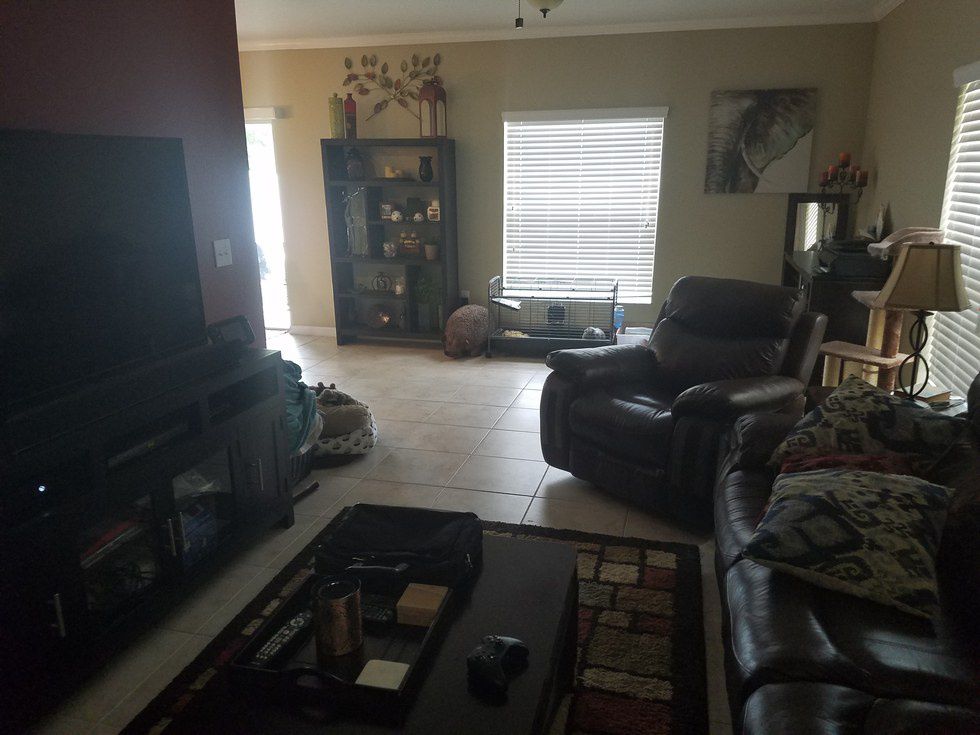
“HEY, YOU SAID NO FANCY EQUIPMENT!”
Don't stop reading yet! If you are a new photographer seeing stands, backdrops, and large lights might seem over your head or budget but I will explain everything in detail. When I’m done you’ll come to realizes that this is all very easy, cheap, and accessible equipment.
Goal
So first things first. When picking any location you have to envision what kind of image you want to create. Even though I was doing this in my living room I wanted the images to look like they came out of a professional studio. I decided I would go with a simple black background and a strong even frontal light so that my friend would pop out and the images would feel very clean.
Sense, I don't have any black walls and the ambient light in my living room wouldn’t do the job, I knew that I would have to set-up a backdrop and light stands. This was going to take a lot more room that my current living room set-up offered, so I moved everything around to make my studio space.
Ambient Light
When taking studio shots it's very important to have complete control over your light direction and white balance. In this situation I have three large windows pouring in light from all sides. If I left these windows as is, they would throw unwanted light and colors onto my subject. So I took some extra backdrops and cover them up.
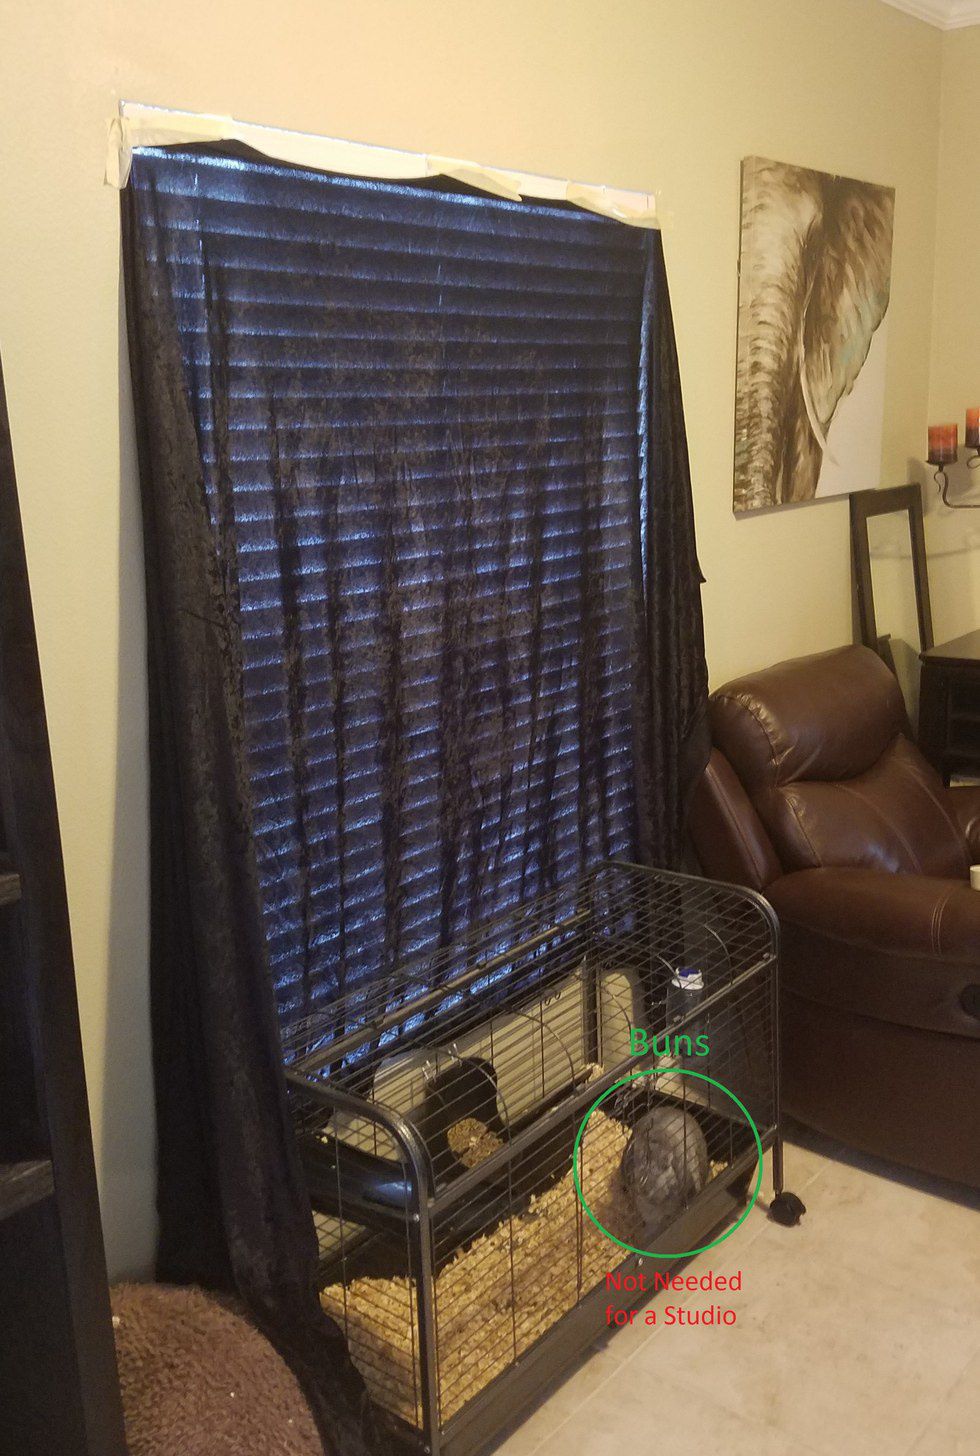
Look at the way the room transforms when I covered up just one window! Mind you all these images are on my cell phone. I didn't manually change settings or edit the images. This is just how my camera reacted to the change in Ambient light.
Equipment
For this shoot, I used:
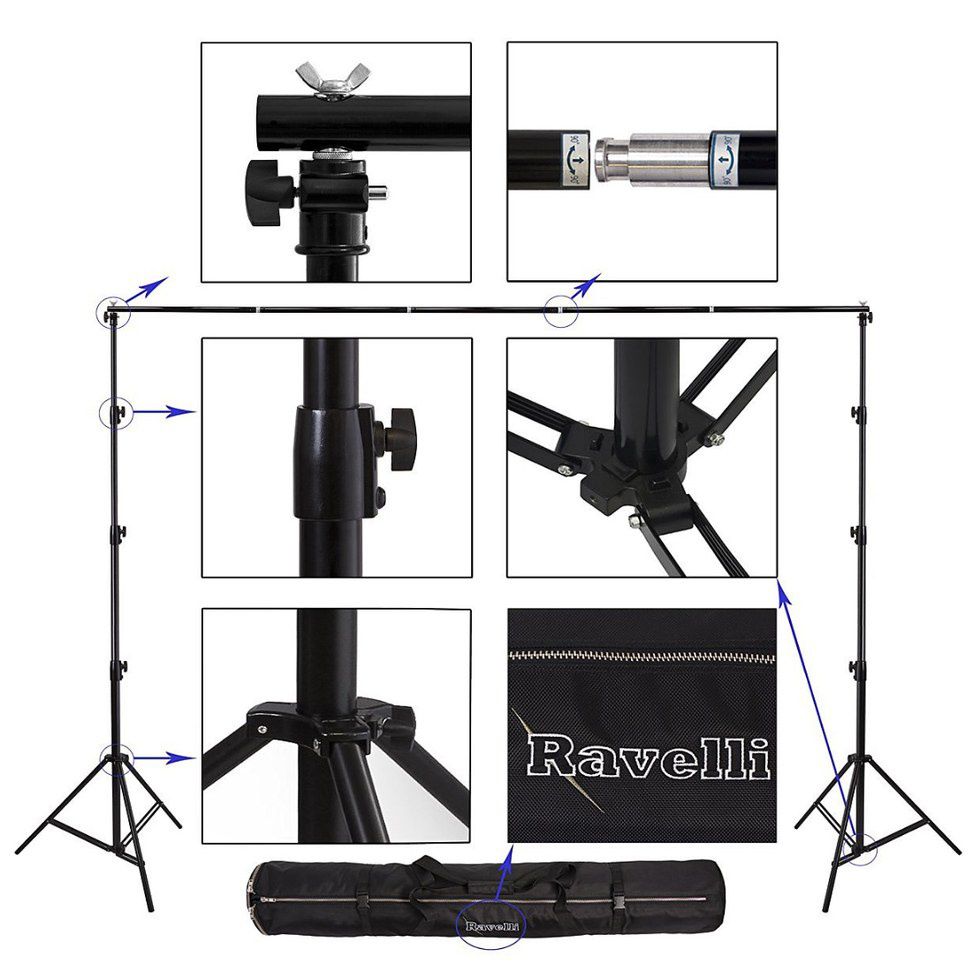
4- Ravelli ABSL 13' Tall x 15' Backdrop stand
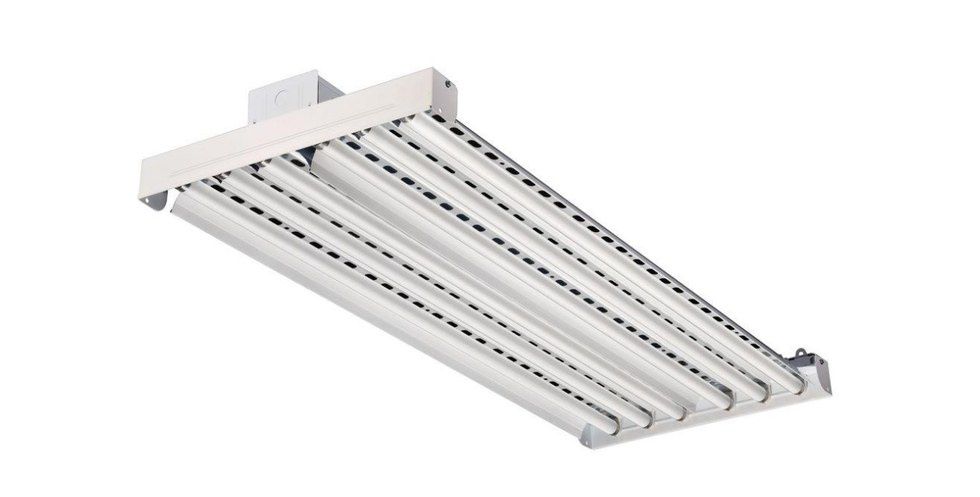
2- Lithonia Lighting High Bay Industrial 6-Light Hanging Fluorescent Fixture with Philips 32 watt bulbs.
Stands - The Ravelli stands run about $100 for two, but so worth the money. They're super easy to operate and durable. I’ve run these stands through the dirt and they just keep going. I use them for backdrops, light stands, flash holders, and when I shoot ballroom events my team uses them to set-up our booth walls. There's a lot of different comparable stands on the market, so don't think you have to buy these ones in particular, but for the sake of this blog, it's what I have.
Light Fixtures - Large video lights can run into the thousands, but luckily for me, I while ago one of my best friends gave me some fluorescent light fixtures that he custom wired with long extension cords for studio work. Now this sounds complicated, but it really is that bad.
There's just something that you need to know if you're thinking of going out and building your own.
First, you have to understand how a fluorescent light works and what is needed for photography. I will post a link that explains everything in detail, but for this post, I will try and keep it as simple as possible. If you don't care, just skip to the end of this part and I'll just tell you what to buy lol
In short, a fluorescent bulb heats up gas inside a tube and the chemicals on the inside work together to create light.The problem with this is that the longer a fluorescent is left on the more freely energy can move, meaning that the current will climb on its own as long as there is adequate voltage. If the current gets too high the light can and will blow out.
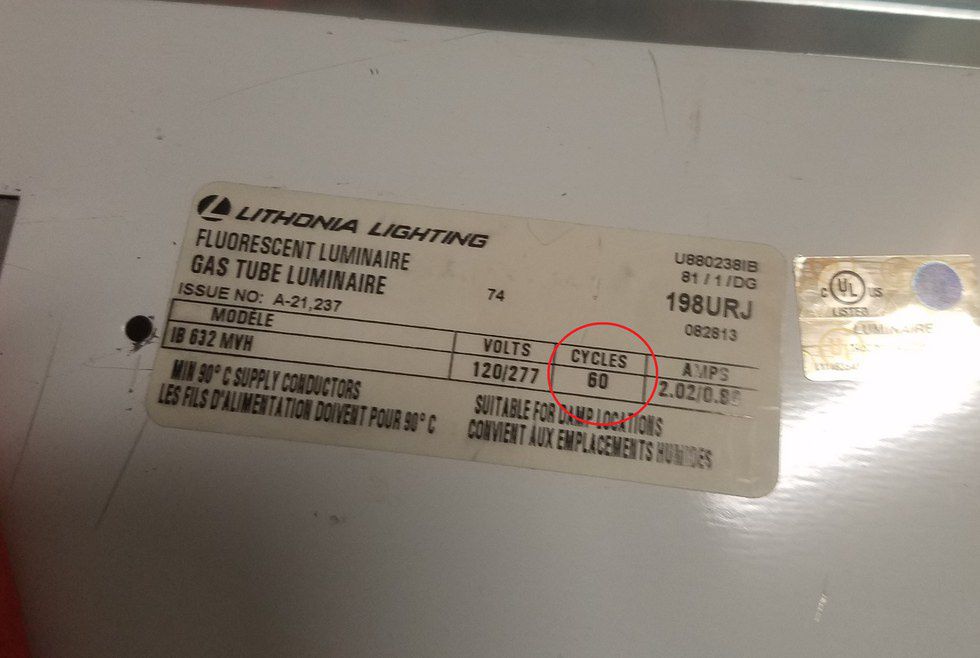
So the current has to be controlled. To do this the fixture is fitted with something called a magnetic ballast which is generally a copper wire spun together. As current flows through the magnetic ballast a magnetic field is created. As the magnetic field grows it resist the electrical current meaning less power to the light bulb, but a ballast can only slow down the current -- it can't stop it. So to further regulate the power, fluorescent light constantly reverse the direction of the current, so the ballast only has to inhibit increasing current in a particular direction for a short amount of time. This is referred to the cycle rate and understanding cycle rate is what's important for photography. When the power reverses there's a short amount of time that the gas cools off and light stops being produced. This is way sometimes you see fluorescent lights flicker.
With photography having consistent light is very important. So if you go out and buy a fluorescent light rack make sure you pick one with a high cycle rate or you’ll risk the chance of taking a shot in the middle of a cycle and your images will come out dark and inconsistent. The ones I used run on a 60Hz second cycle. Most of the time the human eye can’t see any flickering until you go down to 50Hz and is very obvious at around 25Hz. So just stick to 60Hz or higher.
Bulbs - Of course light fixtures are useless without light bulbs, so what to buy? Well, there are hundreds of options that range from bands, power, color, life, length etc….. I used Philips 32 watt bulbs with a 6500K color output. 32watt isn’t at that powerful, but when you have 6 of them going at the same time the combined effect is pretty bright and the 6500K produces crystal clean white. If you want a warmer color you can do down to 3500K, but I wouldn’t recommend anything lower than that because your images will come out looking warm.
Now this is just what I used for this shoot and it doesn’t really have much to do with making a studio. You can use any stand or lights you want. The reason I explained the specifics of my particular gear is because of the price. A professional 6ft, six bulb video light could cost thousands of dollars. Now those professional ones might be better built and have different functions like dimmable lights, or changeable color tones and if you have that kind of money go for it. I don’t so….. being crafty is how I survive and these lights will only run you about $200…….. So ya, if that doesn’t interest you, sorry for the explanation lol.
Putting it all together
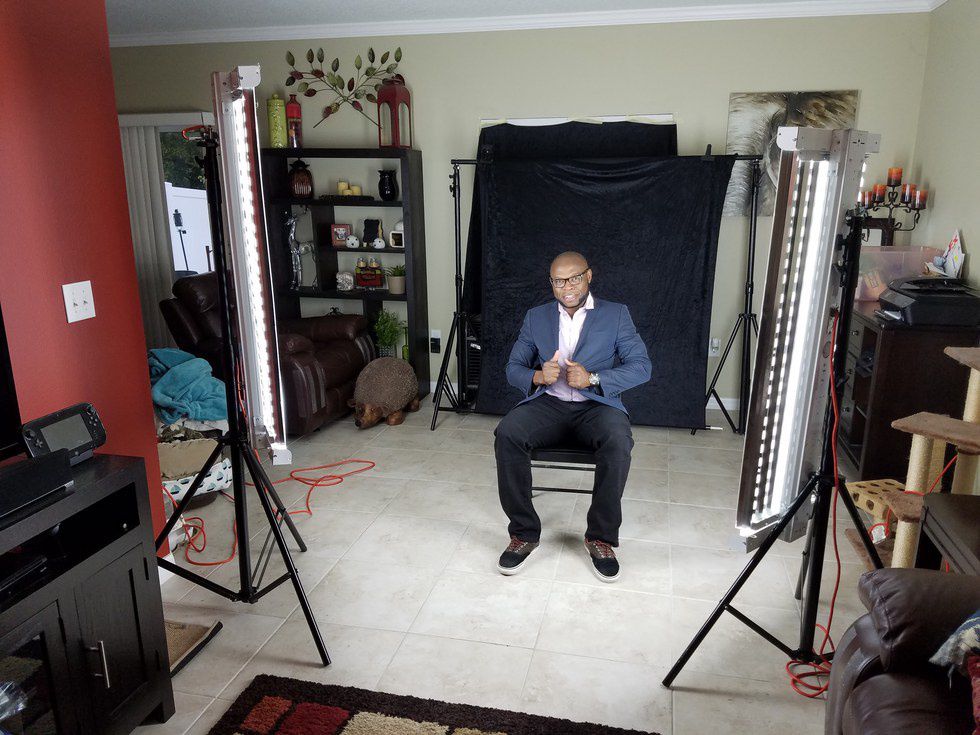
So now that space has been cleared, and the ambient light has been controlled, the last step to my living room studio was to set-up my gear.
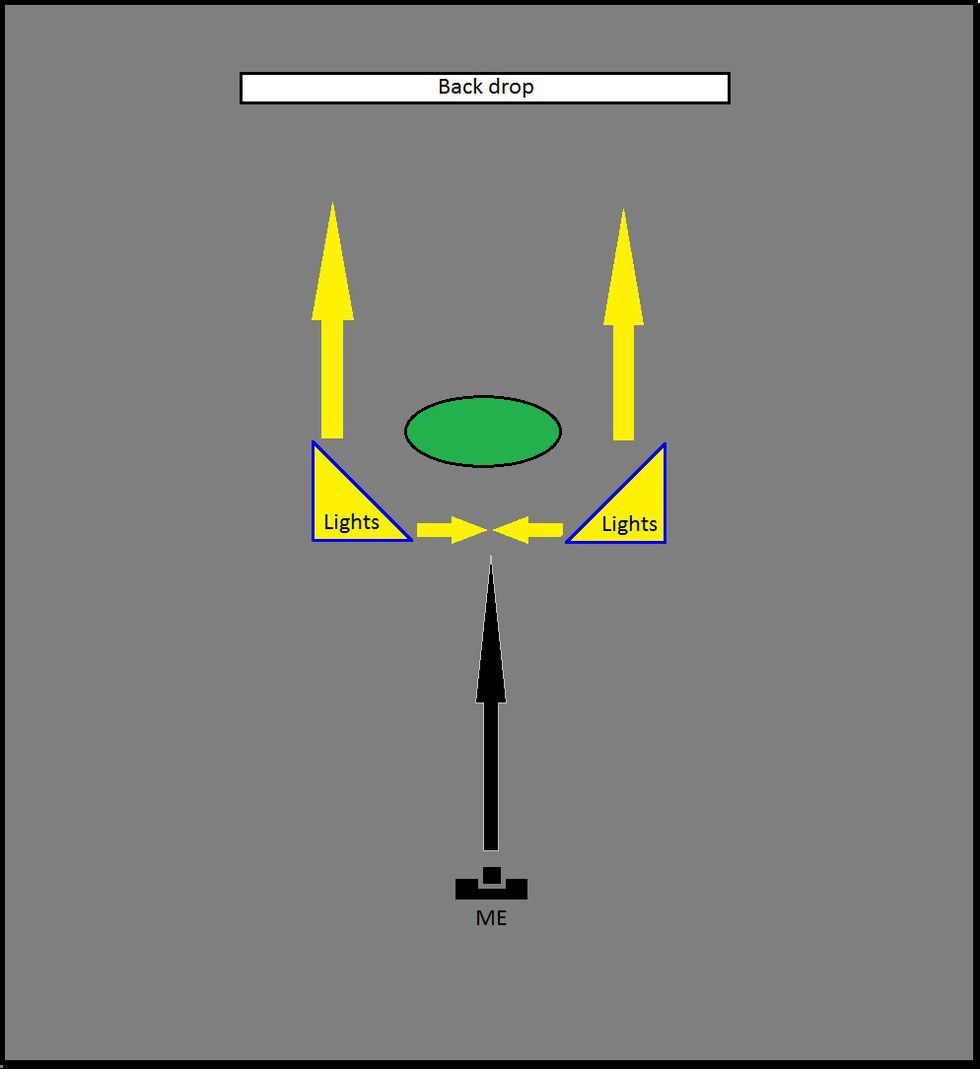
Like I said before my goal was to create even frontal light with a black background. So my strategy was to place the two lights at equal distances in front of the model and off center them by around 45 degrees. This lite the subject evenly on both sides and made the light compliment the model. I also made sure that the subject was standing a good distance from the backdrop to avoid light hitting it and exposing in the images giving me dark gray instead of black.
As you can see, creating a studio is simple, easy, and if you're creative enough, it can be really cheap. I would recommend if you're starting with little to know studio equipment, going out and getting some large well-made stands like the Ravelli I showed you in this post. These stands only run $100 and are really a requirement for most studio work. Secondly, invest in some lighting. In this post, I explained my homemade video lights, but if that's to much work you can use, Speedlights, LEDs, strobes, you name it. As long as your subjects lite, your good to go.
Once you have the equipment, set your goal, clear your space, control your ambient light, set-up, and start shooting!
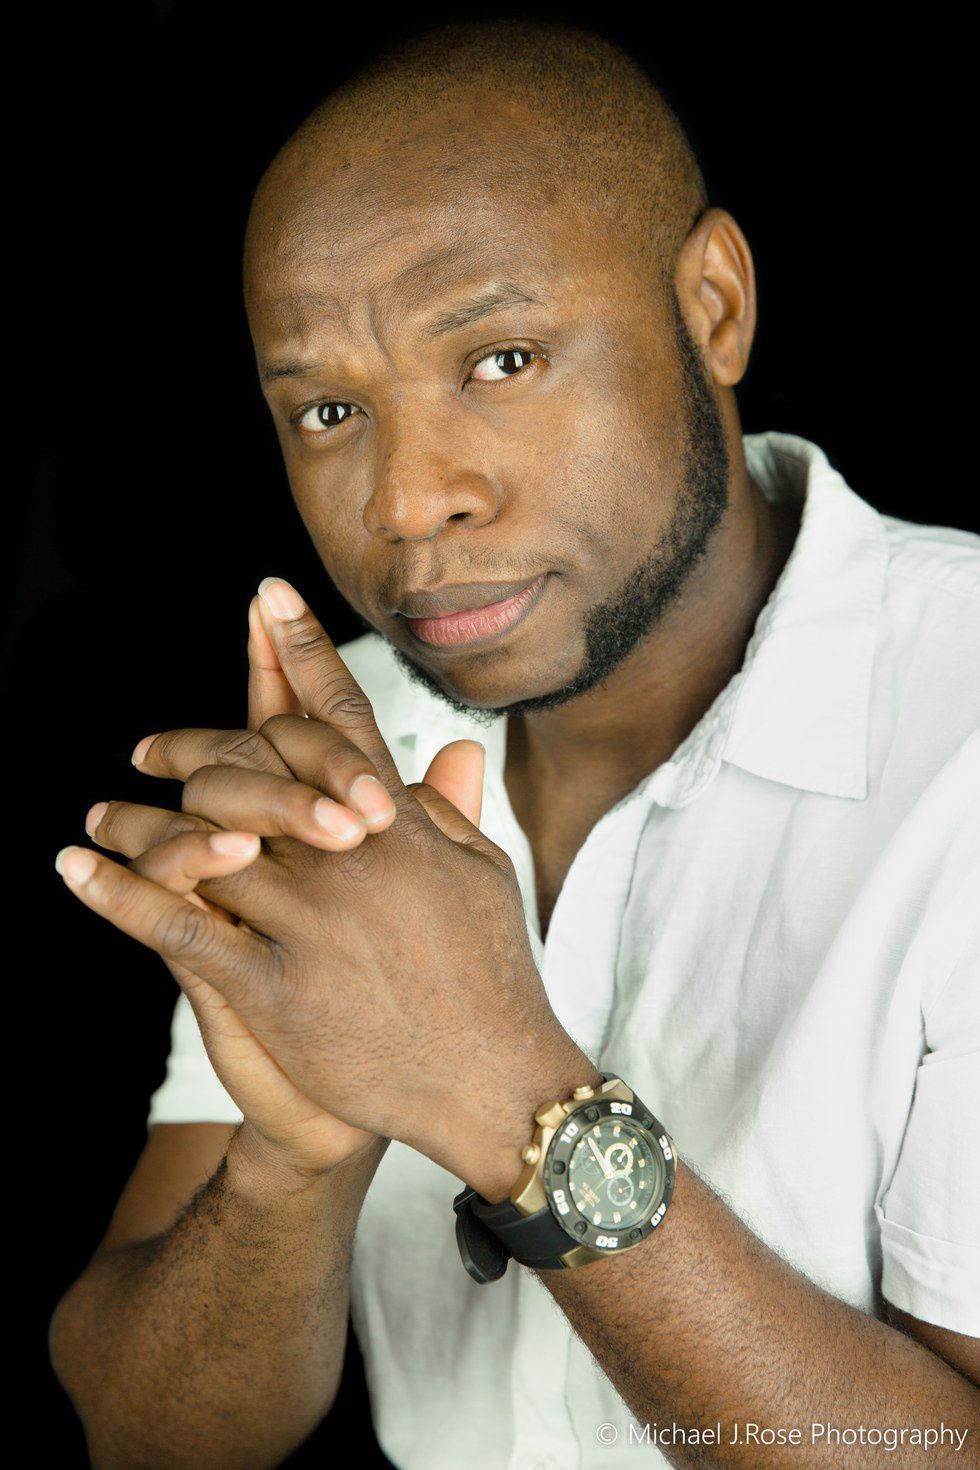
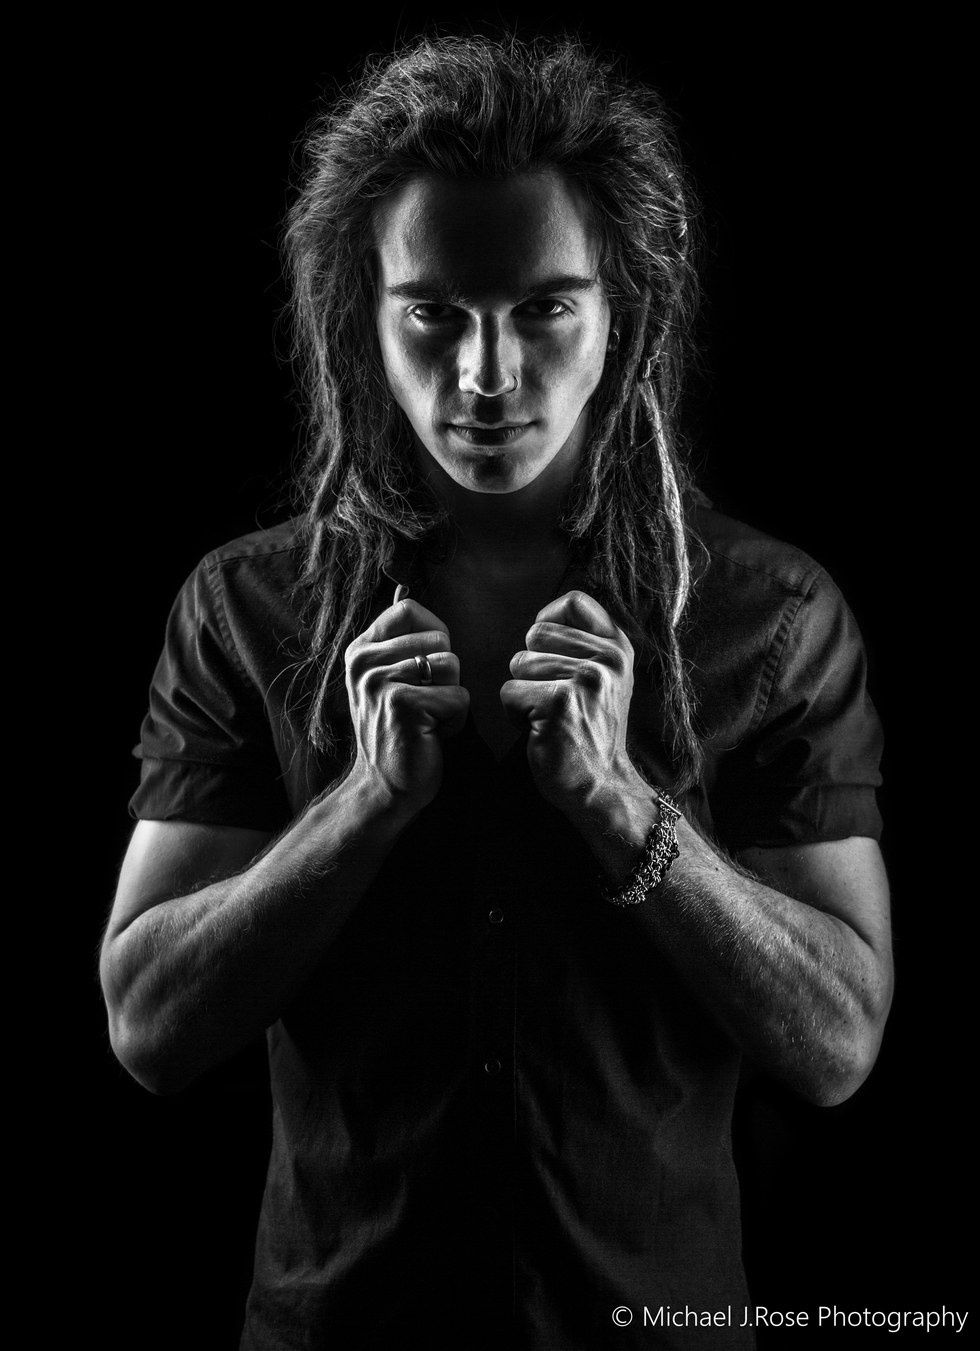
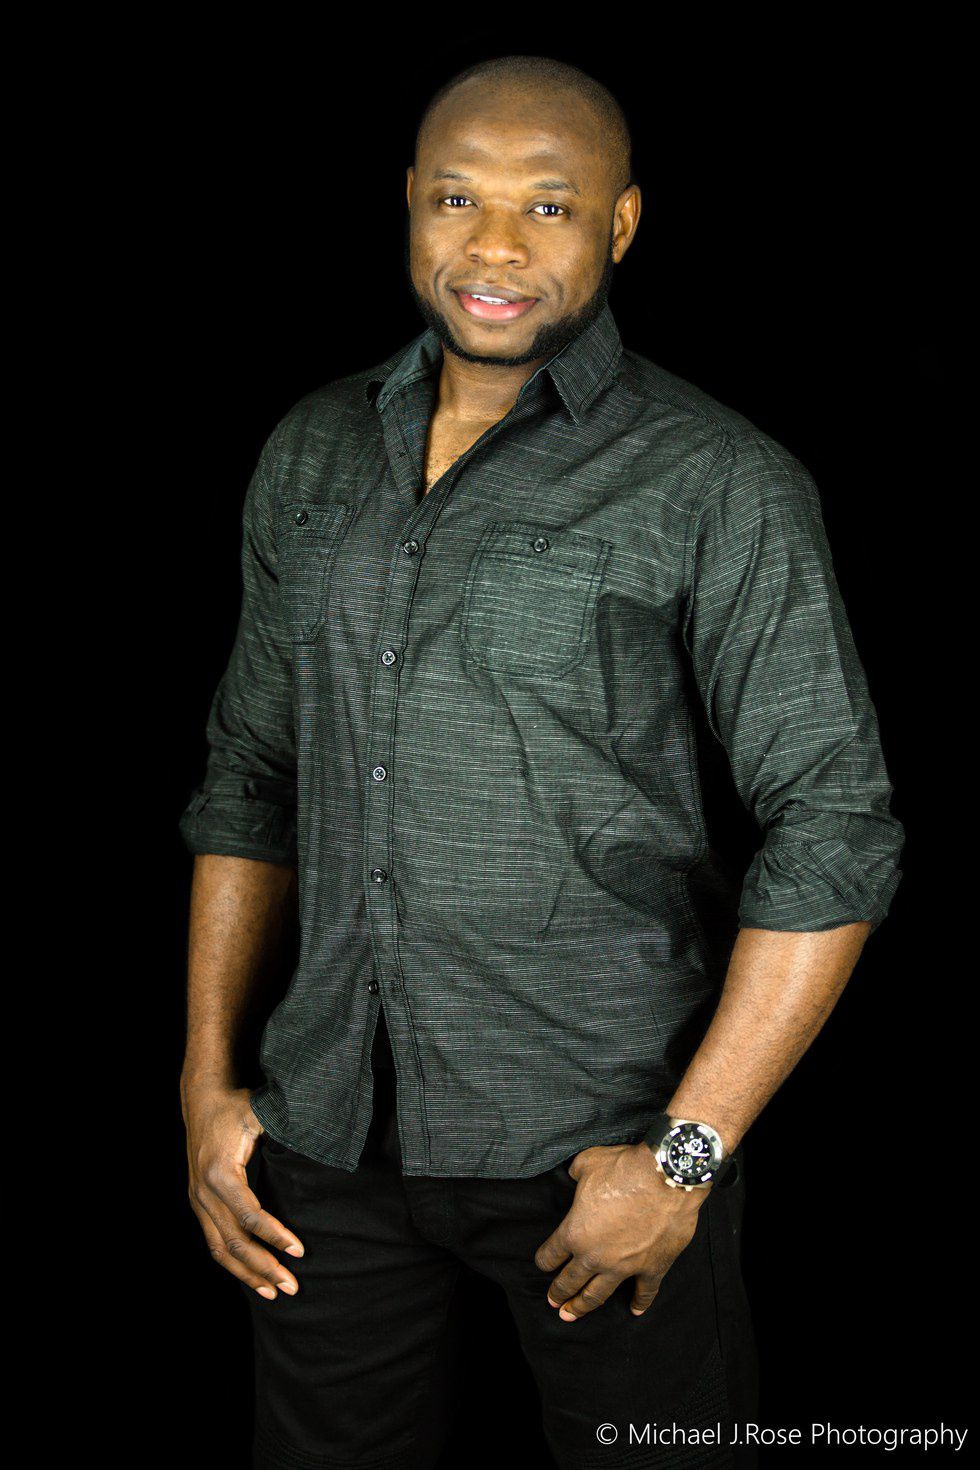
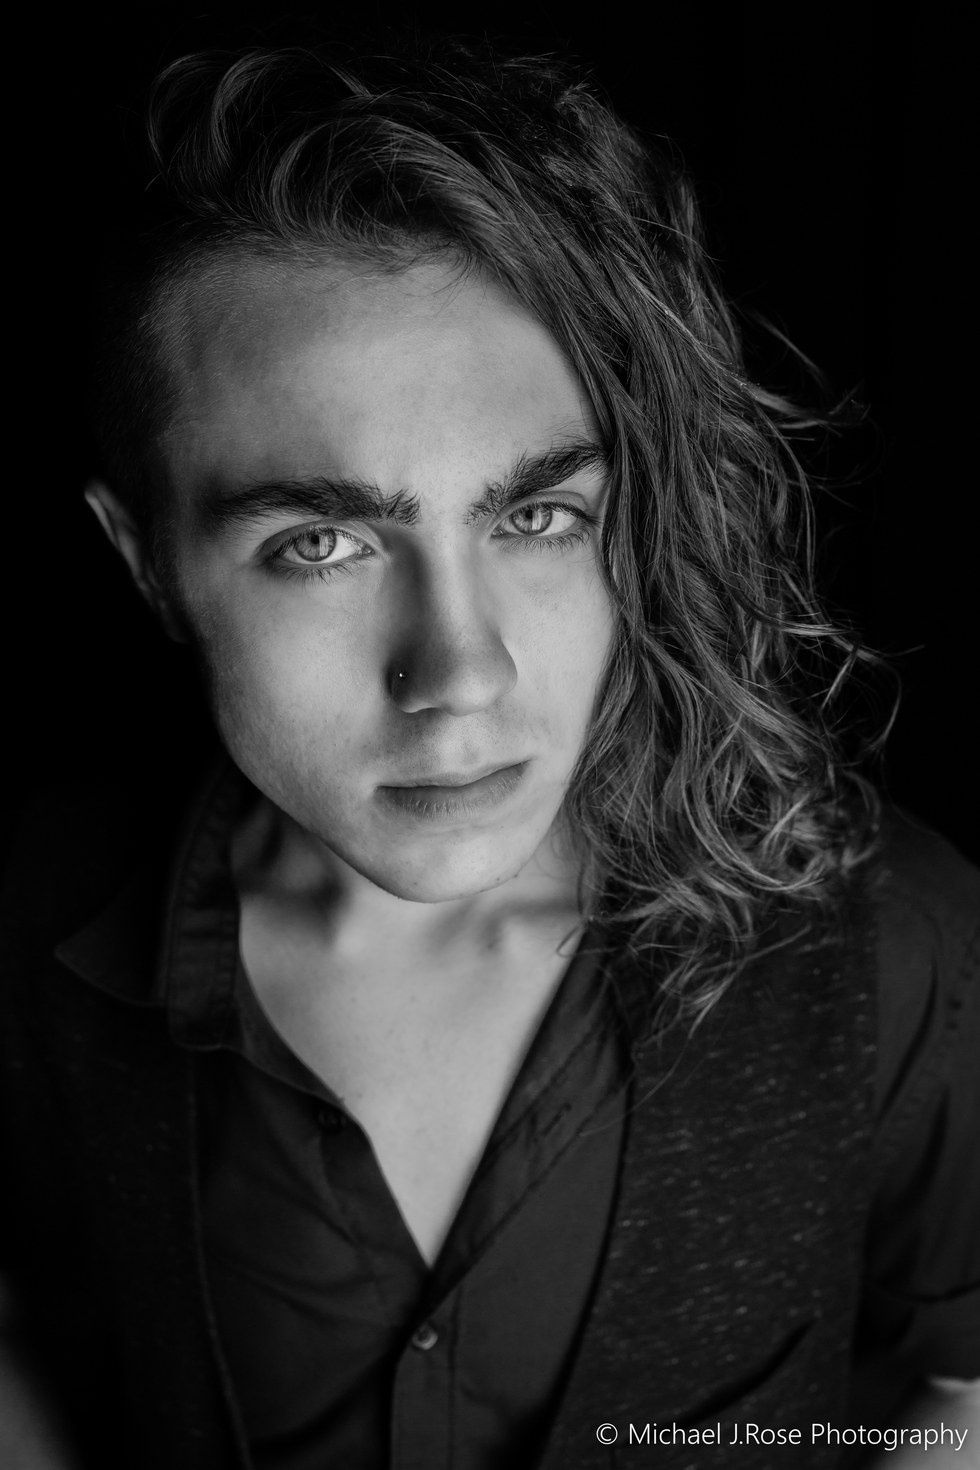
Here are some of the images I took on this shoot and some others with the same Studio set-up. Enjoy!