


Let the zombie apocalypse roll! This basic zombie special effects makeup step-by-step guide is the perfect addition to any Halloween themed party or event. All of the materials are easy to buy and you'd be surprised how much of them are already laying around your house.
What you will need:
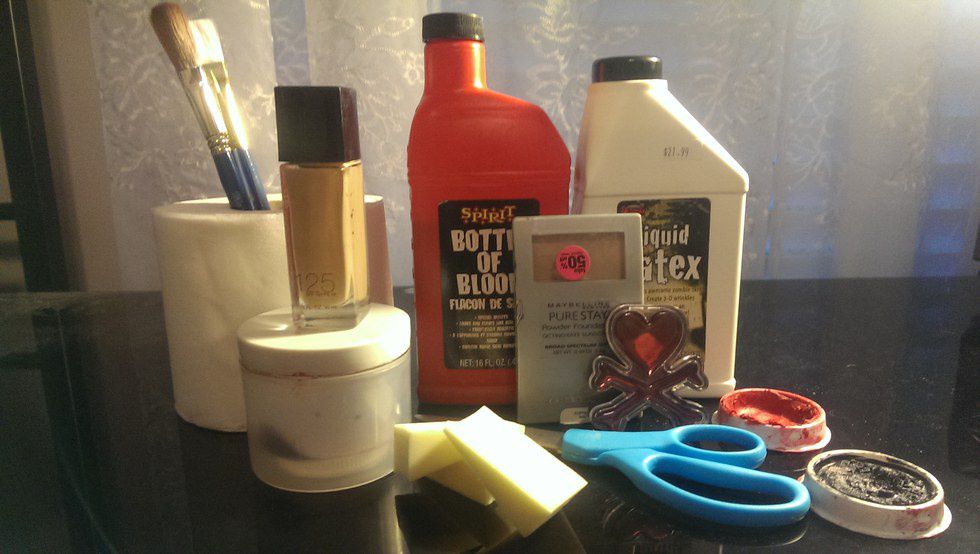
Liquid latex (Halloween store) Elmer's Glue can also be used in case of allergies
Fake blood (Halloween store)
Plastic containers (2)
Scissors
1-Ply toilet paper or multi-ply toilet paper that can be separated into 1-ply
Makeup or paint brushes
Liquid makeup foundation (a couple shades darker than your skin tone)
Blow dryer (not pictured)
Makeup sponges
Power Foundation
Costume or regular makeup in black, red and burgundy
The Steps:
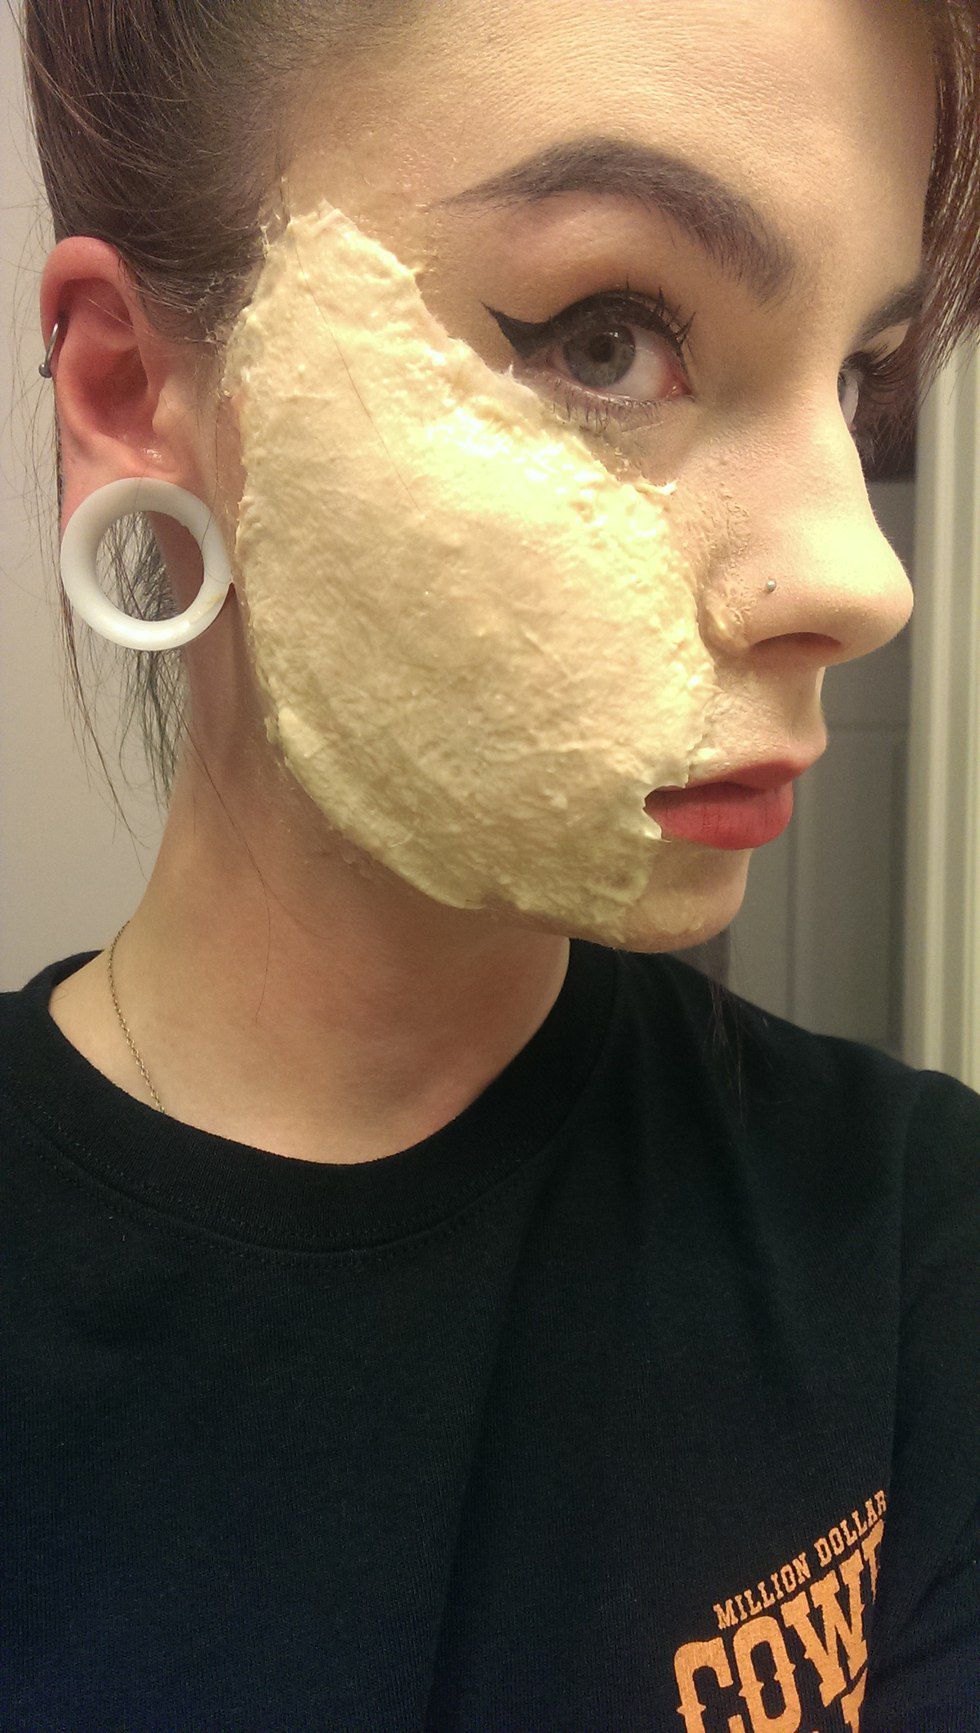
1. Application of the liquid latex
Chose a spot on your body that you are comfortable putting liquid latex on. Take a plastic container filled with a small amount of liquid latex and dip your makeup sponge into it to start the application.
Outline the basic shape of the wound and fill it in with liquid latex. Add a layer of toilet paper onto of that. Dry with a blow dryer until fully dry. TIP: The latex will turn a yellow color when fully dry and feel slightly sticky.
Apply five or more full layers of liquid latex and toilet paper to the outlined wound area, making sure everything is fully dry before adding a new layer. You want to concentrate the toilet paper on the center of the wound area, thinning the layered toilet paper out towards the end.
Once fully dry, it will look like this:
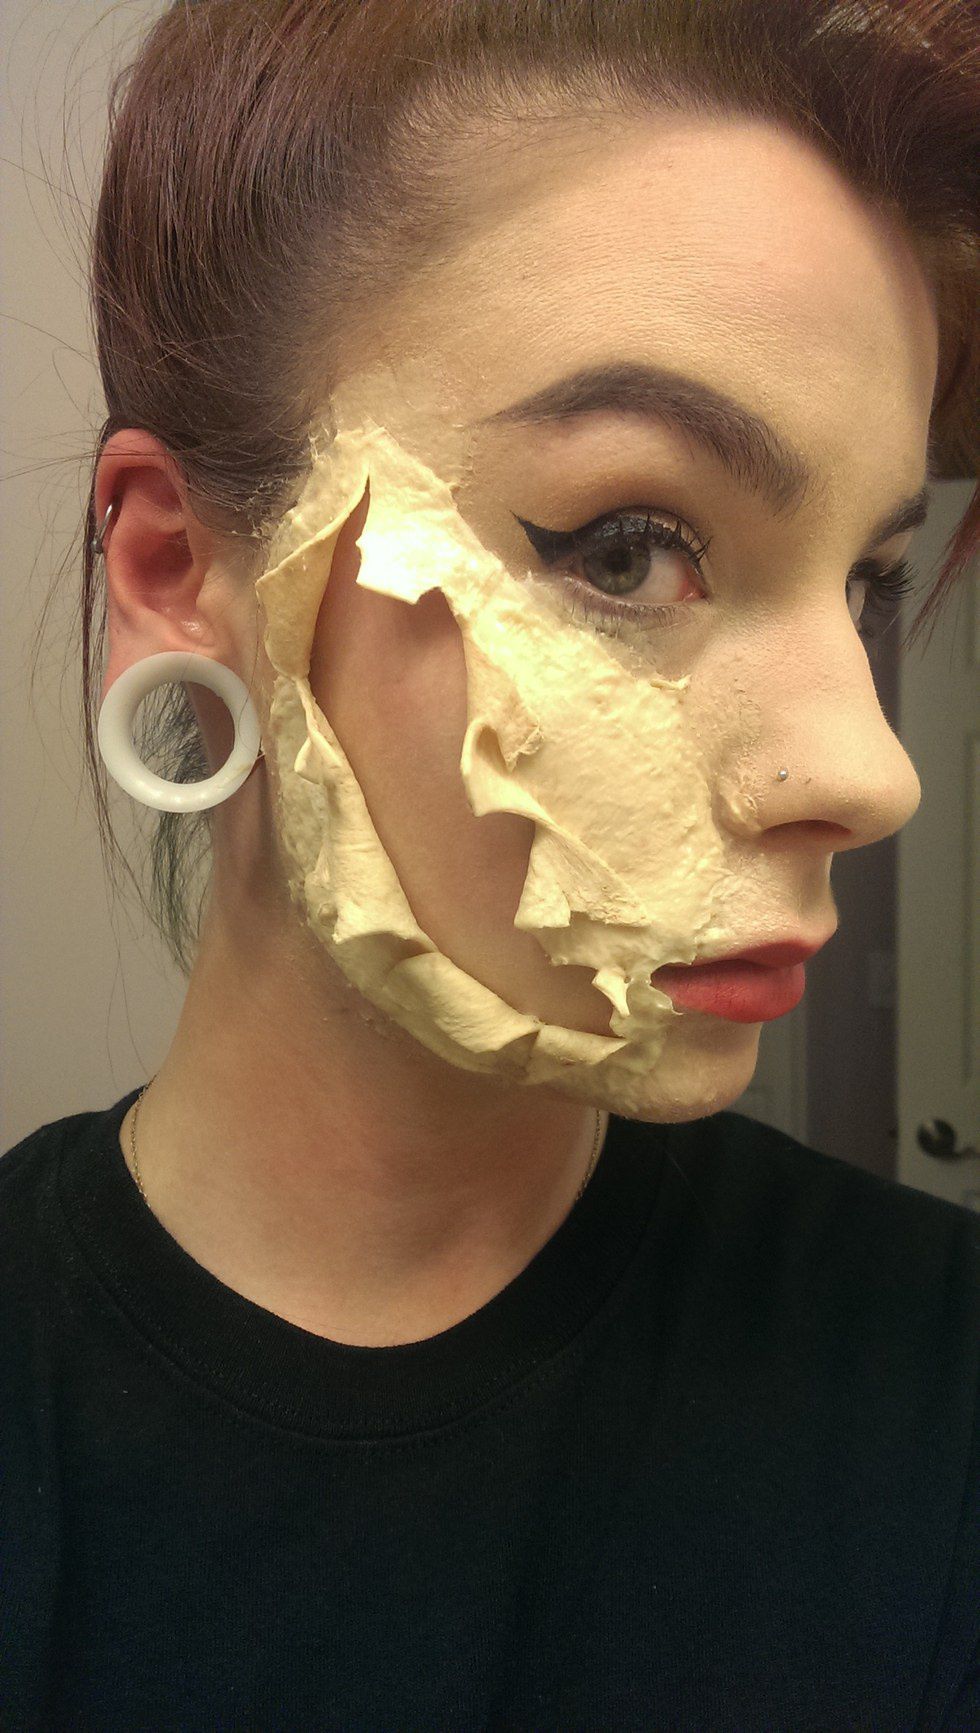
2. Opening the wound:
Take a sharp object, I use scissors, and poke a small hole in the center of the latex-ed area to start the wound. Use the scissors to cut along the latex to create a wound, pulling and cutting sections back to create the illusion of ripped skin. You can also pull apart the latex once the initial hole is made. TIP: Leave a little space between the cut wound and the solid latex to ensure the latex stays in place. The more rips and tears the more realistic looking.
I will now refer to the latex as inside (part touching skin) and outside (part not touching skin).
After you have achieved the final wound shape, take a powered foundation and brush it on the inside latex to remove stickiness.
Mine looks like this:
3. Makeup Application:
After the wound is formed, it is time to apply the makeup.
Using a brush, apply the liquid foundation to the outside latex layer and a little past to fully blend. Apply power to set.
Using a burgundy makeup color, apply this to the inside areas of latex that show on the outside. Add black mixed with red to the inside edges of this.
Next, use a black makeup on the outside edge of you actual skin and fade into a red toward the center. TIP: The wound will look more realistic the darker the outside is compared to the inside.
Finished product:
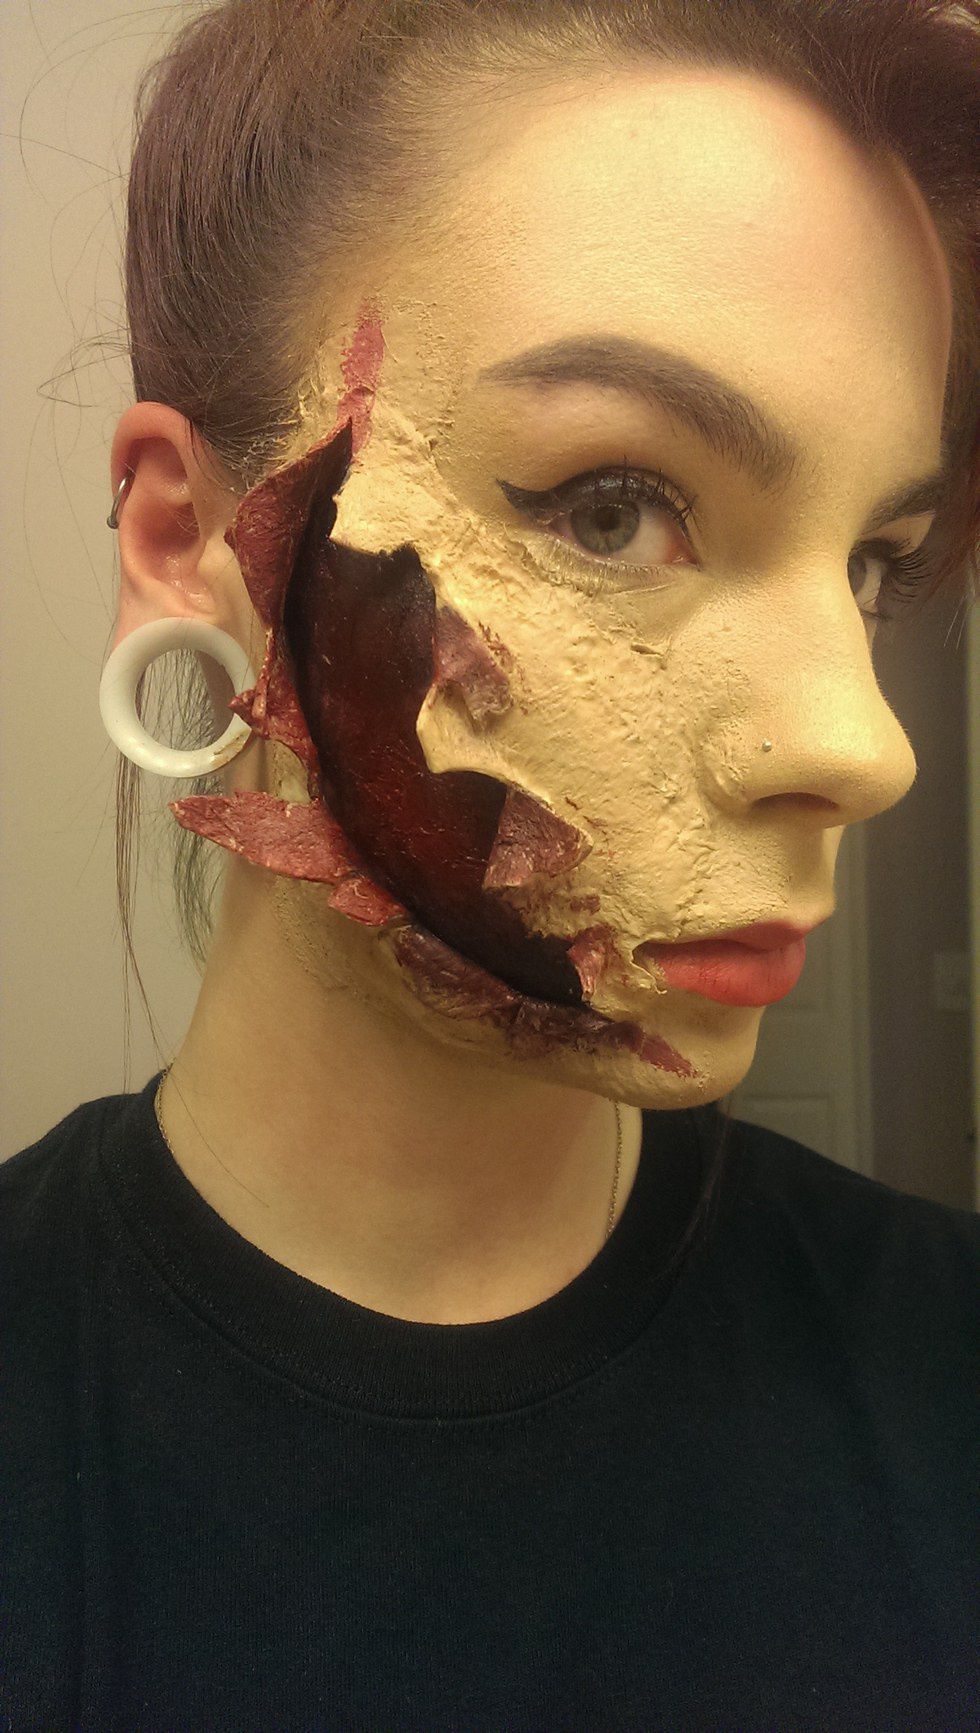
4. Finishing Touches
Add fake blood to the inside and outside of the wound for a more realistic effect using a makeup sponge.
Using a brown colored makeup, you can also add some bruises to the outside.
The zombie makeup will stay in place all through your Halloween endeavors and also impress your friends. Don't forget to make up some stories as to how you got your wounds.
Enjoy!


