Before I start this article I would like to share some background information about myself and the upcoming articles. I am a self taught special effects makeup artist working on making my way to college. Being a makeup artist who specializes in anything to do with the gore of Halloween since it is my favorite holiday. Ever since I got into makeup, every Halloween I've had many people ask how to do certain makeup designs I've done. So I figured I'd do a mini series on different makeup looks leading up to Halloween. In this article I will be showing you how to do two different kinds of injuries for any Halloween costume. I'm going to split this article into two parts: part one showing you how to create bruises and part two showing you how to create cuts and scratches.
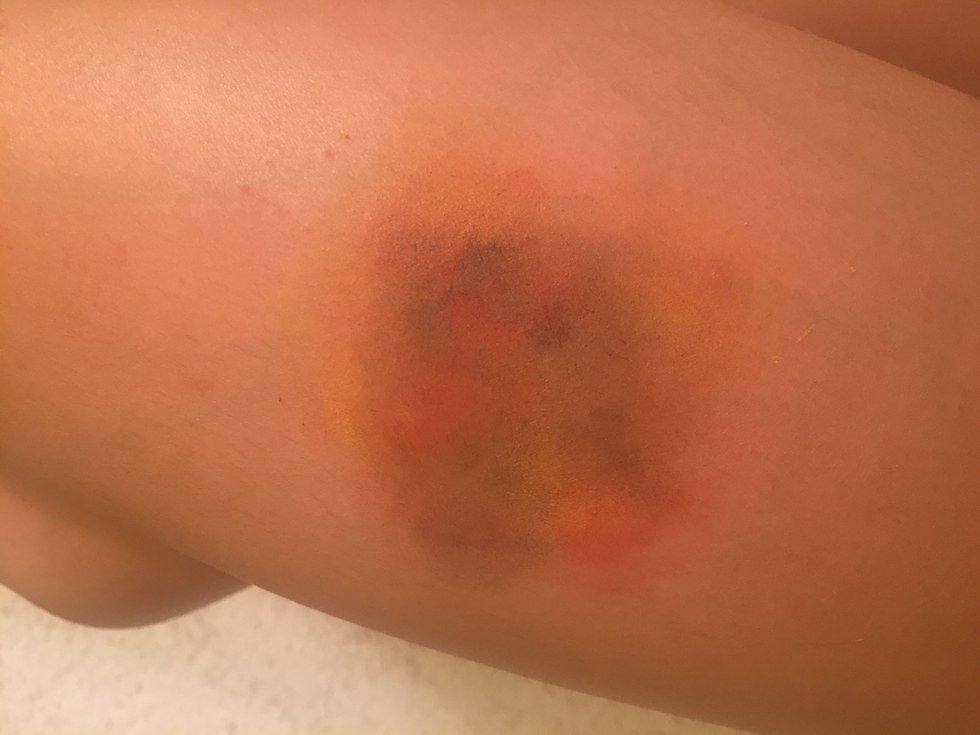
The materials to create bruises you'll need are: red, green, blue, and yellow face or body paint and makeup sponges.
For this tutorial I will be using the Ben Nye F/X Color Wheel Cuts & Bruises, but you could just as easily use cream or grease face paints you would find in your standard Halloween store. You can use any kind of makeup sponge for the application it just depends on what you prefer and what works best for you. This is a loose tutorial since bruises rarely look alike. It only depends on how dark or light, fresh or old, or how big or how small. So don't feel the need to follow the pictures exactly how they are. Have fun with it and do your thing.
Side note: When creating your bruise effect, looking up pictures of actual bruises really helps you achieve that realistic look.
Also when applying the paint use a dabbing motion as opposed to actually painting it on.
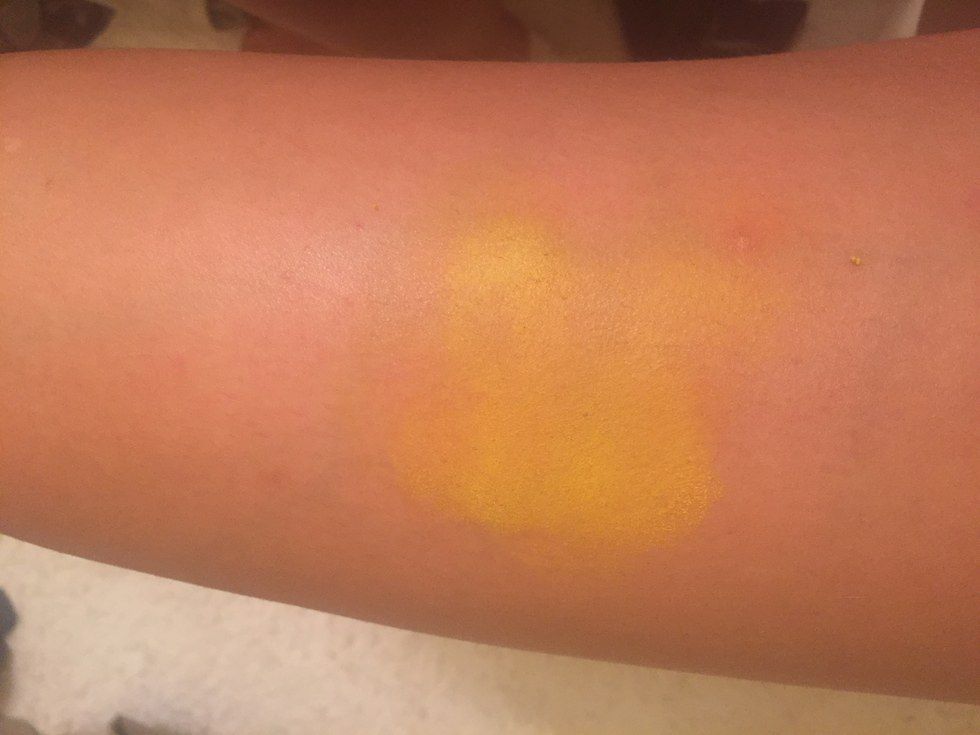
Step 1: Create a splotchy layer of yellow paint.
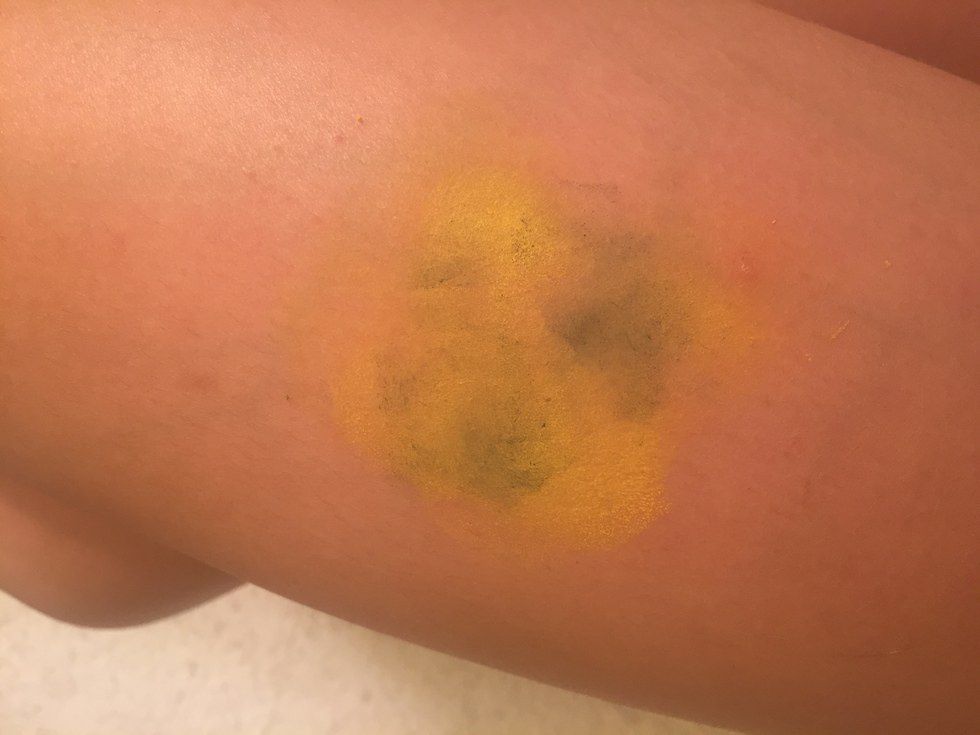
Step 2: Add some green.
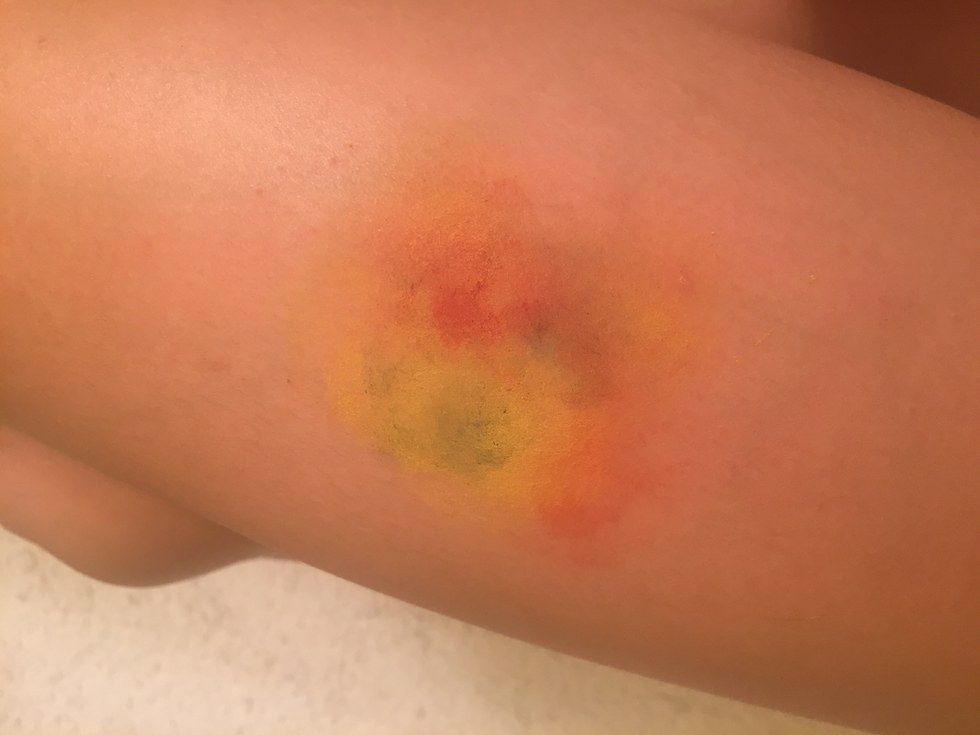
Step 3: Add some red.
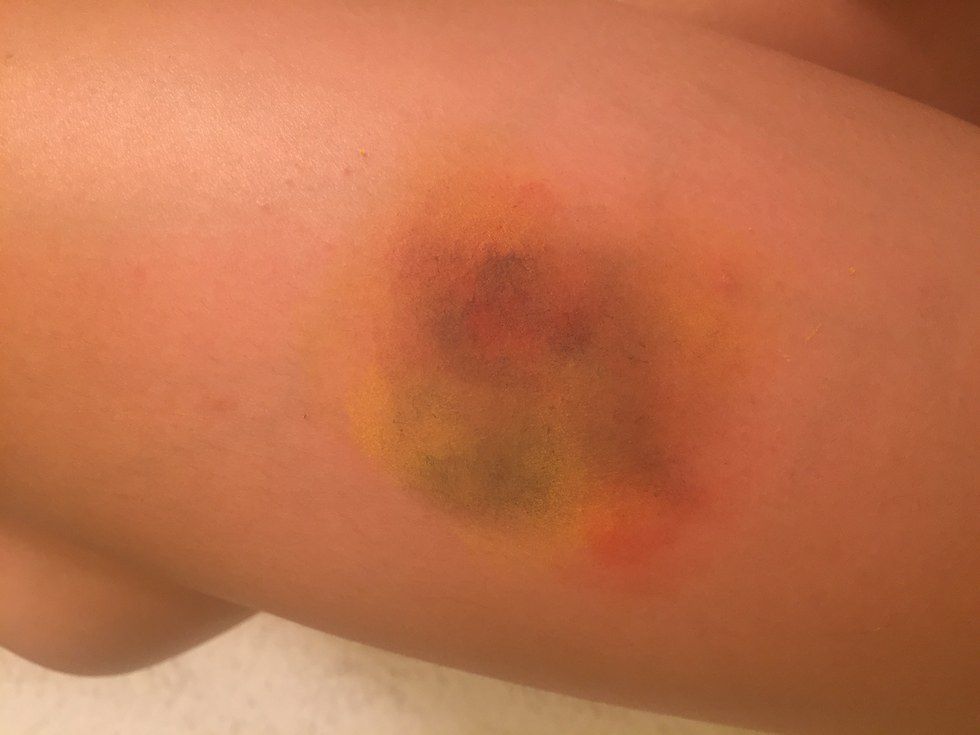
Step 4: Add some blue.
Step 5: Fill in areas you think need more of a certain color.
Tip: Blend some colors together such as blue and red to create a fresh deep purple look. If a color comes out more bold than you wanted take a clean sponge or your finger and dab at it until it's light enough. And remember most bruises aren't perfectly round so mess around with different shapes.
There you have it. Seems simple enough right? The next part is even easier. Now I'm going to show you how to paint fake cuts and scrapes. There are many many different ways to create cuts (of which I will do tutorials on in the following weeks) but for now I'm keeping it simple.
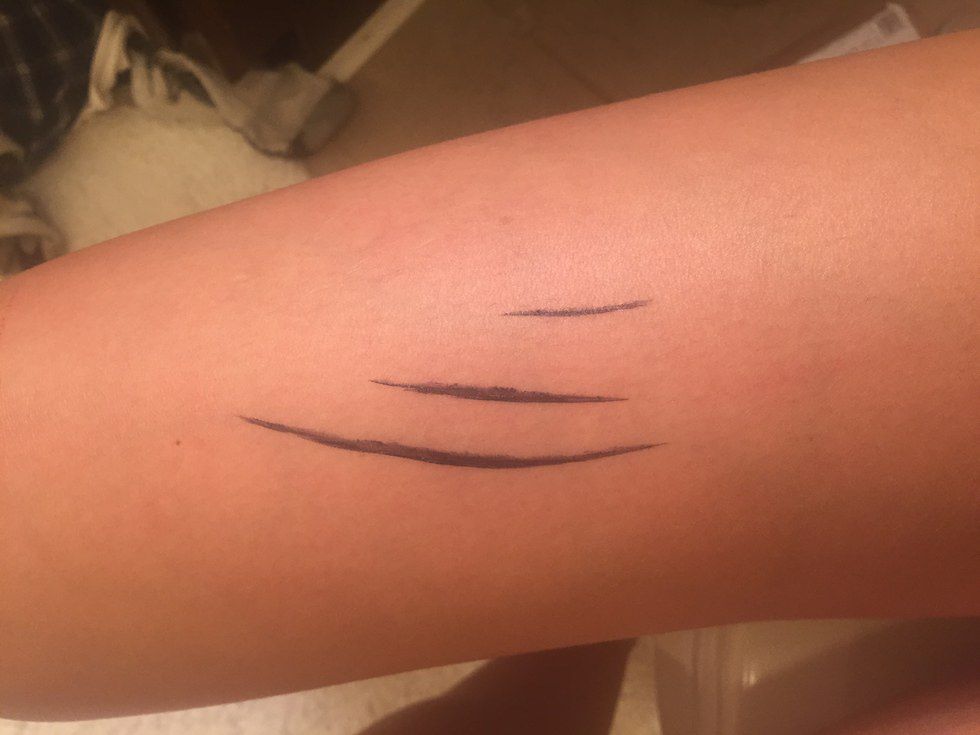
The materials you'll need to paint a fake cut are: red and black face or body paint and a paint brush.
For this tutorial I will be using the Ben Nye F/X Color Wheel Burns and Blisters, but again you could just as easily use any face or body paint from a Halloween store. I will also the using a Ben Nye paint brush, but you could use any old or cheap paint brush. I prefer one with bristles only because it creates smother lines but if you only have those paint brushes you get from the dollar store with the black plastic bristles it'll be fine. If it'll paint a line, it'll work.
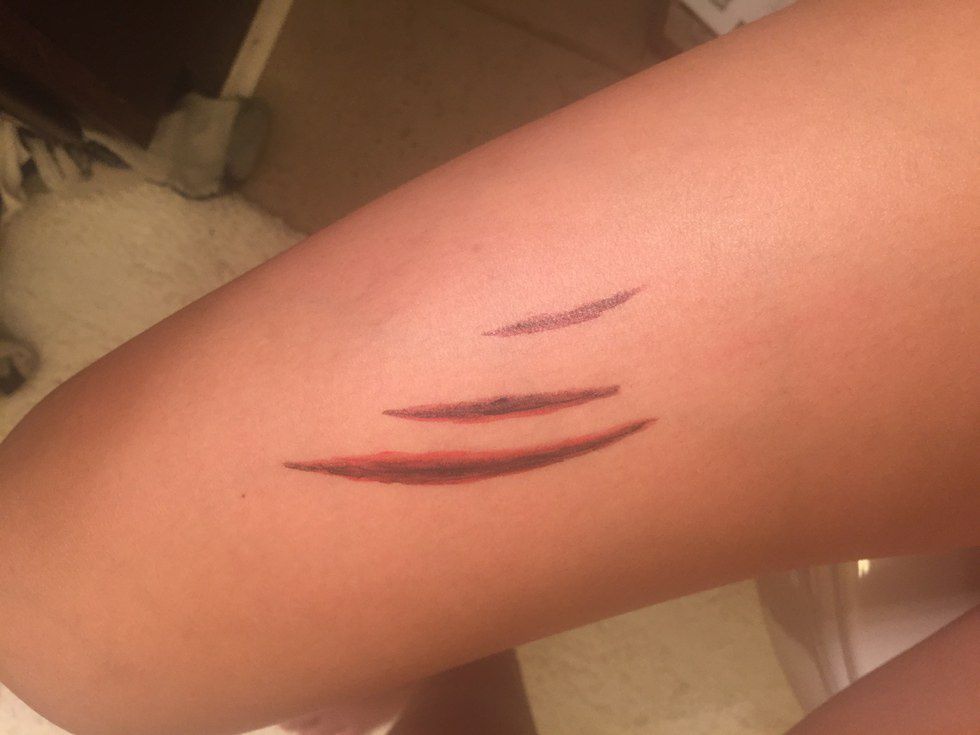
Step 1: Paint a black line in any length or shape you want. This will be the inside of the cut. I will be showing a few different sizes just so you know how it'll look
Step 2: Go over the black with red overlapping it a little. This doesn't have to be clean or smooth. It's a cut, no cut is perfect. (I forgot to take a picture of this one because I got carried away with outlining)
Step 3: Outline the cut with red. This is the "blood." At this point it might look muddy and not like a cut at all but that's okay.
Step 4: Go back in a add more black where it got smudged away.
Tip: For an added realistic effect add fake blood.
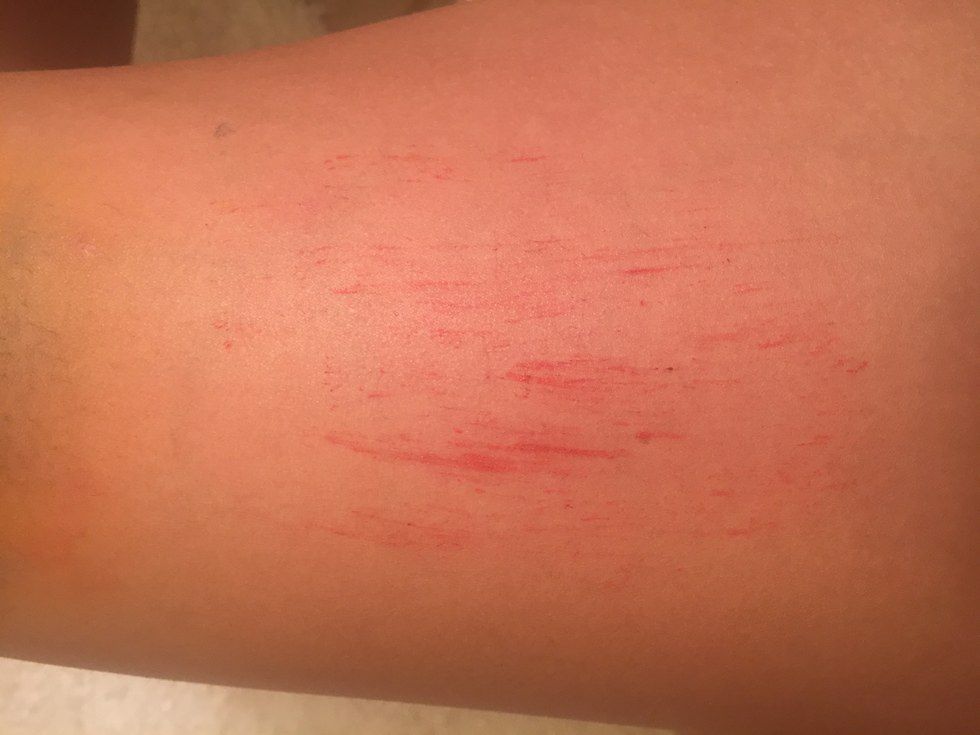
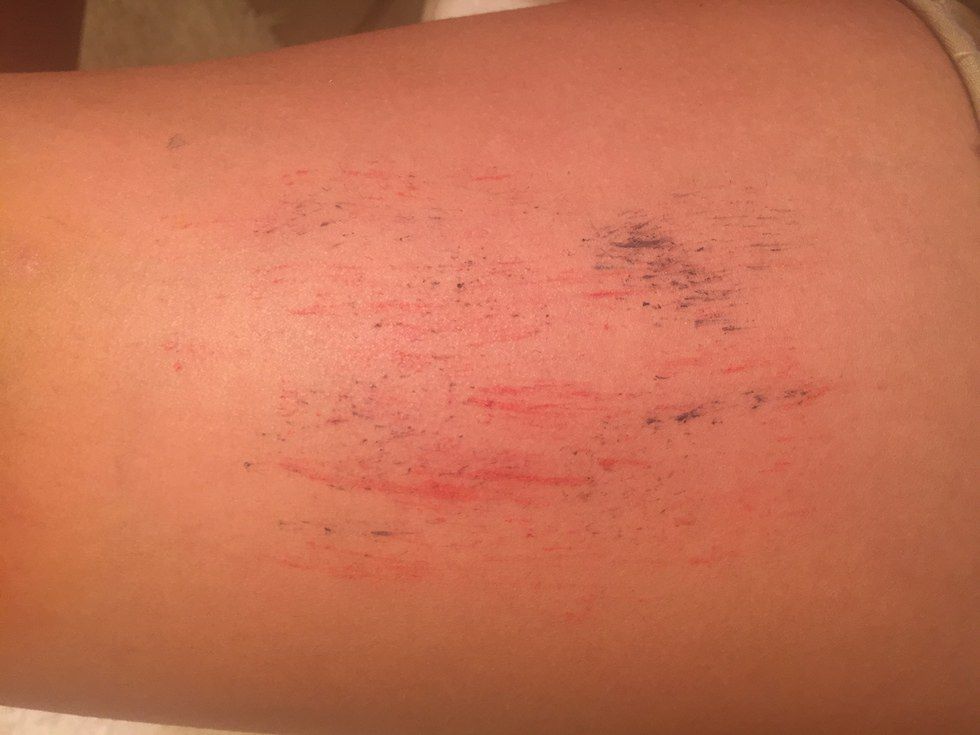
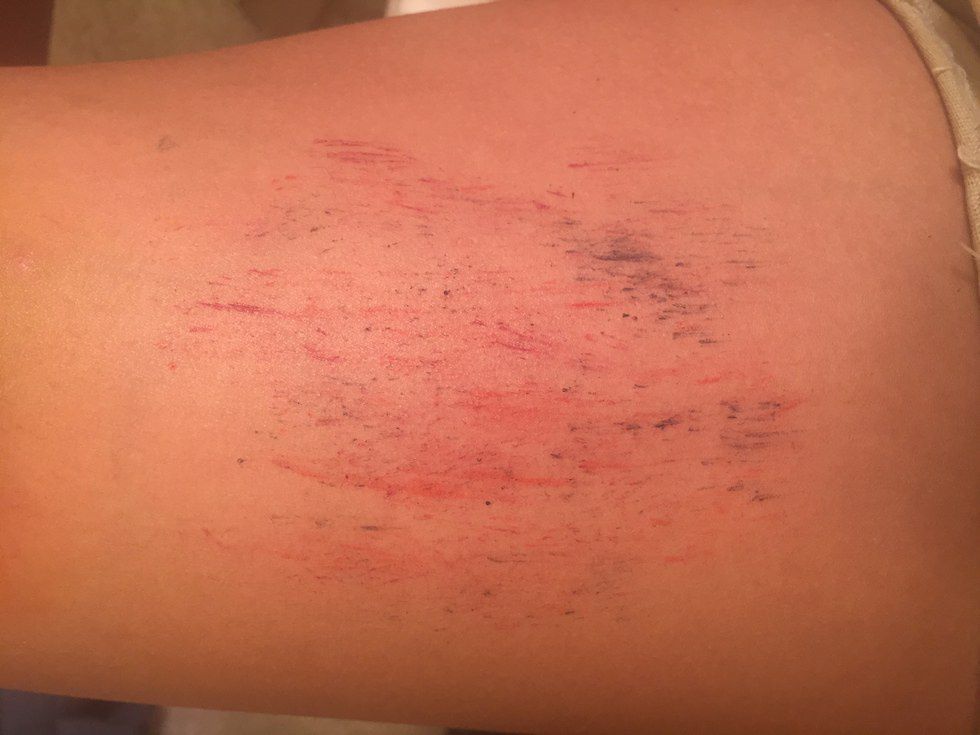
That's how you create fake cuts/scratches. It really is that simple. Now if you really want to freak some people out and have a stippling sponge you can create road rash with just red and black paint.
Step 1: Lightly scrape red paint wherever you're "injured."
Step 2: Scrape some black to stimulate rocks embedded in the skin.
Tip: Mix some blue with red to create a deep blood color (mix more red than blue, you don't want it exactly purple) and scrape some of that on.
That's all for this tutorial. With practice you'll learn to do these in less than five minutes. If you have any questions or even suggestions for future tutorials feel free to message me.

