

So, you take a cute picture and you want to post it, but you feel like it needs a little something extra to make it even better. You could edit it with Instagram filters, but let's face it: that's kind of boring. I edit all of my pictures using VSCO. My VSCO gives a sneak peek into my life, but I also use the app to jazz up an ordinary picture I take and want to post later on Instagram.
Here's a basic guide (with screenshots) to editing your pictures with VSCO.
1. The free version of VSCO is absolutely fine
So many apps seem like they're free when you first download them, but as soon as you start using them, they trick you into paying for special features. VSCO asks users to upgrade to a more advanced editing system, but it doesn't require them to. The basic, free version of the app offers incredible edits that are just as amazing as the ones that cost money.
2. Uploading your content to edit
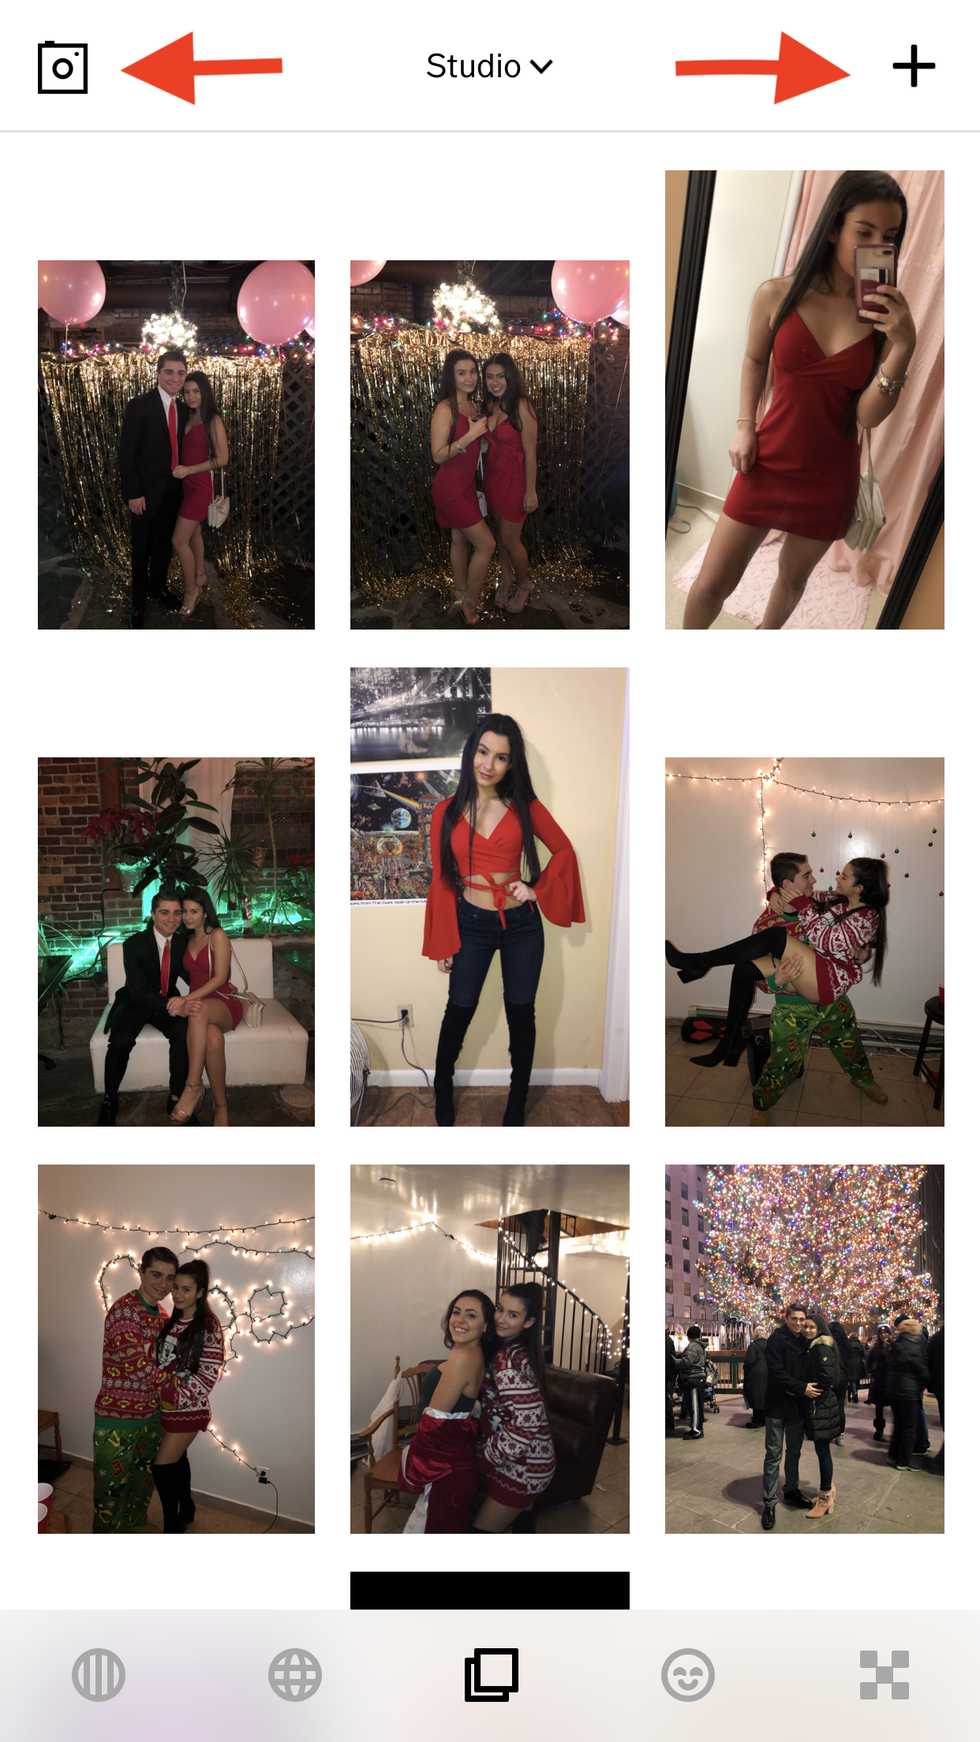
screenshot from my iPhone
Click on the plus sign located at the upper right-hand corner of the "studio" page to choose the images you would like to import from your camera roll. If you want to take a picture using the app itself, click on the camera sign at the upper left-hand corner.
3. How to edit
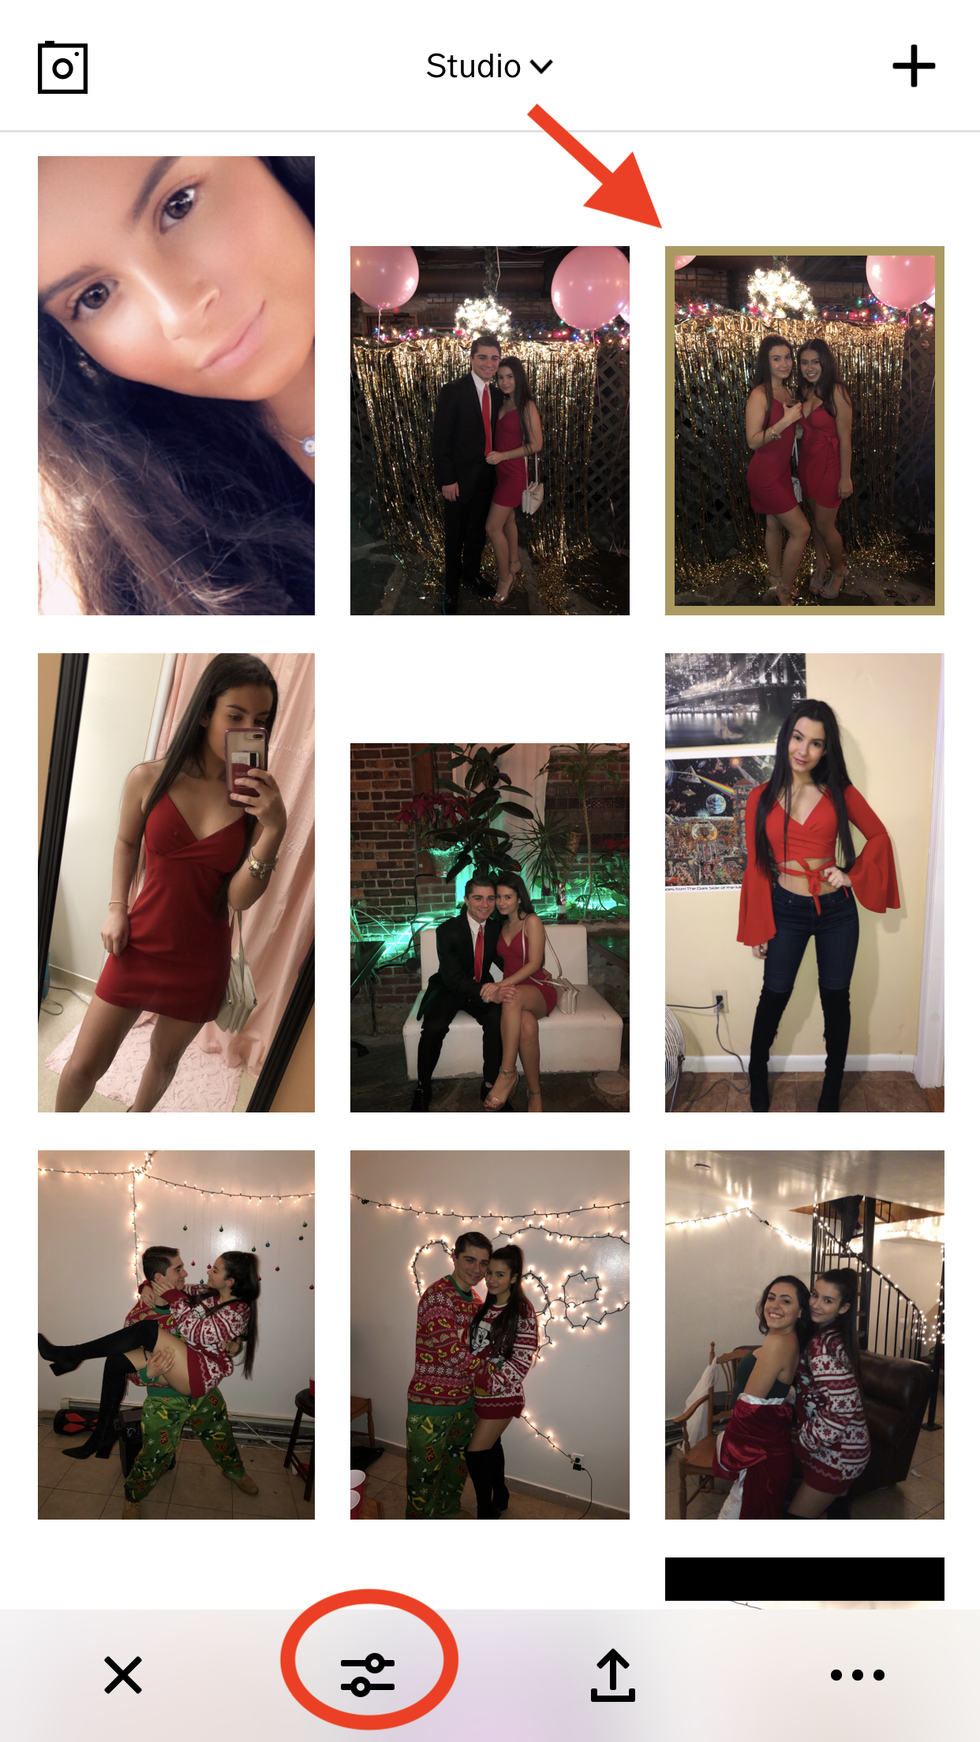
screenshot from my iPhone
To choose a picture to edit, click on the image and you'll see the box around the picture turn olive-colored. To edit it, click on the icon toward the bottom of the screen with the lines and circles (pictured above).
4. Filters
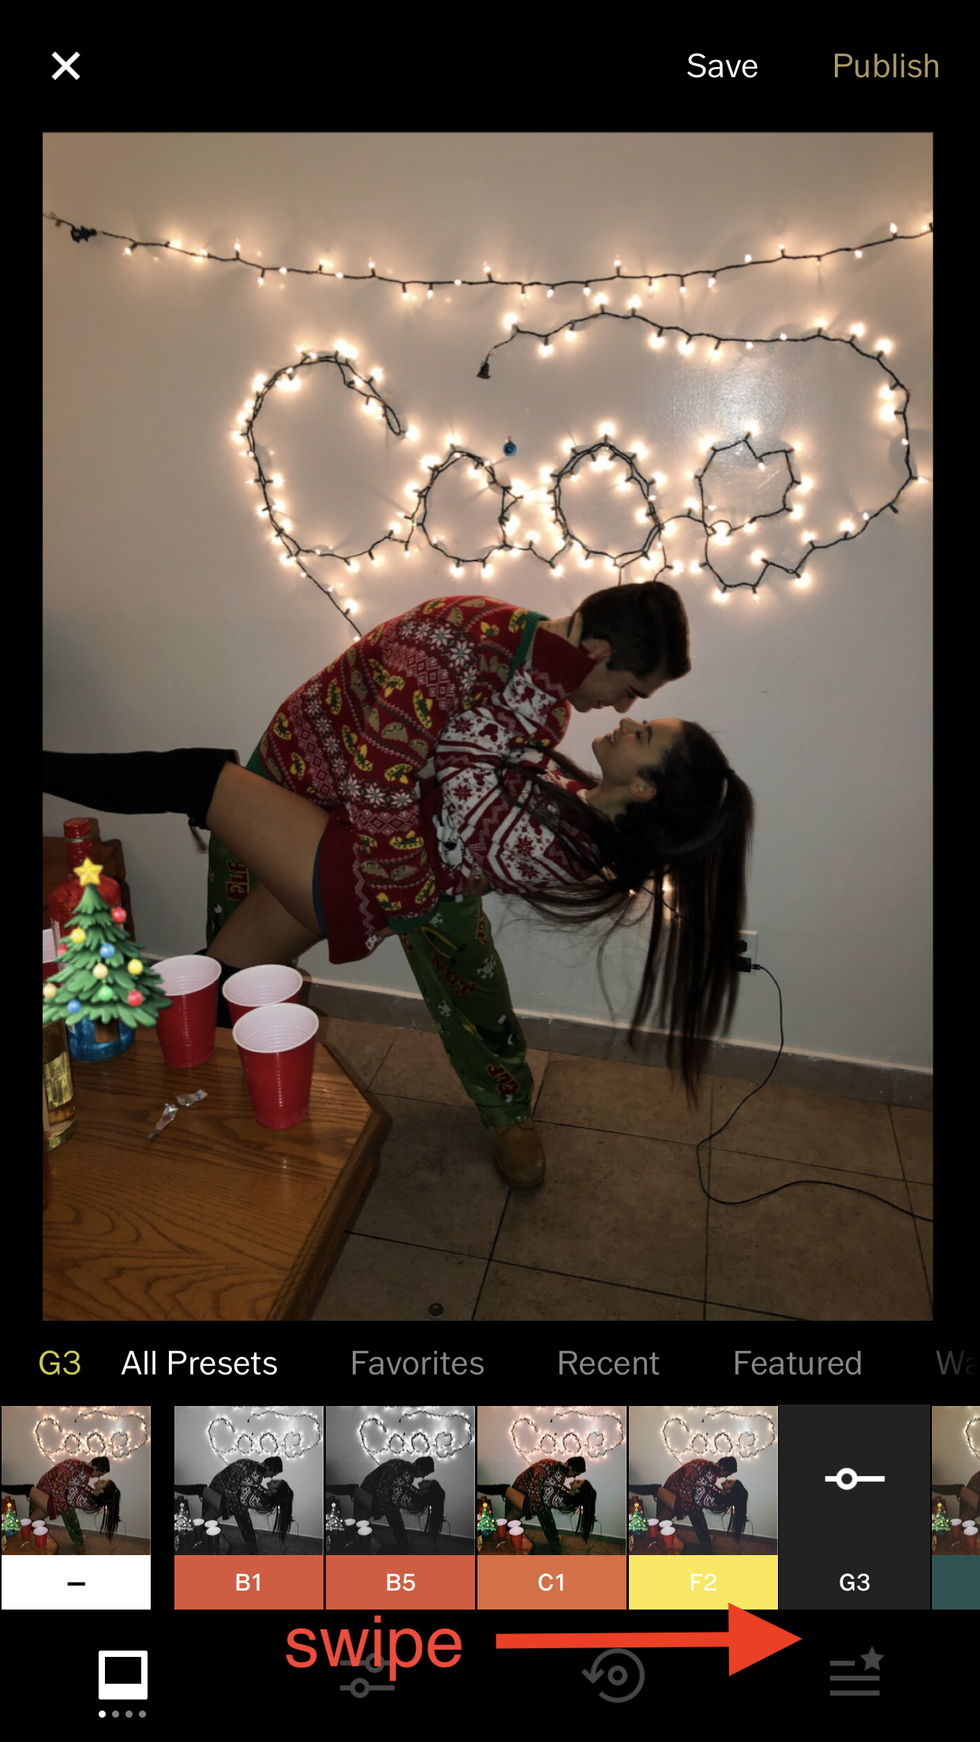
screenshot from my iPhone
When you click the "edit" button, you'll be directed to the screen that lets you experiment with the filters. Swipe through the different filters at the bottom to see how they look with your picture.
5. Experiment with the intensity of filters
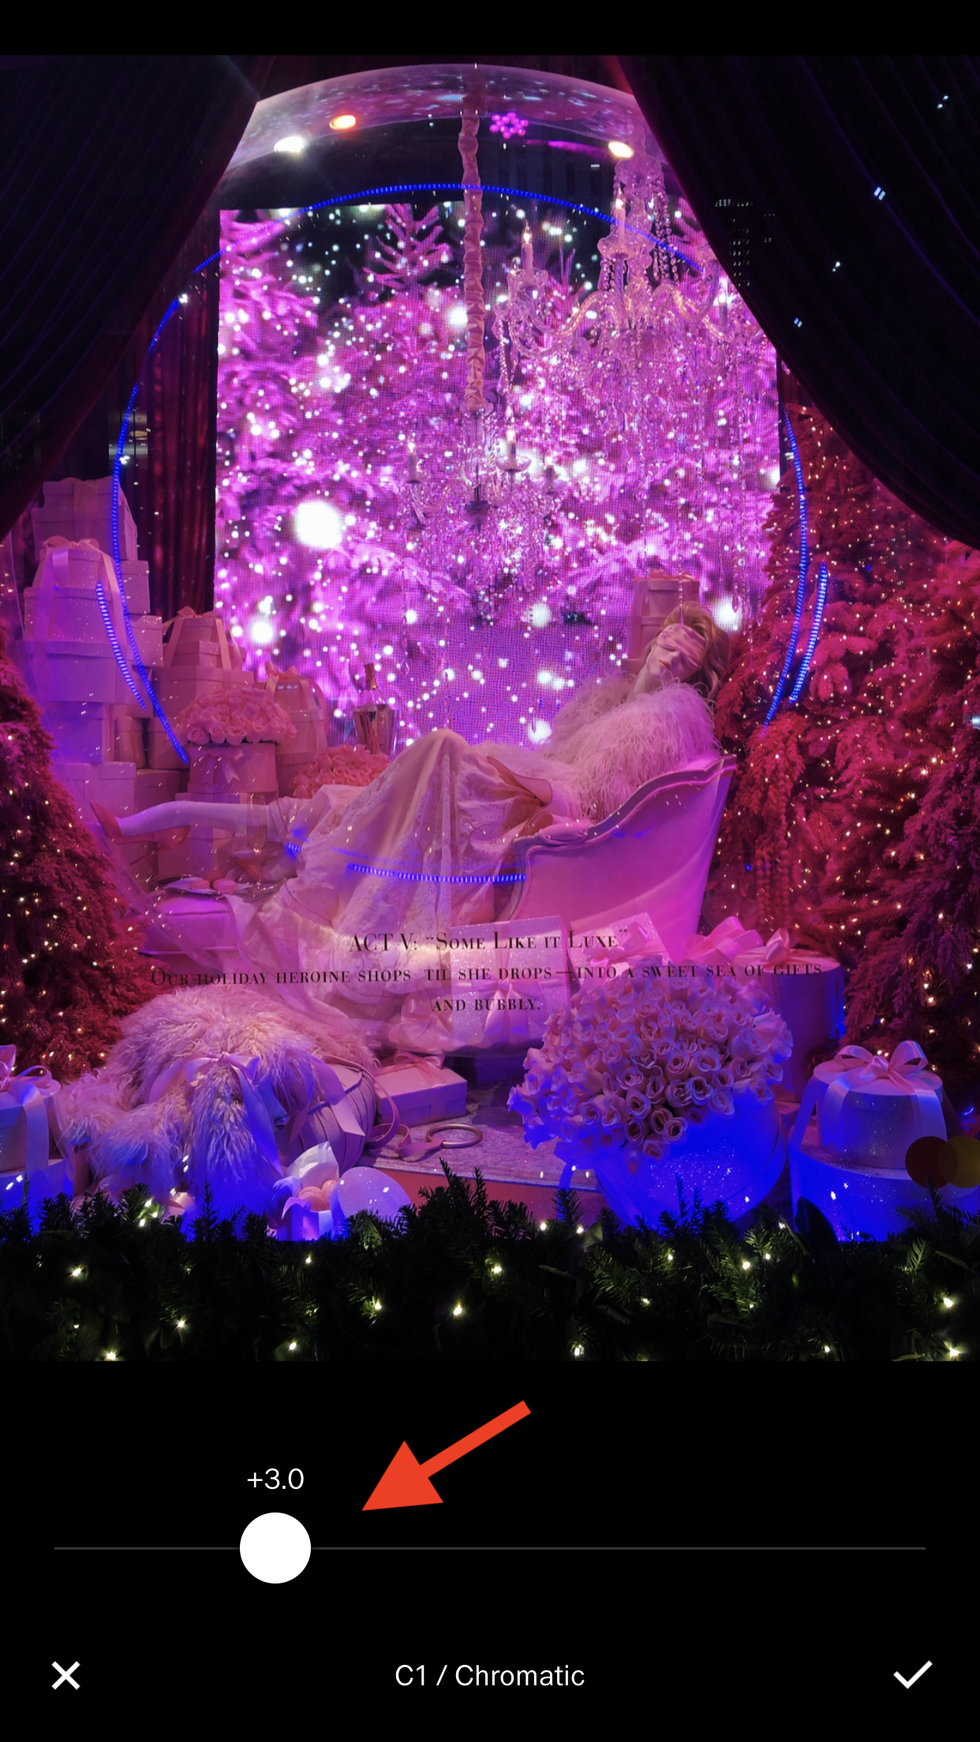
screenshot from my iPhone
You can change the intensity of the filters by lessening it. Simply click on the filter once again, and the app will show you a scale. VSCO automatically sets the effect at +12 on the scale, but you can slide the circle to the left to make the filter lighter. In this picture from Manhattan, I lessened the intensity of the filter to +3.
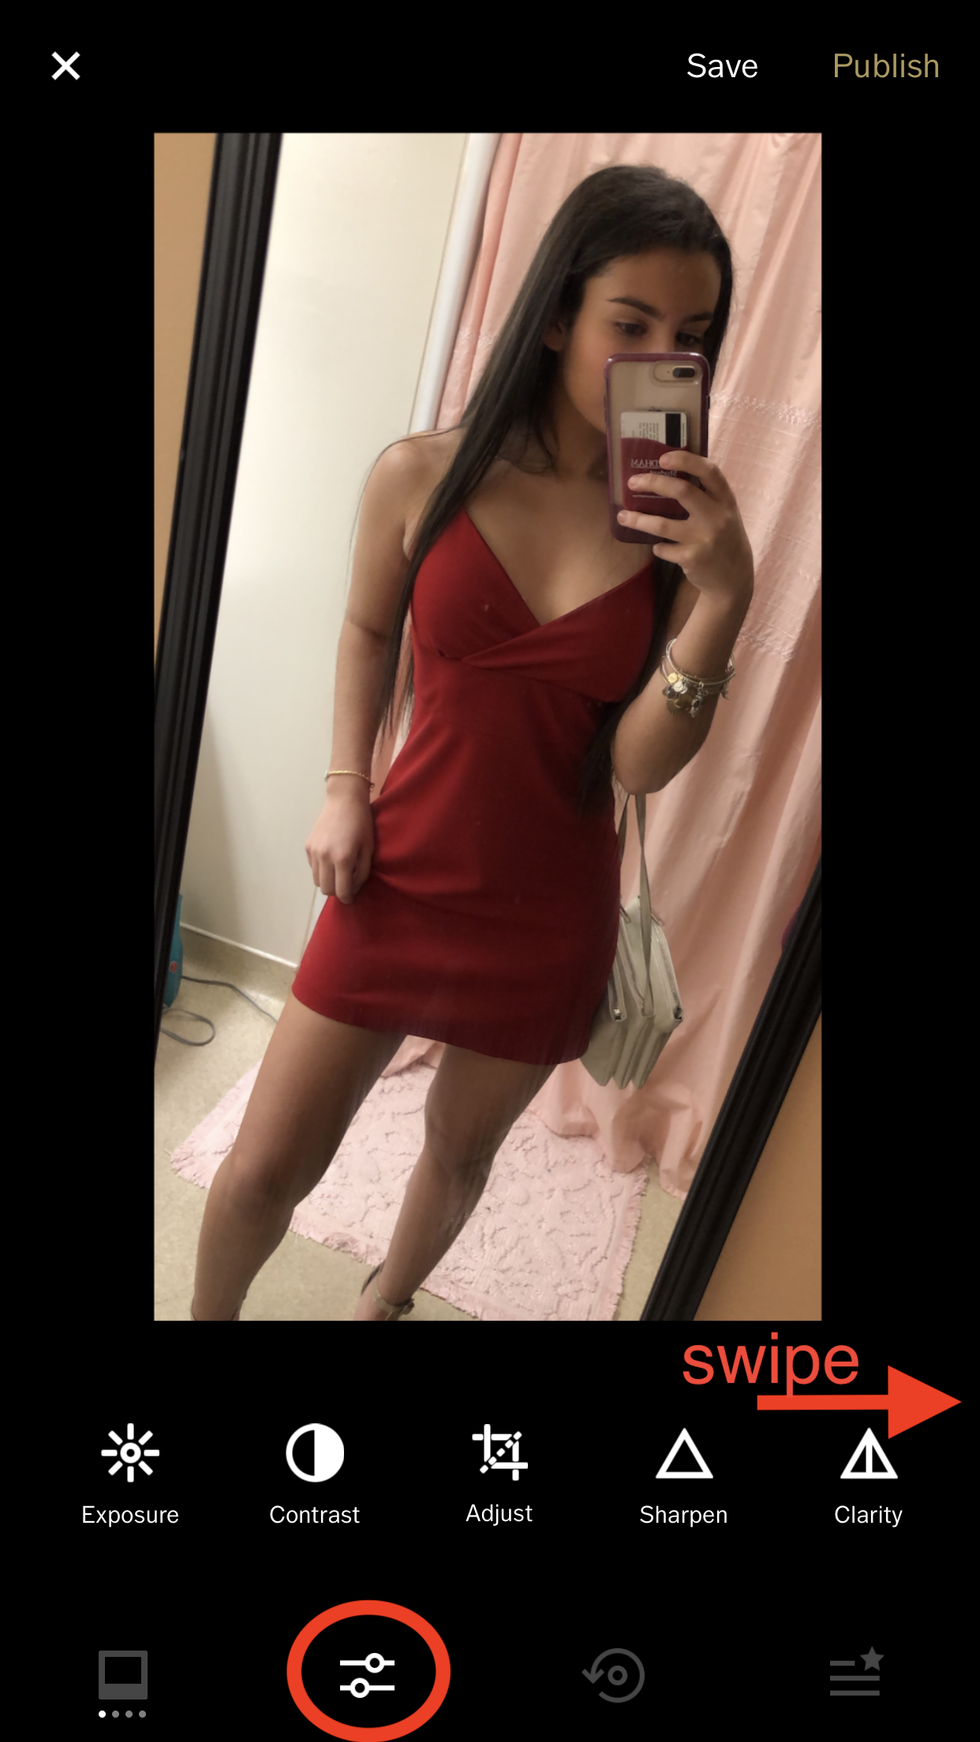
6. Other various effects
screenshot from my iPhone
The second button on the bottom of the screen (the image of the lines and dots, again) will redirect you to a page offering even more edits. You can see all the editing options if you swipe through the icons at the bottom. I'm not an expert at editing, but even people who know nothing about photography can master these edits.
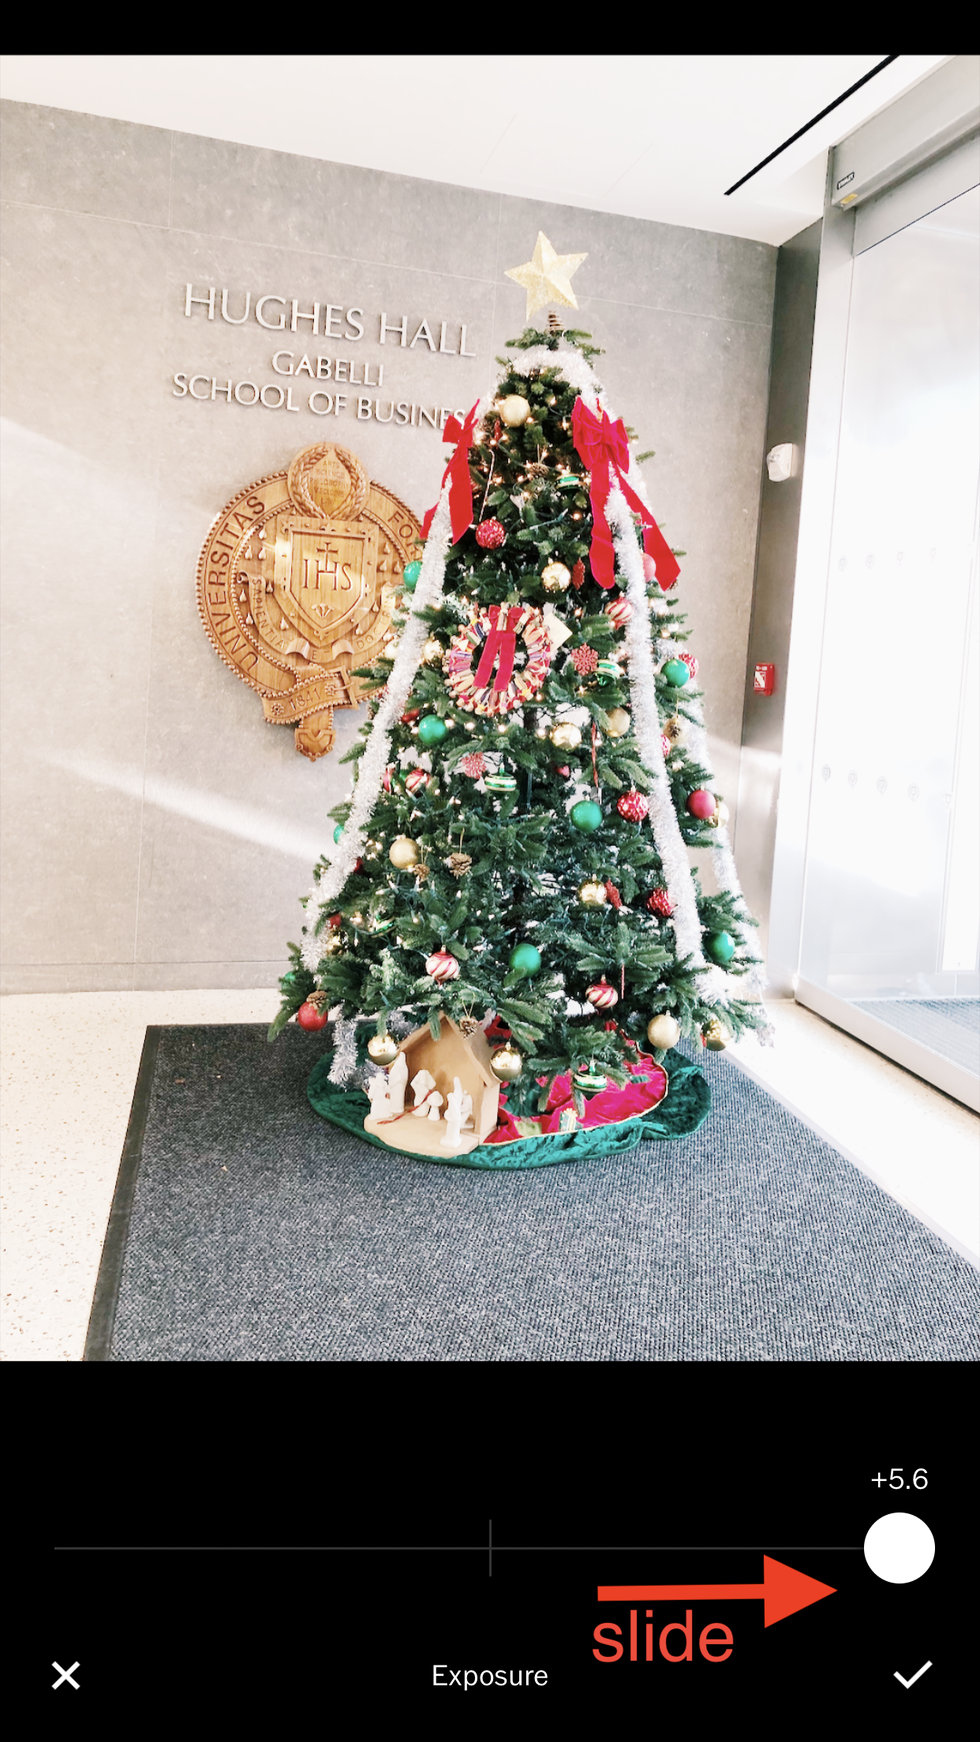
7. Exposure
screenshot from my iPhone
The first icon that looks like the sun is for exposure. Simply slide the circle to experiment with the image at different exposure levels. Negative exposures make the image appear darker, and positive ones make them appear lighter.
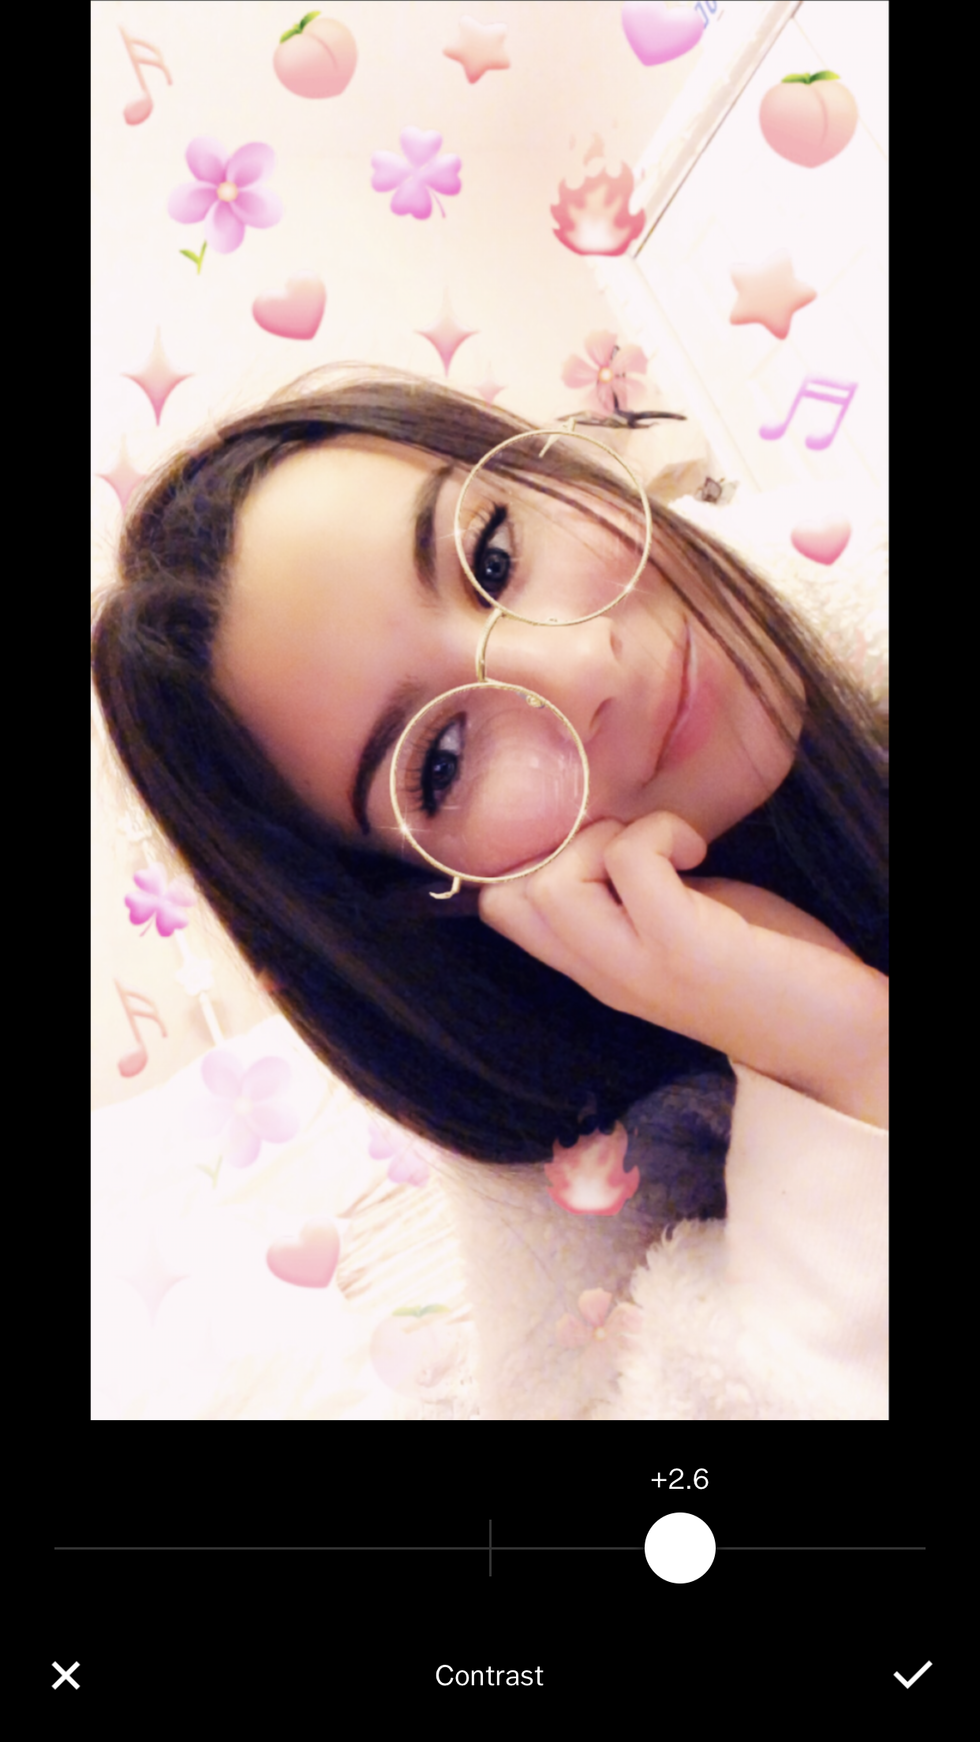
8. Contrast
screenshot from my iPhone
The second icon is for contrast, which is kind of hard to explain, but it basically affects the tone of the picture. Just like exposure, slide the circle to experiment with different contrast levels.
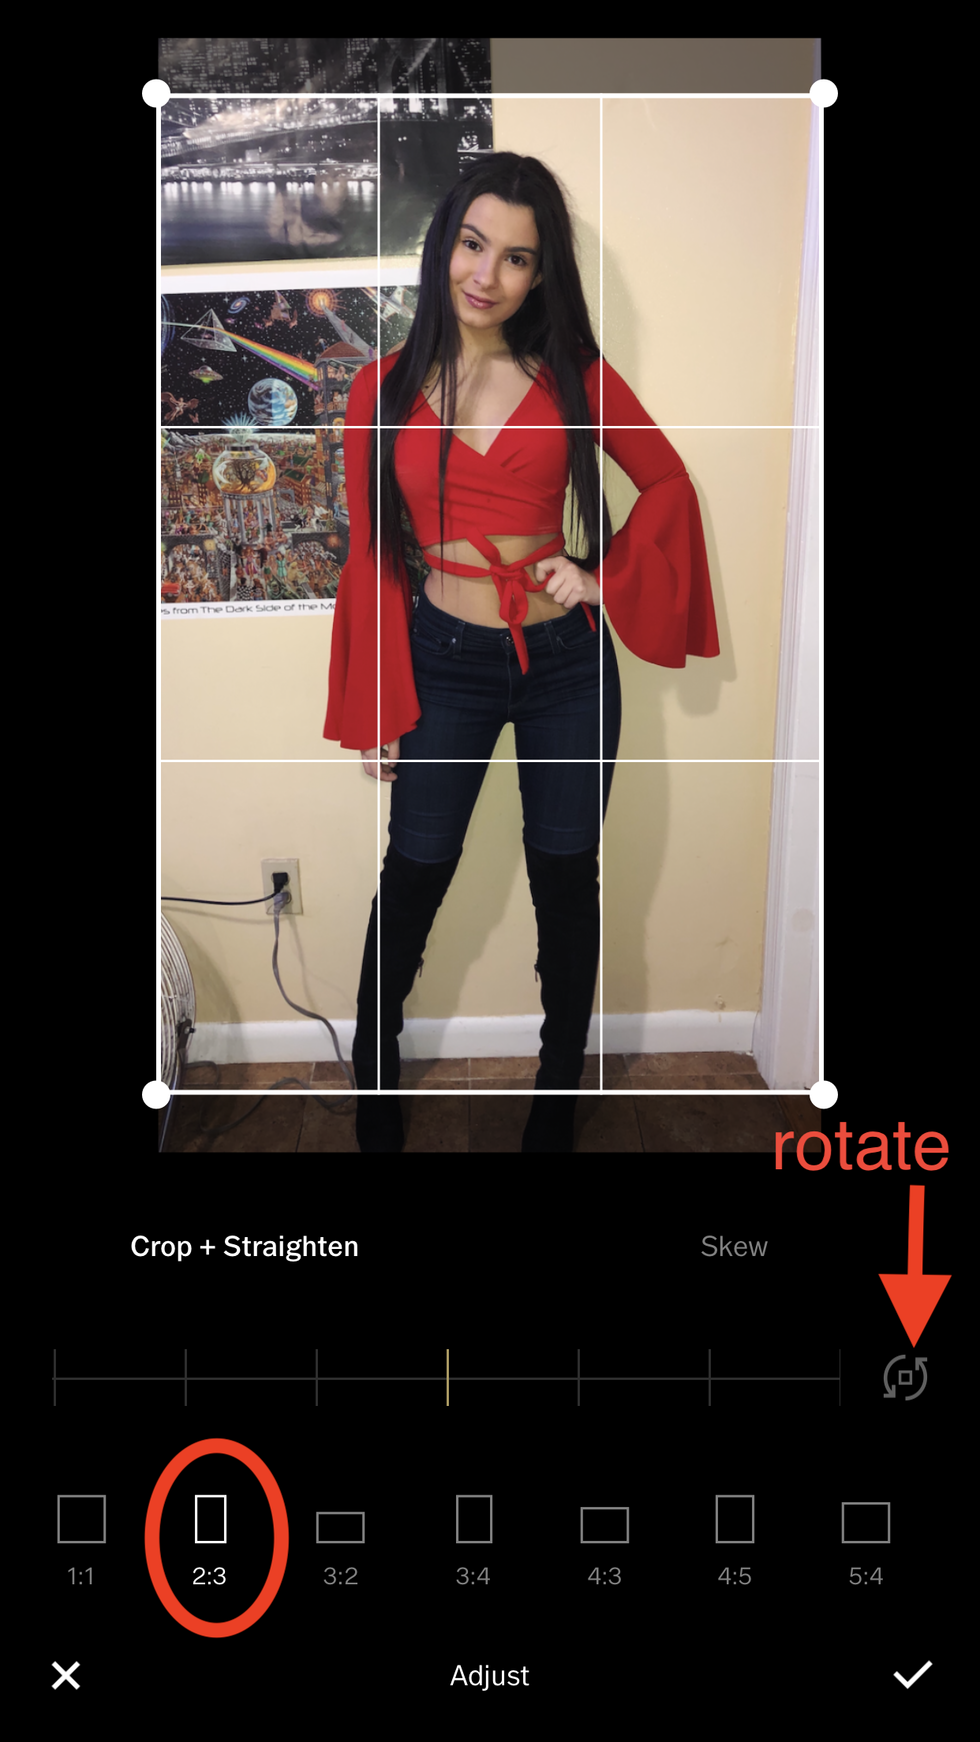
9. Cropping and straightening
screenshot from my iPhone
The third icon is for adjusting. You can crop the image by adjusting the box by yourself, or you can click on one of the ratios that the app gives at the bottom. In this picture, I used the 2:3 ratio. Even though I didn't use this in my picture, you can swipe the colored tick mark along the line to straighten and un-straighten the image. Finally, you can rotate the image by clicking on the rotate icon.
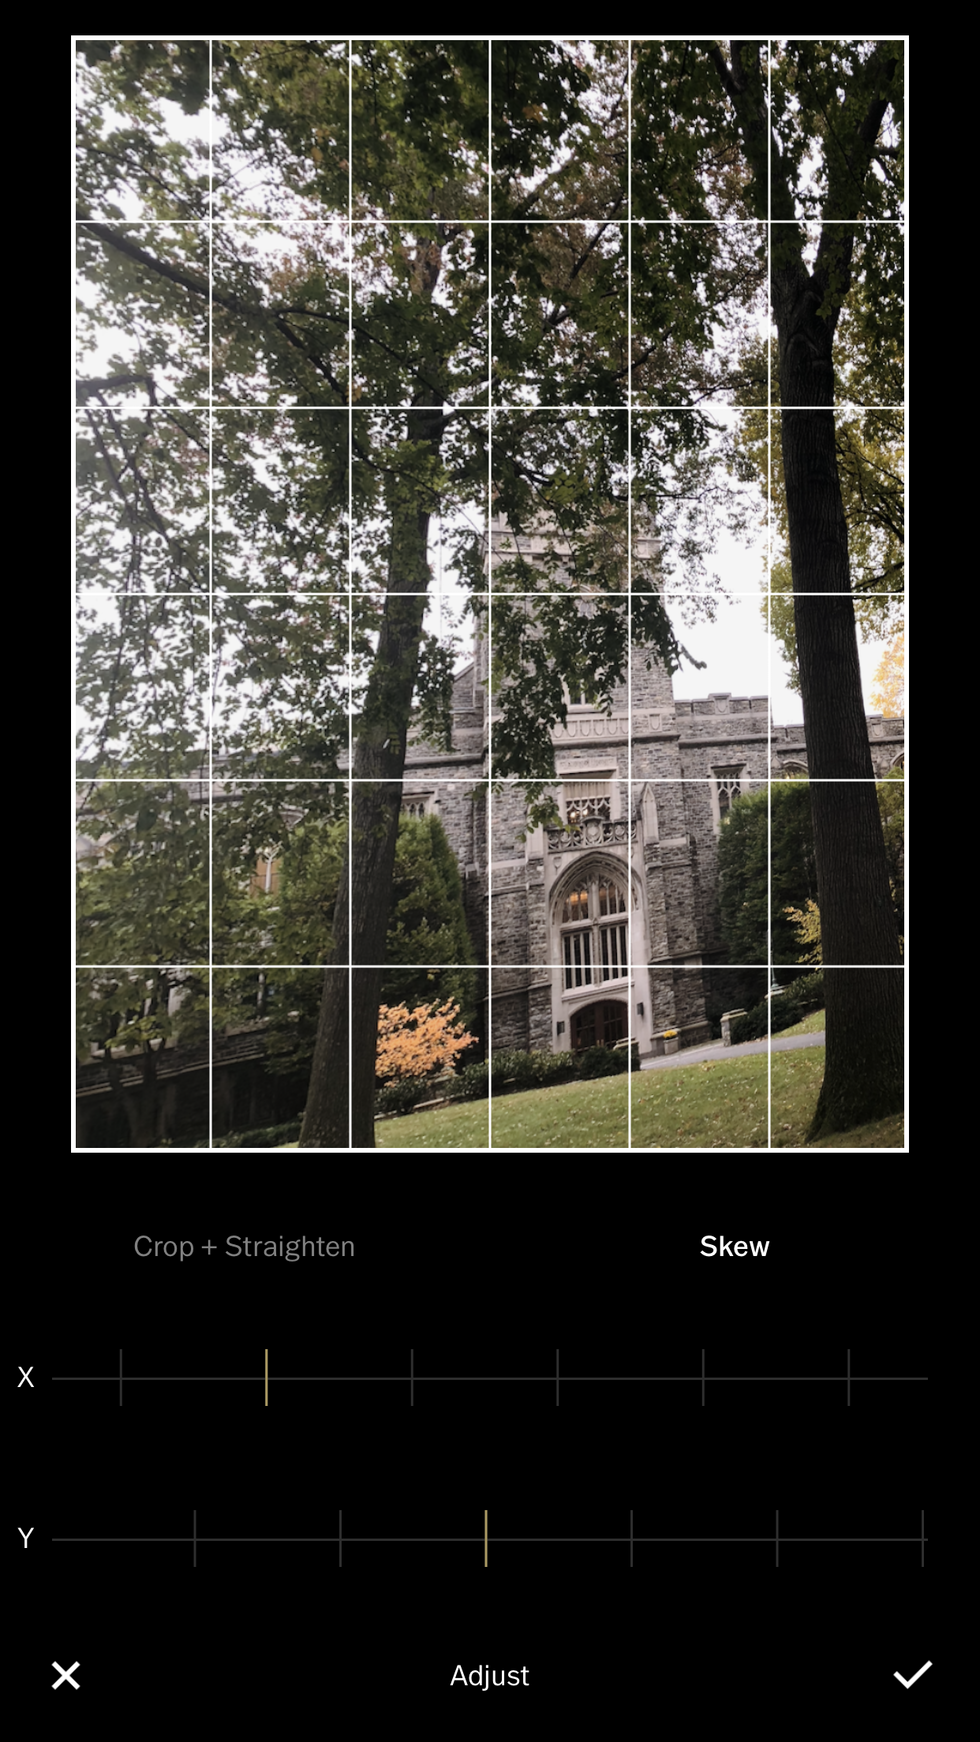
10. Skewing
screenshot from my iPhone
You can also skew the photo under the same icon simply by clicking "skew". I honestly find this effect weird and have only used it right now for the purpose of this guide, but it basically just distorts your image. It kind of reminds me of looking at yourself in a funhouse mirror at a carnival. To play with the effect, just slide the colored tick mark along the lines.
11. Sharpening, clarity, saturation, and tone
These are more effects you can experiment with by dragging the circles along the lines.
12. White balance

screenshot from my iPhone
You can add a tint of color to your photo by dragging the circles along the lines at different places until you find the balance you like.
13. Skin tone

screenshot from my iPhone
Even though I've never used this effect either, it's supposed to enhance your skin tone. I don't really see it in this particular picture, but you can play around with it to see if it looks good in yours.
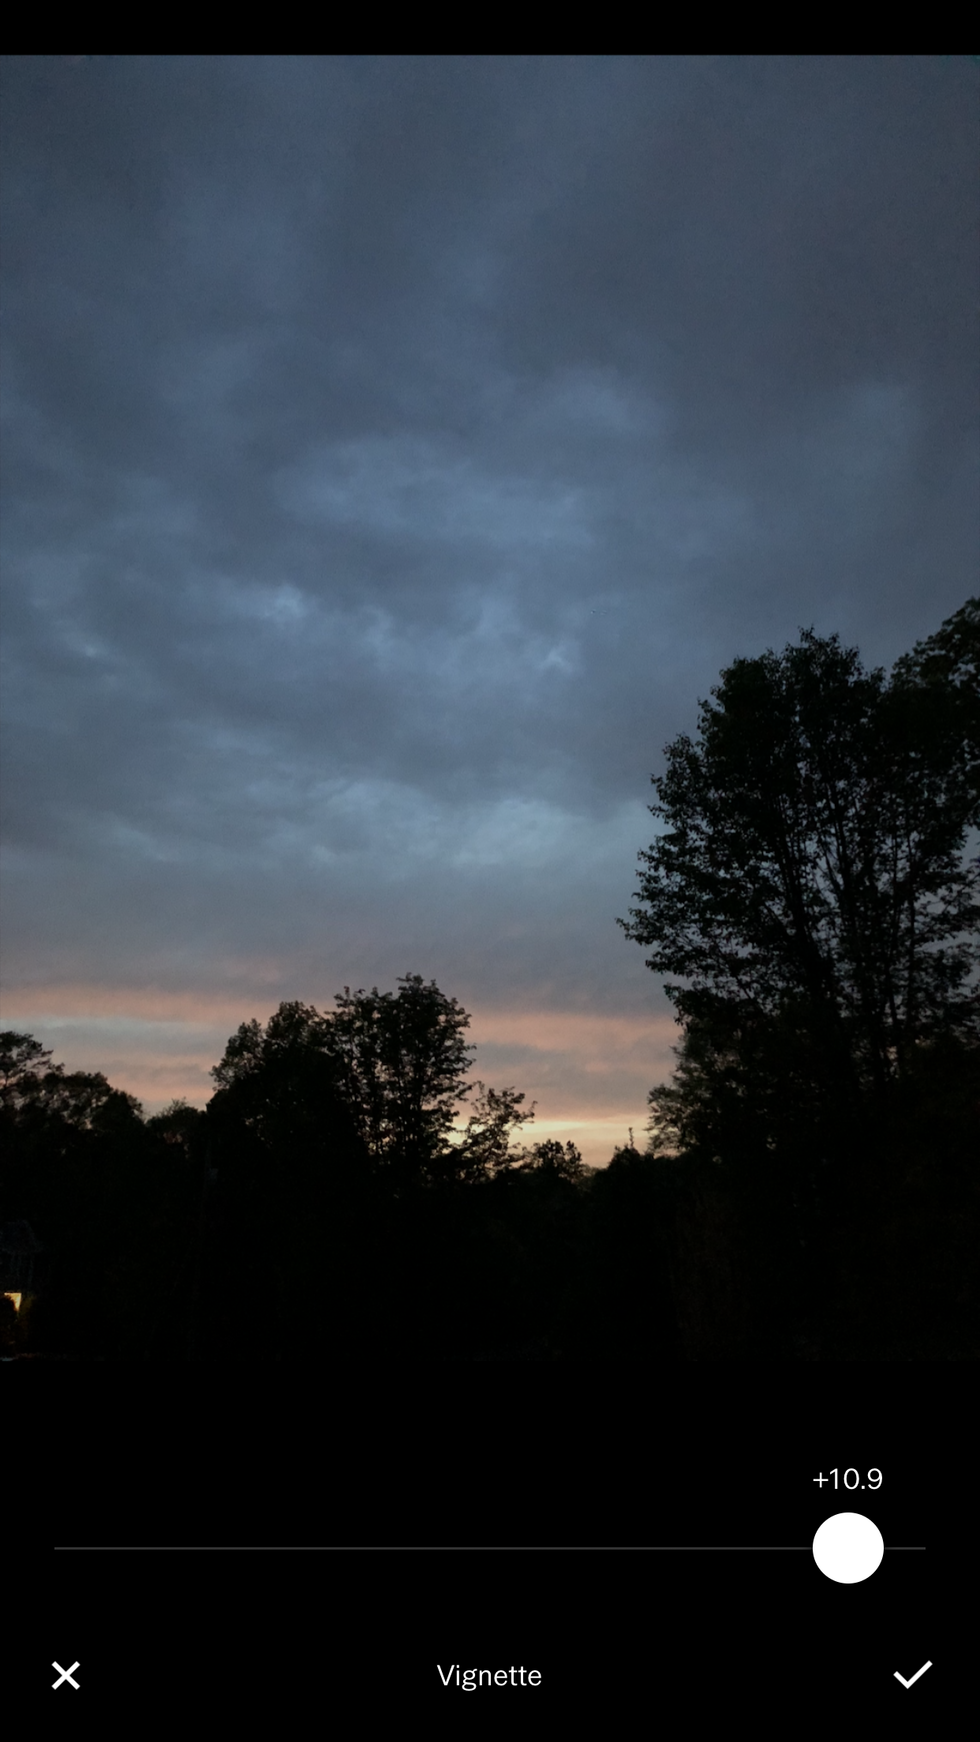
14. Vignette
screenshot from my iPhone
From a person who's not an expert in editing, this effect just reduces the brightness toward the center of the image, producing a shadowy effect.
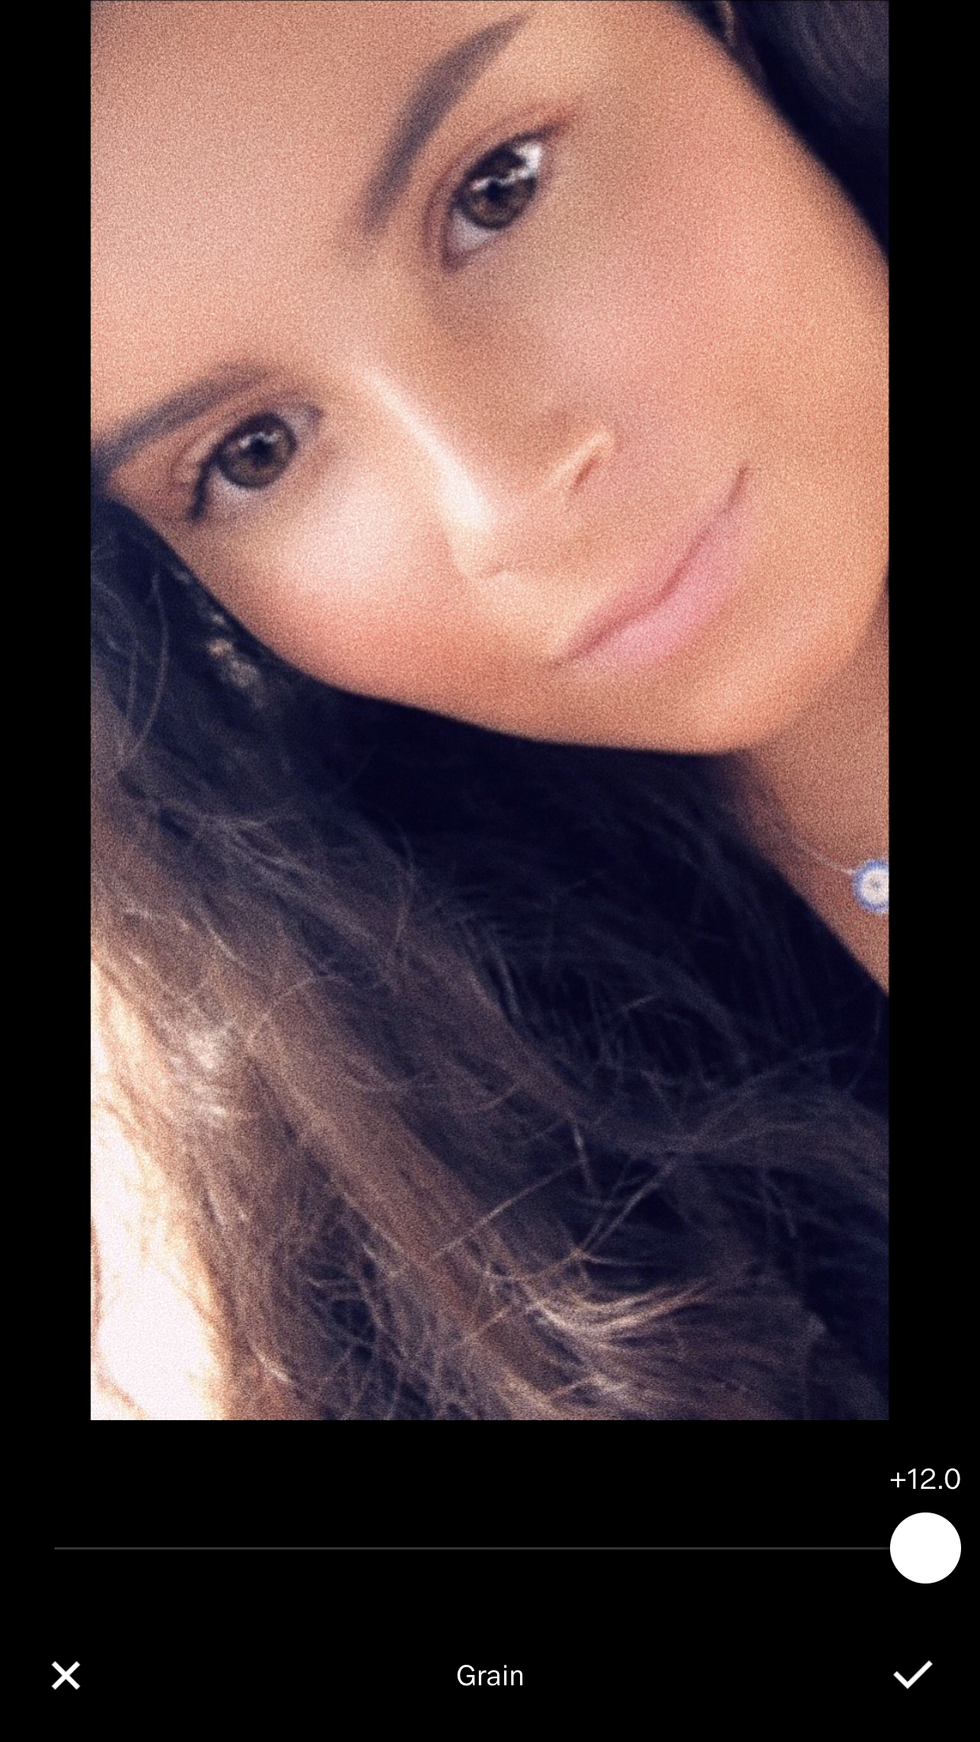
15. Grain
screenshot from my iPhone
This is a pretty cool effect that turns your image, well, grainy.
16. Fade

screenshot from my iPhone
The name says it all: the picture fades into the background.
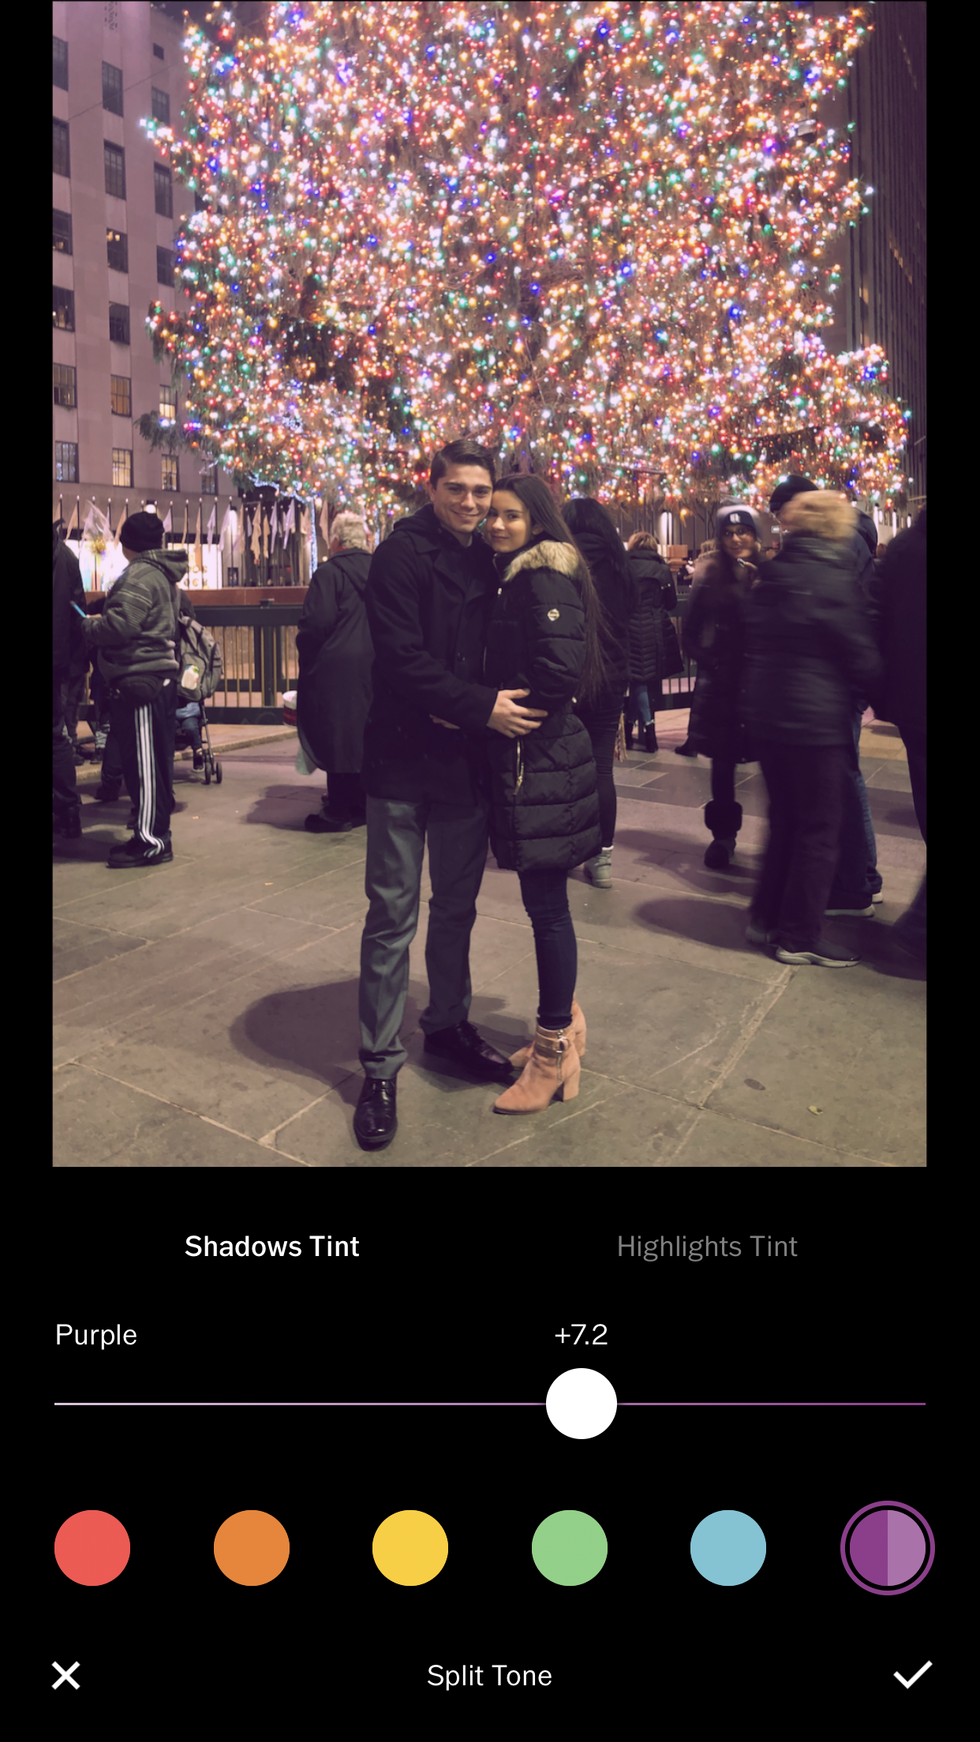
17. Split tone
screenshot from my iPhone
With this last effect, you can play around with the highlight and shadow tint by clicking on the different colors and sliding the circles along the lines. You can experiment with both tints at the same time, creating an even better image.
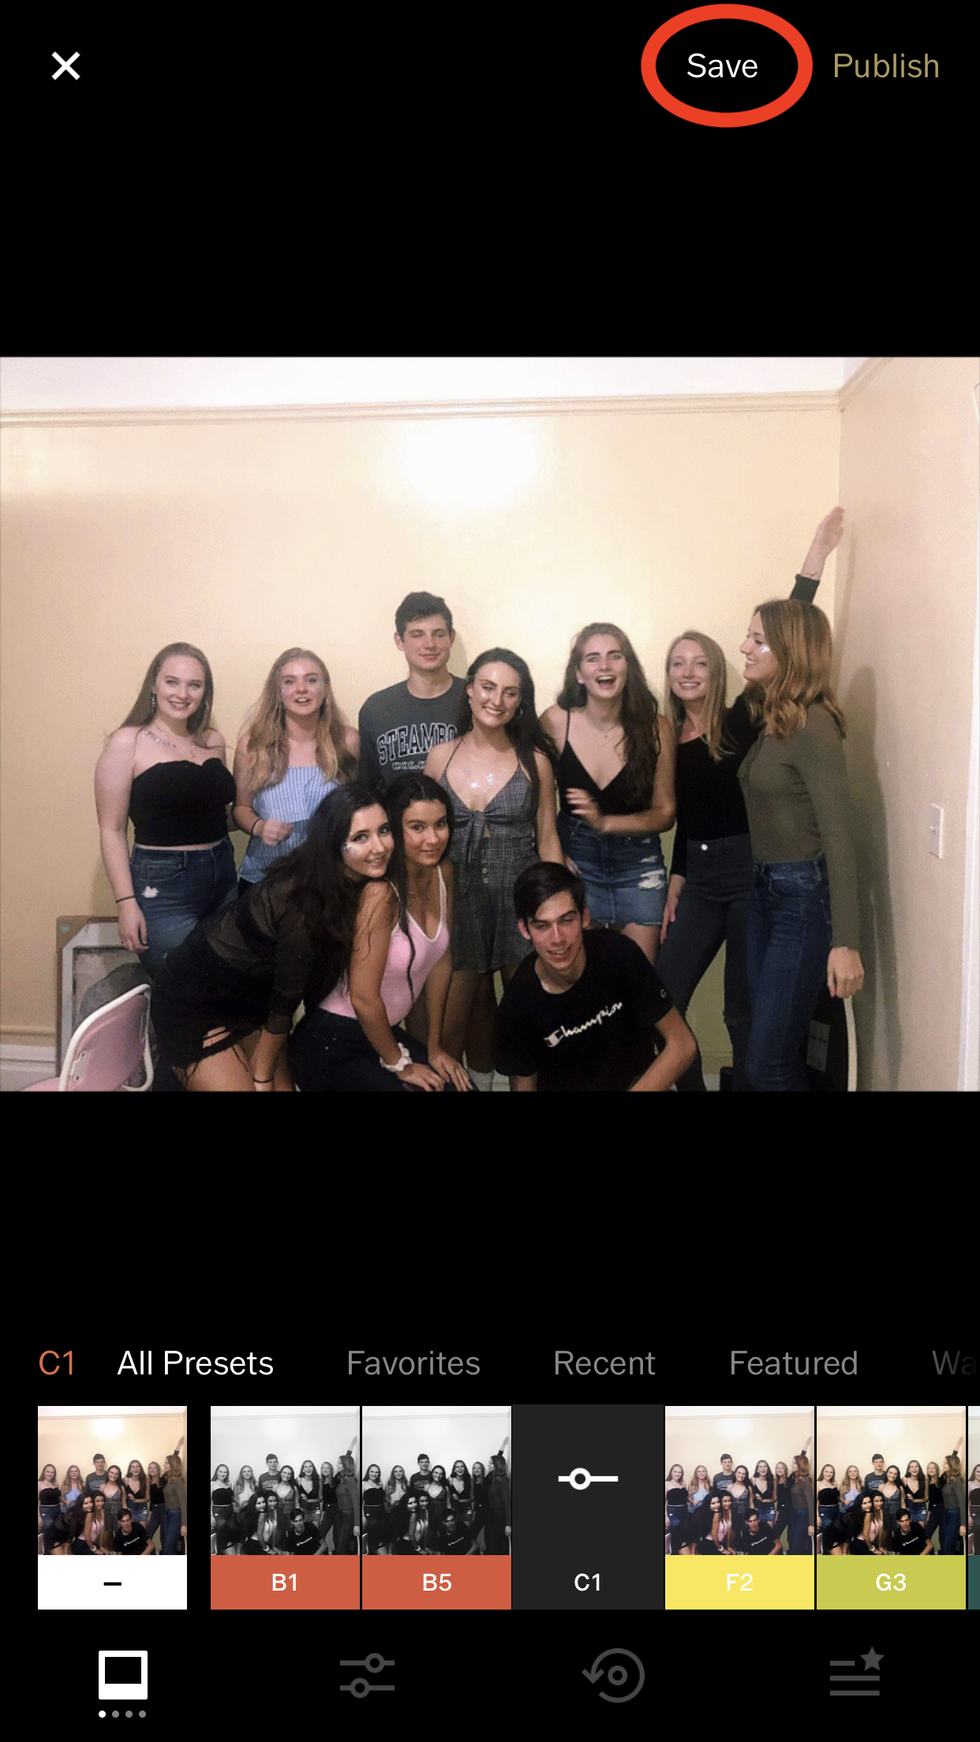
18. Saving edits
Click "save" at the top to save edits. If you exit out of an edit, the app will ask you if you really want to discard it.
19. Viewing your list of edits
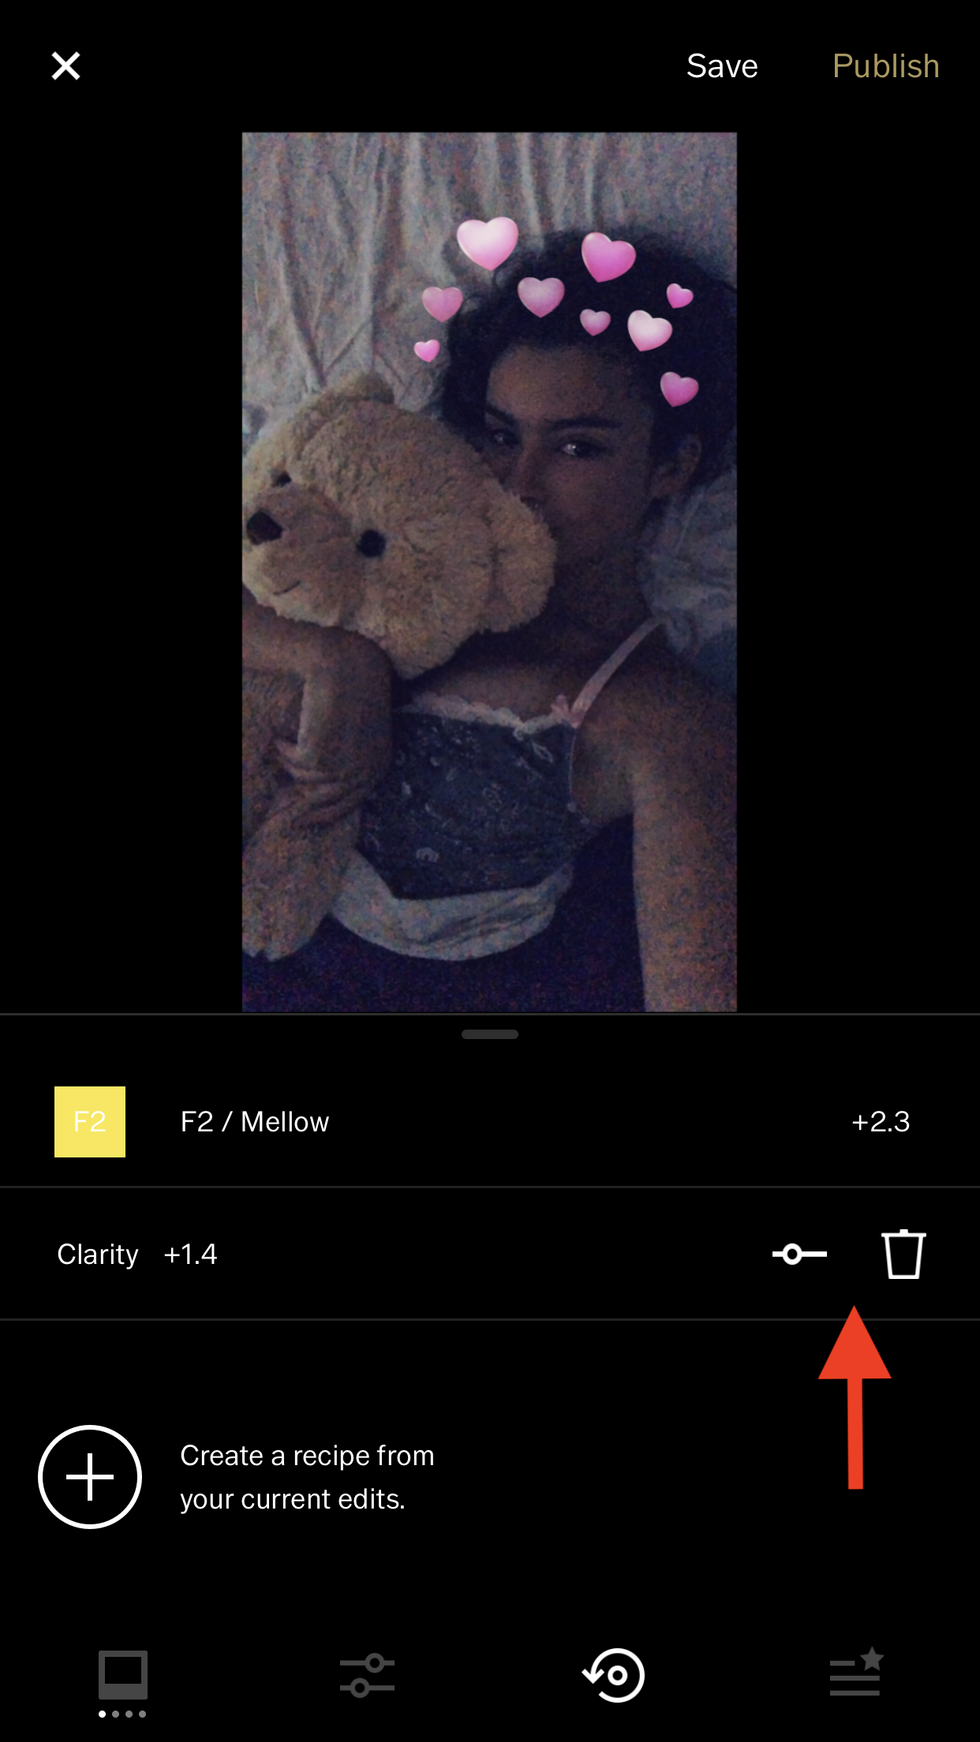
screenshot from my iPhone
The icon at the very bottom of the original editing page shows you a complete list of your edits. You can change the edits by clicking on them and choosing the icon with the line and circle. You can also delete the edits completely by clicking on the edit and choosing the trash icon.
20. Saving edited items to your camera roll
screenshot from my iPhone
When returning back to the "studio" page, click on the icon at the bottom right-hand corner with the three dots. This gives you the option to save your image to your camera roll, share it over text or on other social media platforms, or delete the picture altogether.

 true love
StableDiffusion
true love
StableDiffusion
 My Cheerleader
StableDiffusion
My Cheerleader
StableDiffusion
 womans transformation to happiness and love
StableDiffusion
womans transformation to happiness and love
StableDiffusion
 future life together of adventures
StableDiffusion
future life together of adventures
StableDiffusion


 shiny things
StableDiffusion
shiny things
StableDiffusion
 listen to your heart
StableDiffusion
listen to your heart
StableDiffusion
 face your fear
StableDiffusion
face your fear
StableDiffusion
 olympic woman
StableDiffusion
olympic woman
StableDiffusion
 Lessons of life
StableDiffusion
Lessons of life
StableDiffusion
 Woman praying
StableDiffusion
Woman praying
StableDiffusion
 Disneys Goofy
StableDiffusion
Disneys Goofy
StableDiffusion
 love
StableDiffusion
love
StableDiffusion
 you are stronger than you think
StableDiffusion
you are stronger than you think
StableDiffusion
 kindness
StableDiffusion
kindness
StableDiffusion
 StableDiffusion
 StableDiffusion
 StableDiffusion
 StableDiffusion
 StableDiffusion
 StableDiffusion
 StableDiffusion

 StableDiffusion
 StableDiffusion
 StableDiffusion
 StableDiffusion
 StableDiffusion
 StableDiffusion


