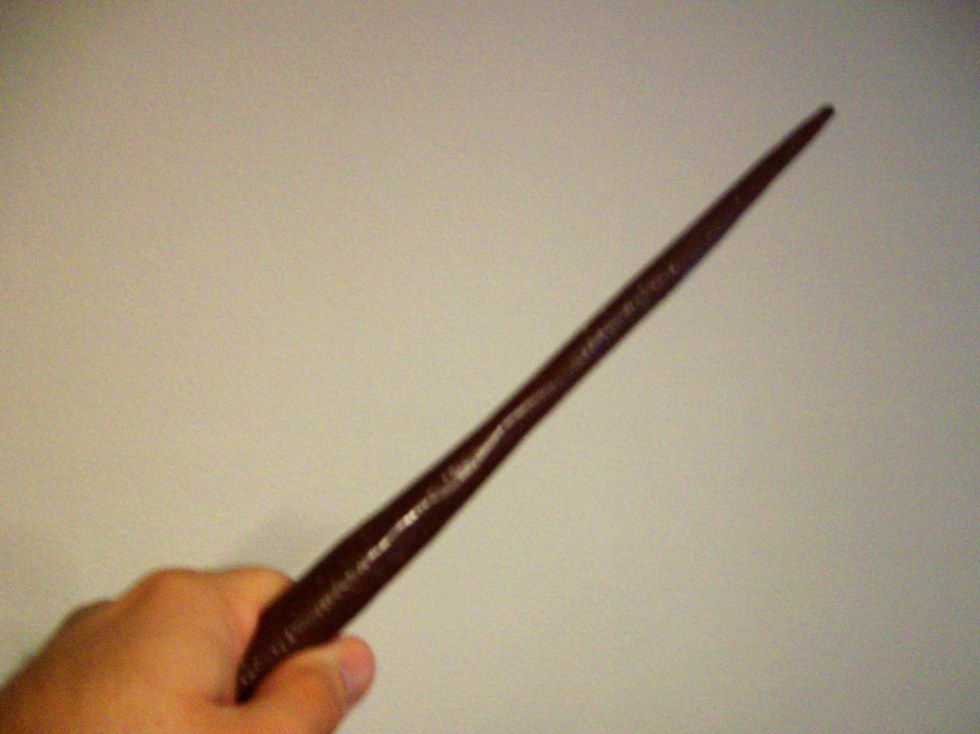
It’s Halloween time again! What better costume could there be than to dress up as a witch or wizard from the world of Harry Potter? But no witch or wizard would be complete without their wand! Rather than spend upwards of $50 for an authentic, licensed Harry Potter wand, or a ridiculous fat and glowing plastic thing, craft your own!
A few years ago, my kids were nuts about Harry Potter, and the costume for that years Halloween had to be Hogwarts students! Rather than buy expensive, ready-made costumes or those cheap slip on type with Velcro in the back, we opted to make the costumes ourselves. My wife sewed cloaks, bought and added House patches, bought the correct ties and used their black and white dress clothes underneath. One critical element was left, the wand!
Not being one to shell out $100 or so for two young boys to have authentic Harry Potter wands that likely wouldn’t survive Halloween night, and my own fandom being insulted by the silly, glowing plastic things they sold for costumes, I decided to make my own. I knew that if I were to be as authentic as possible, I’d likely need a wood lathe and wood turning skills. Wasn’t going to happen. I studied wand pics and found many that had an uneven, found in the woods, real tree branch look to them. I liked that a lot, and decided to mimic that design.
What I came up with ended up being very inexpensive, fairly simple to make, and lots of wizarding fun for the kids. They kept and played with these wands for years! A happier Dad I could not have been.
Below is a picture tutorial for crafting your own Harry Potter inspired wands. Remember, safety first! This craft involves sharp objects and slivers of wood. If you’re younger, ask a grownup for help, and everyone please be careful and wear safety glasses!
Harry Potter Inspired Wand Craft Tutorial
Step 1: Tools and Supplies You Will Need
A small hand saw
A sharp carving knife
Sandpaper
Paint Brush
Safety Glasses
Craft wood dowel
Craft paint
Polyurethane Finish

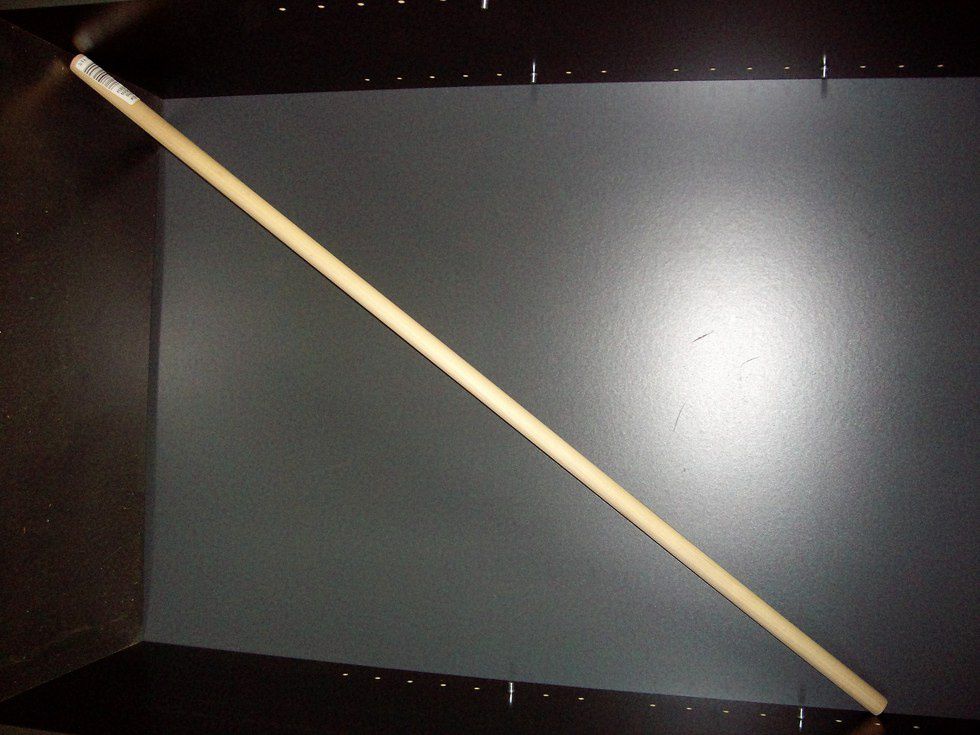
Step 2: The Wood
Head to your local craft store and look for the wood dowels in the craft wood section. A dowel is a long, straight and round length of wood. Choose one that’s diameter feels comfortable to grip in your hand. Roughly 1/2 to 3/4 of an inch. This type of wood is important, because it is soft and easy to work, and very lightweight. It should only cost a few dollars.
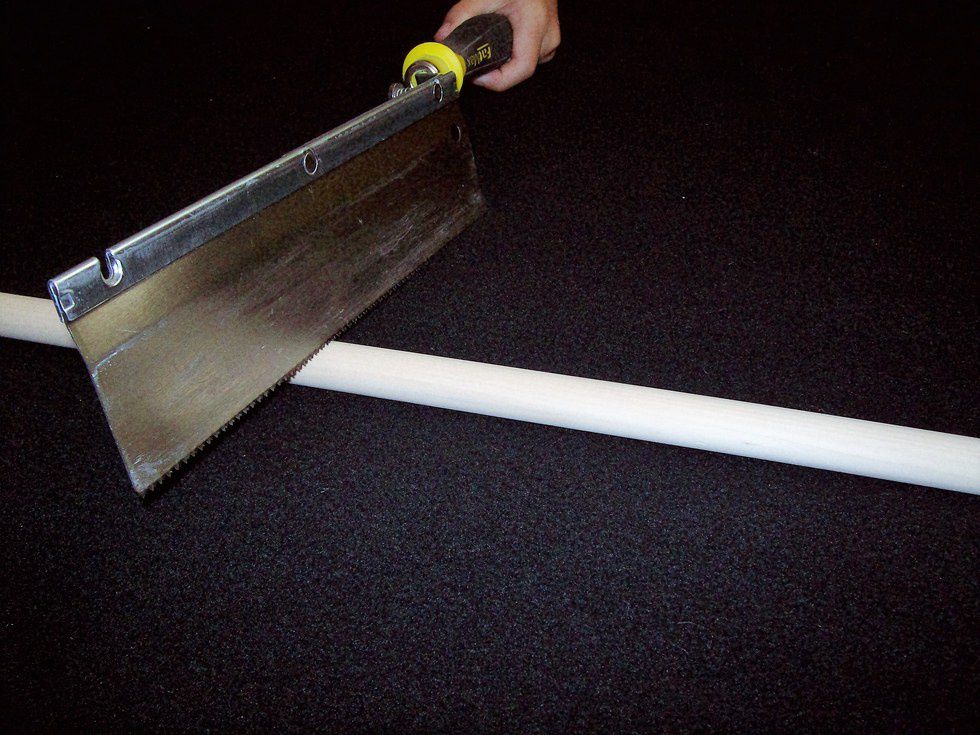
Step 3: Cut to Length
Take your wood dowel home and decide how long you’d like your wand to be. This is a fun step, and completely up to you! Do you prefer a shorter wand, 9 ½in. perhaps? Or a longer, imposing wand at 15in.? Whichever you choose, use your hand saw and cut the dowel to length.
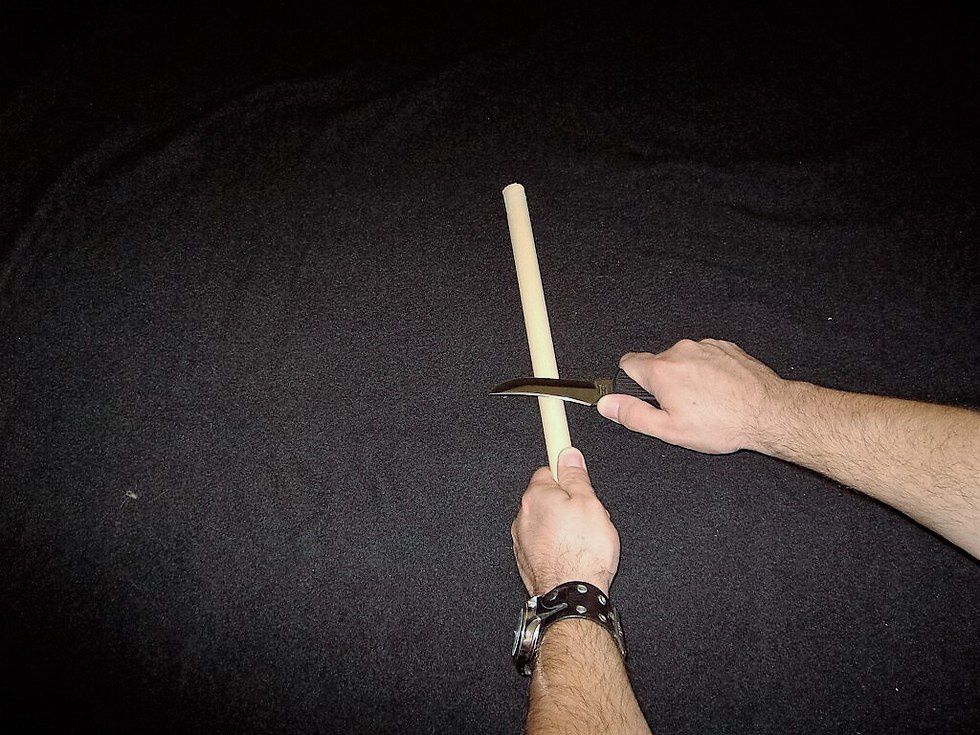
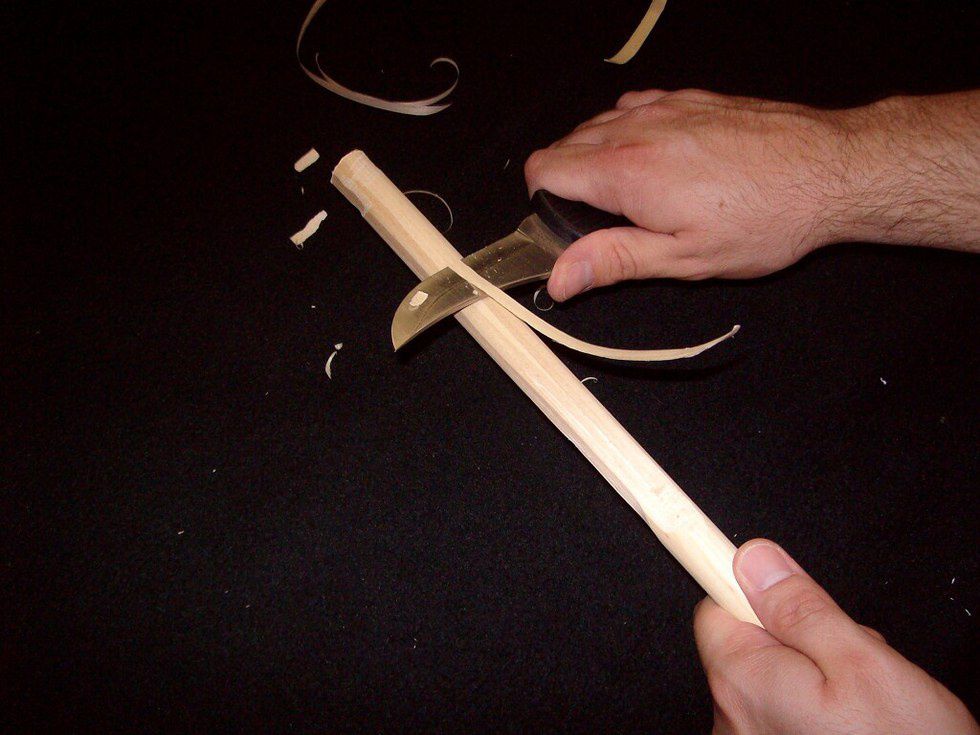
Step 4: Whittling and Shaping
This is where your wand takes shape! Hold the dowel in your hand in a comfortable position. This section you are holding now will become your grip. Using your carving knife held at a shallow angle to the wood, ALWAYS cutting in a direction away from any part of your body, carefully begin to shave off pieces of the dowel. This wood is very soft, and should carve easily. Turn it slightly for each carve, going around it’s circumference. Continue to whittle away the wood, careful to leave your grip section alone and to taper the wand to a narrower point. The wand will be rough, and that’s ok. There’s no wrong look to this, make it as craggy or as smooth as you like!

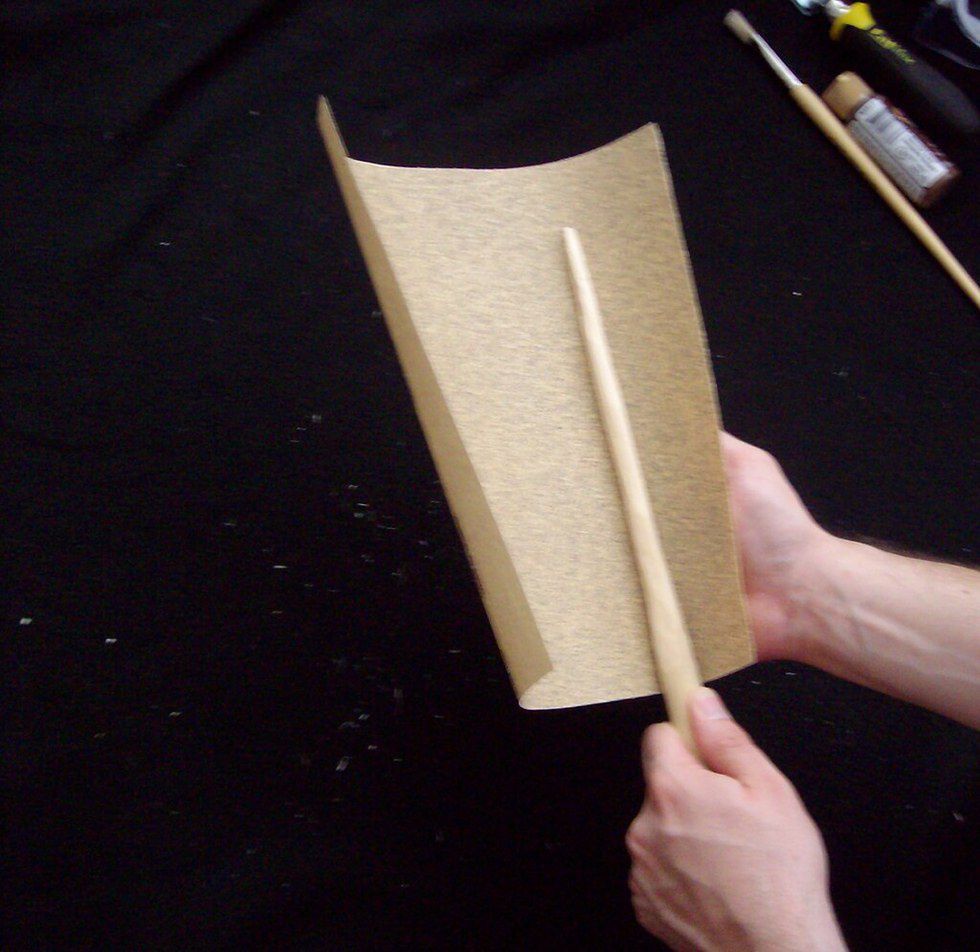
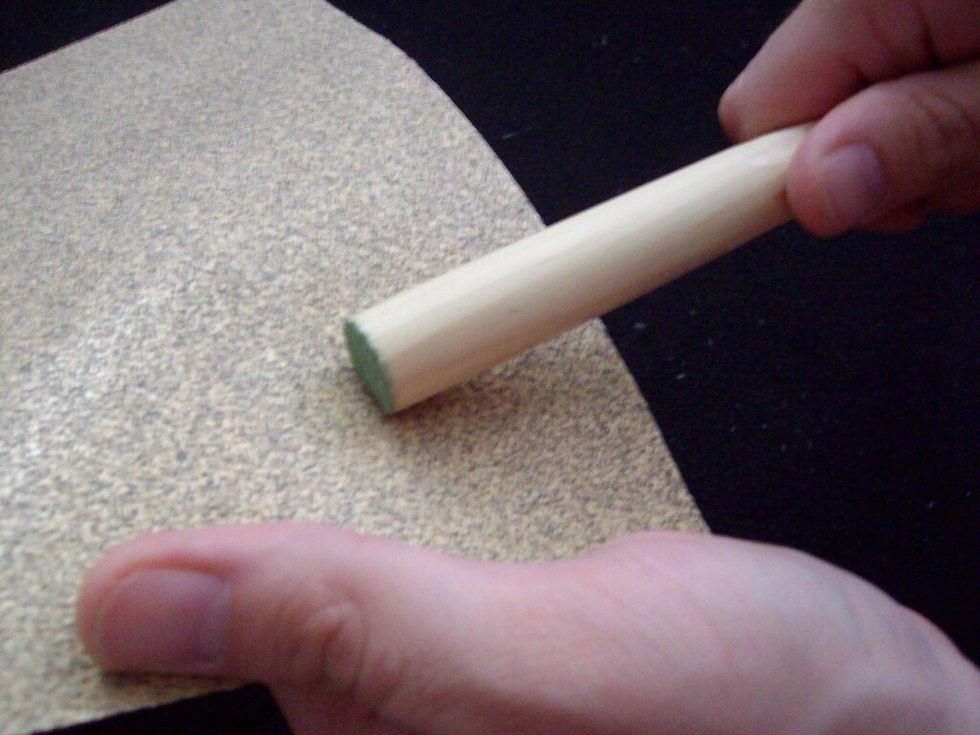
Step 5: Sanding
When you are happy with your wands shape and design, give the whole thing a light sanding to smooth out the edges and remove any possible burrs. Sand the hard edges at the end of your grip section smooth and more rounded, too. Again, this wood is soft so it won’t take much. If you’re really hoping for a smoother, rounder style wand, the sandpaper will help you get there. It will just take a lot more sanding.
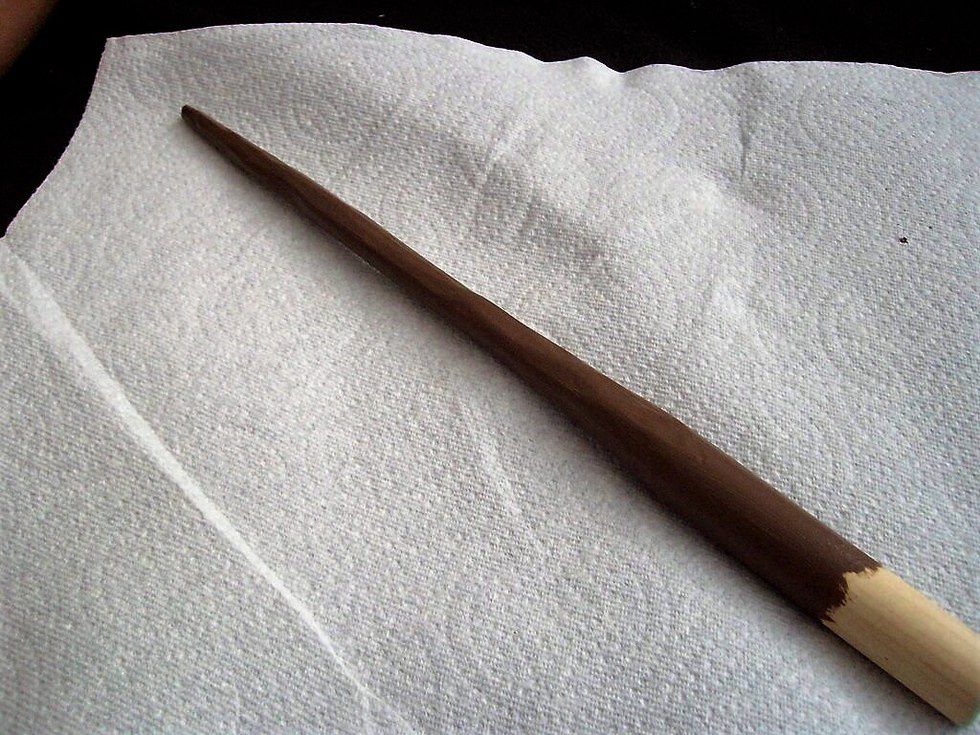
Step 6: Paint
Using a craft paint, which you can also get at the local craft store for a few dollars, you’re going to paint your wand. Choose whichever color you want, but think browns and earth tones. It’s supposed to have come from a real tree, right? Holding it at one end, paint your wand, leaving the area you’re holding unpainted. Prop it up on something using the unpainted end to dry. When it’s dry, flip it around and paint the part you left last time. Let dry again. Repeat the paint for 2 to 3 coats, until you have full coverage and a nice, even paint. If you wish to be extra creative, hand paint other designs or patterns on the wand in a contrast color like black or even gold. It’s entirely up to you, and should reflect your personality!

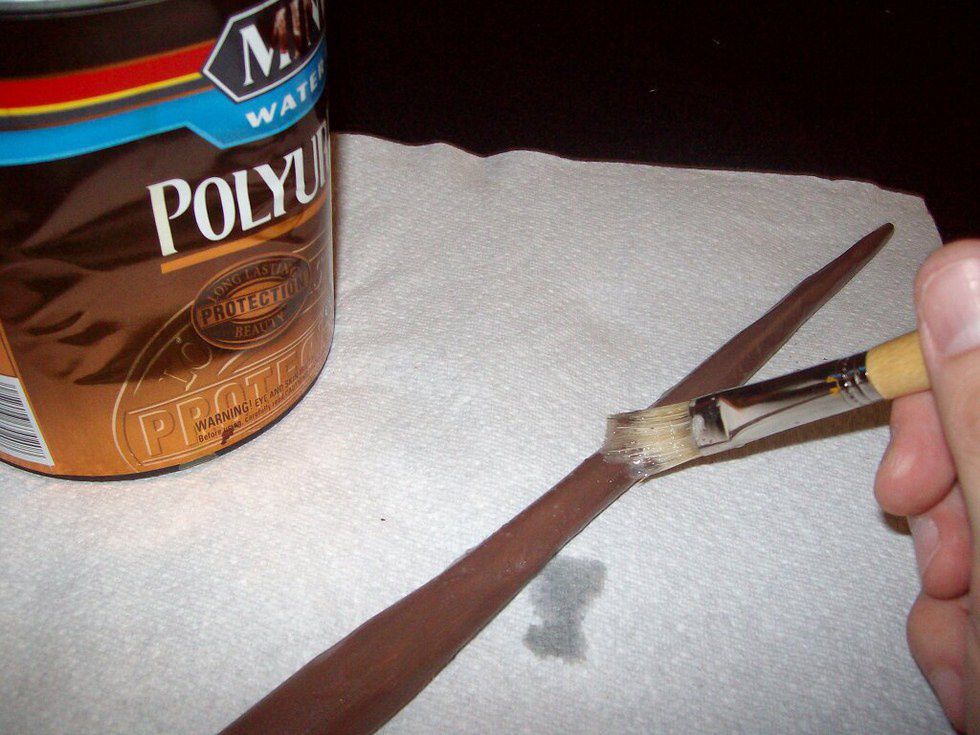
Step 7: Sealing
You don’t necessarily have to do this step, but it will protect your wand and its paintjob. Using polyurethane or a similar product like polycryllic, brush on a couple coats over the whole wand, allowing to dry between coats. These products come in different finishes, either flat, satin or shiny gloss. This is your choice, however you wish your wand to look!
That’s all there is to it! I realize the knife carving aspect can be intimidating or not for everyone. That’s ok! It is much easier than it sounds, but if you aren’t comfortable with it, you could alternatively hand sand the dowel into the tapered shape. It will take a fair amount of time and elbow grease, and creates a lot of dust. But eventually will yield a nice looking wand.
With your awesome wizarding wand in hand, made yourself for only a few dollars, you’re ready for Halloween, a cosplay event, or any time you're feeling magical! Cast some spells and have a great time!


 The minimum wage is not a living wage.
StableDiffusion
The minimum wage is not a living wage.
StableDiffusion
 influential nations
StableDiffusion
influential nations
StableDiffusion