As many of my readers figured out by now, I love taking pictures. I often use photos I take in the pieces I write to help tell my story. I always receive compliments when I showcase any new pictures online via Instagram or Facebook. People often asked how I took such photos, and it all boils down to technique.
I took a photography class during my sophomore year of college. I learned so much, but you don’t need to take a class to be just as good. No matter if you are an amateur with a cell phone or a professional with a DSLR camera, you too can take quality pictures.
Just keep these four things in mind.
Focus
This is one of the most crucial things to learn in photography. You need to have good focus. Some photographers know how to get away with taking blurry pictures for an artistic effect, but that should be left to the pros. Always make sure whatever you’re photographing is in focus. On a DSLR camera, autofocusing can be accomplished by holding down the shutter-release button halfway. On most cell phones and tablets, just tap your subject as it appears on the screen. You can focus manually with a DSLR, but most situations don’t call for it. Your device will do the best job of focusing for you.
(Photo Caption: Autofocus produces nice, crisps pictures.)
Lighting
Good lighting is paramount to taking the best photos. If you’re taking portraits, the best kind of lighting is soft, so I recommend taking outdoor portraits at dusk or when it’s cloudy outside. This will also keep your subject from squinting. For photographing a sunset, 20 minutes before the sun goes down yields the most dramatic colors (in my opinion). Another phenomenon occurs about 30 minutes after the sun goes down that will show some exceptional colors. For any other situation, be mindful of glare on your lens. Avoid harsh lighting or dim lighting, if at all possible. I could talk about using flash, but I will save that for another time. If the lighting didn’t work well with you, you can always fix it in post-processing.
(Photo caption: My best friend and fellow Odyssey writer, Chelsie Peckio, taken about an hour before sunset.)
Angle
Subjects rarely look good head-on. I would only recommend doing this if you’re dealing with something very symmetrical or something with a pattern. Otherwise, find a good angle. (I received this advice in my journalism classes as well, but that’s a different story). Angling your subject correctly can drastically improve your image. Position your subject where it is the most recognizable, you get the most visual information out of it, or you capture a certain detail. For example, don’t take a picture of a sunflower from the side or from below. Take the picture where the flower itself can be seen in its entirety.
(Photo caption: Berlin Wall in East Berlin. I wanted to capture the length of the wall, and the people walking next to it.)
Rule of Thirds
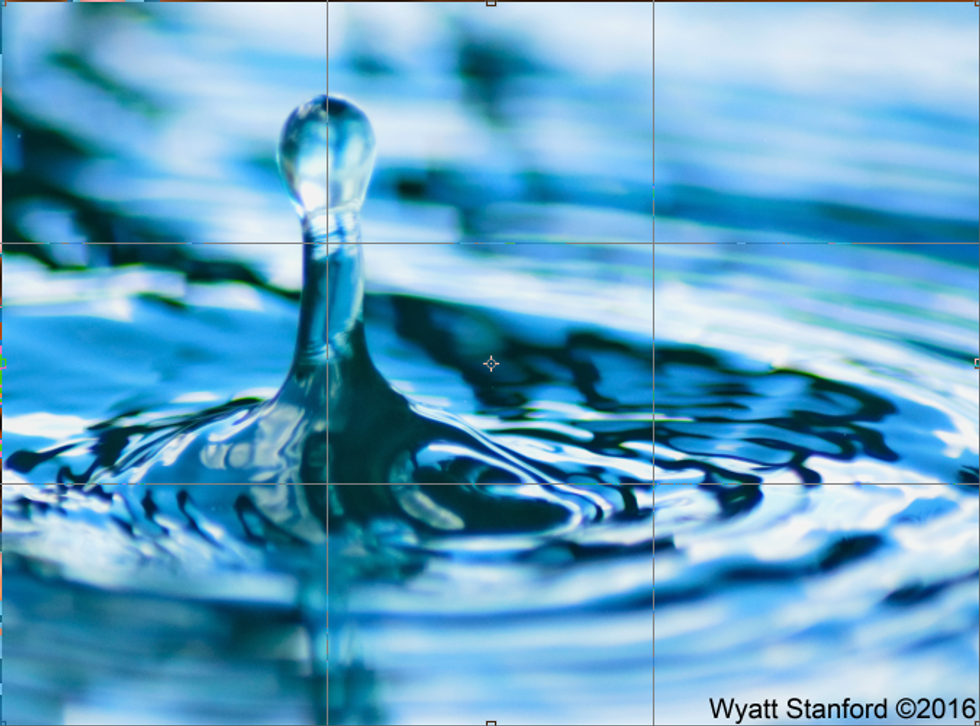
My photography teacher stressed this rule heavily, almost as much as the preceding three techniques. Subjects rarely look great in the center of a picture. Rule of thirds is a way of positioning subject matter in your photos. Line your subject up with one of the invisible lines that cuts your picture into thirds (horizontally or vertically) and done! You achieve an amazing effect giving your picture balance. Rule of thirds works well with almost any kind of photography, from landscapes to portraits.
(Photo Caption: Rule of thirds illustrated. Notice how the water drop is on the intersection of the two "thirds" lines.)
Taking good pictures isn’t just for professional photographers with high-dollar cameras. Anyone can take good pictures with just employing the techniques I discussed in this article. So many other tips and tricks exist I could talk about, but we will save those for another time. For now, just use these few simple approaches to get the most out of your photography. Happy snapping!


