Hey readers, today I'm going to show you how to make these cute and unique string light lanterns in just 10 simple steps. Now, I know it is just as easy to go out and buy these types of lights, but this DIY is a fun way to bring a little bit of yourself to your living space.
Materials:
- String lights -- white or colored (look for a 50 count string, if possible)
- Semi-thick paper
- Any type of paint or coloring utensil (maybe avoid pastels)
- Ruler
- Scissors
- Hot glue gun
Get out the paper you will be using.

Paint the pages whatever color or colors you want your lanterns to be.

I alternated between blue/green and a red/yellow for my backgrounds using just a quick watercolor wash over. You will need to paint quite a few so I suggest painting them all at once so they all dry together. After they all tried, I went back and splatter painted them with black (not shown). Adding additional designs will add a little more personality to the final project. This would also be a good time to plug in your hot glue gun.
On a separate sheet of paper, cut out this layout:
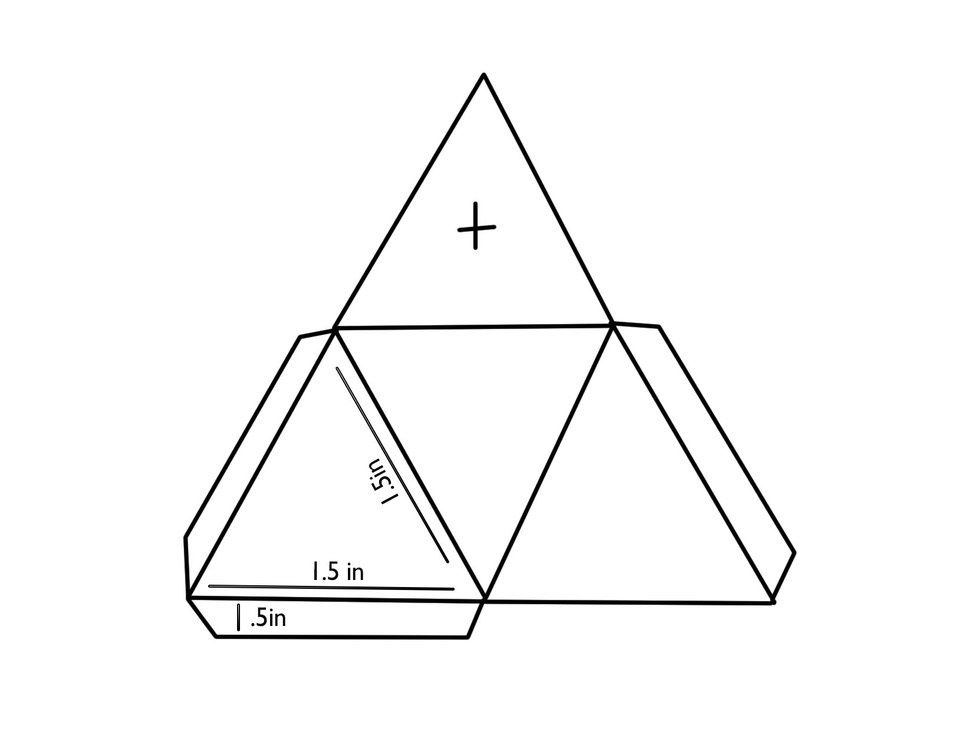 Four equilateral triangles, two of which have trapezoid-shaped flaps drawn on their edges. The measurements I used were 1.5in per triangular side and .5in for the height of the trapezoid. This seemed to work because of the distance between each light, but you can try for yourself.
Trace the layout as many times as you can fit on the back of your colored pages.
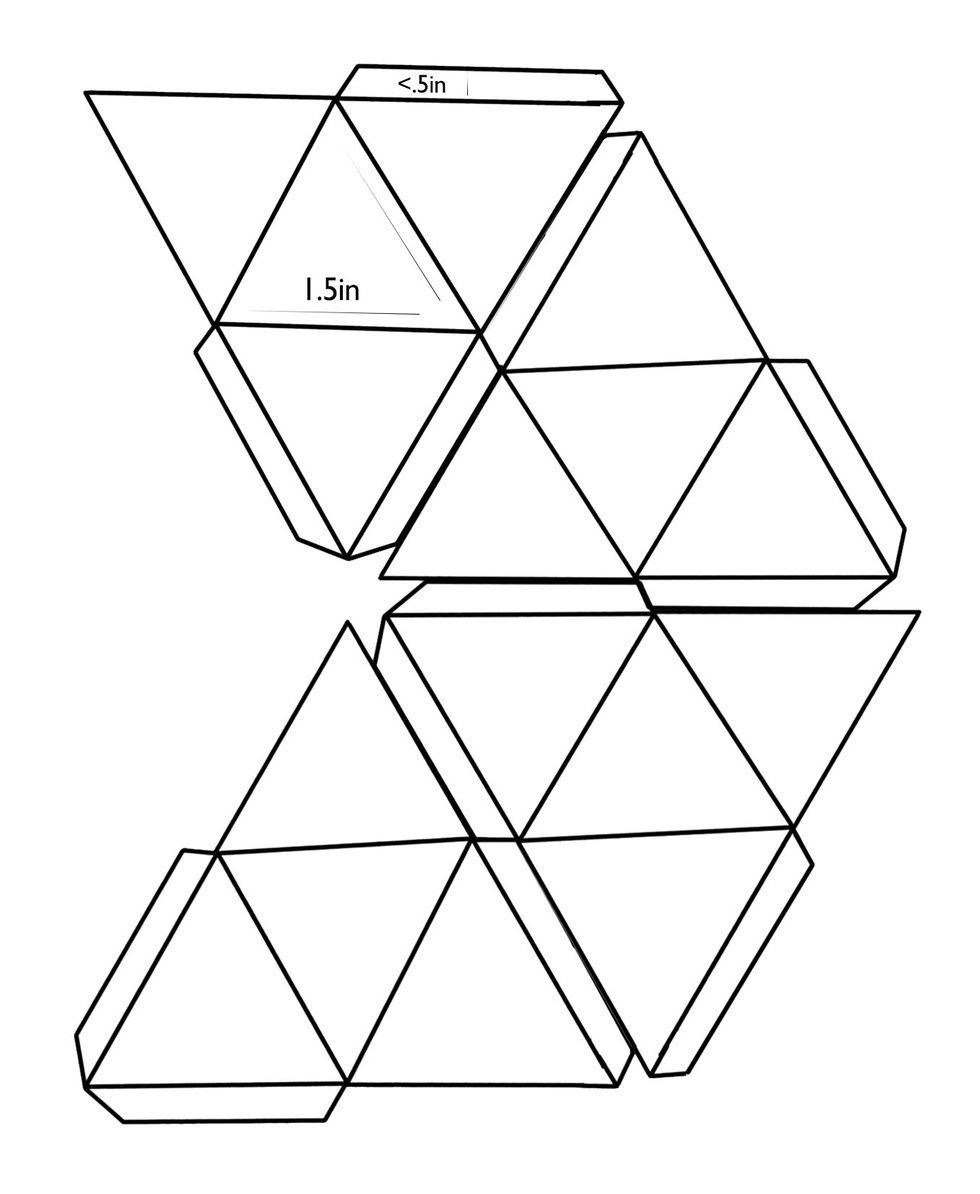 With my 9x12 page, I could only fit four of them. They all fit into one another light puzzle pieces, so make sure you are using the most of the page.
Trace lines within the layout to mark where you will be folding.
 We want it to fold up into a pyramid, the dashed lines show above represent where we will be folding them. Also note the marked X in step 3, and consider that we will be cutting those lines as well. I also recommend darkening the borders between figures, so there is no confusion to where one starts and ends. This will stop you from accidentally cutting off one of the flaps.
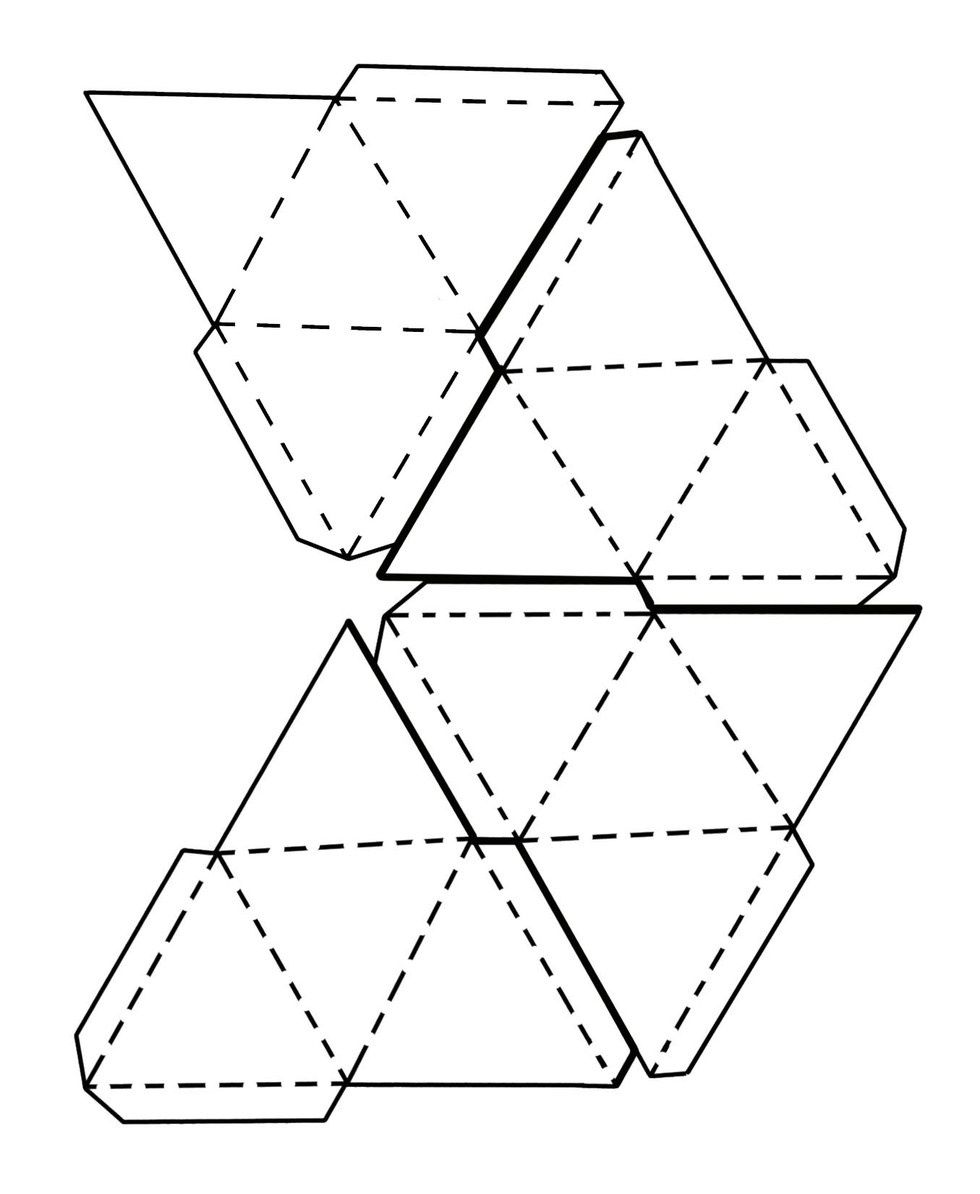
Cut and fold crisply on the indicated lines.
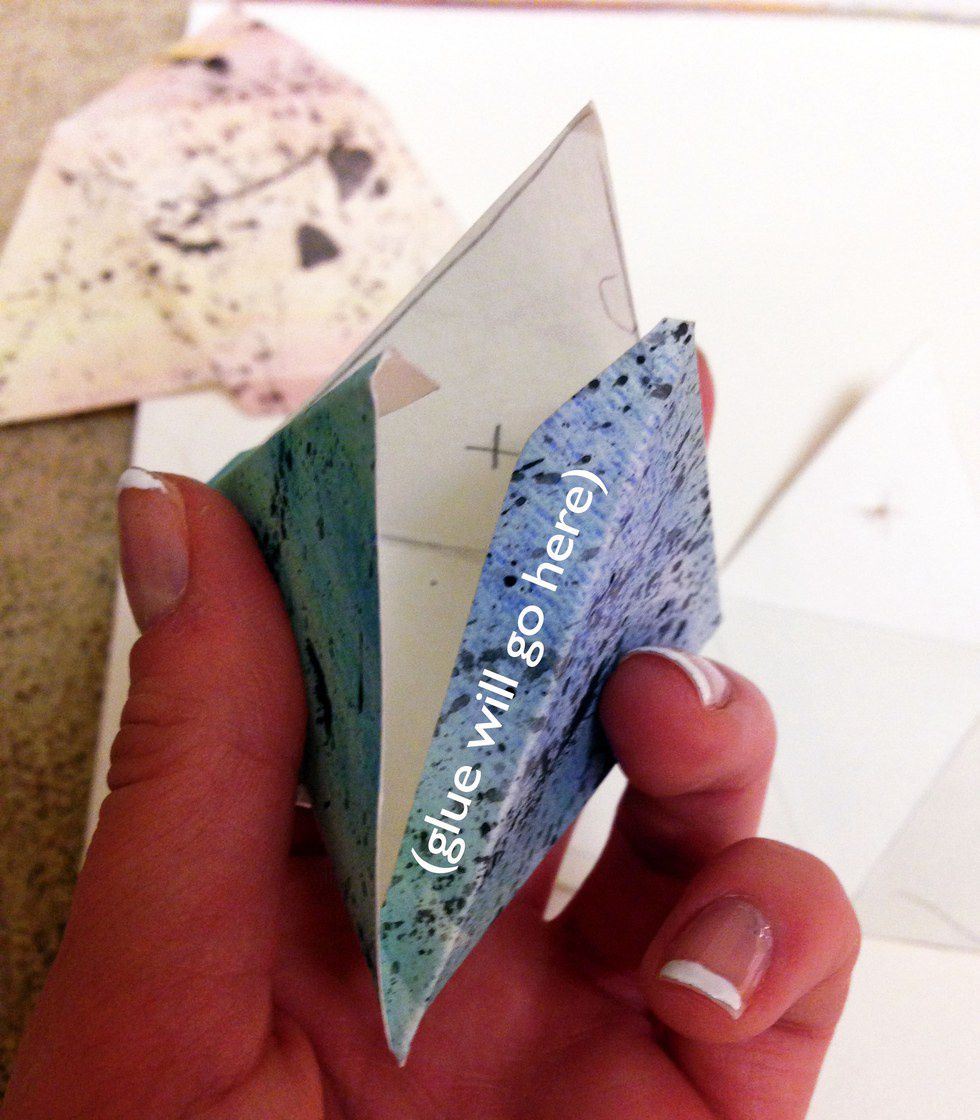 *Note: you could cut the marked X in this step or Step 7-- Now with cut out each individual figure on the page and fold them along their dashed lines. This step may be easier with a flat ruler to aid in folding the lines neatly. When you are done folding, it should look like this.
Once you’ve folded it, use your hot glue gun to glue the pyramid together using the tabs.
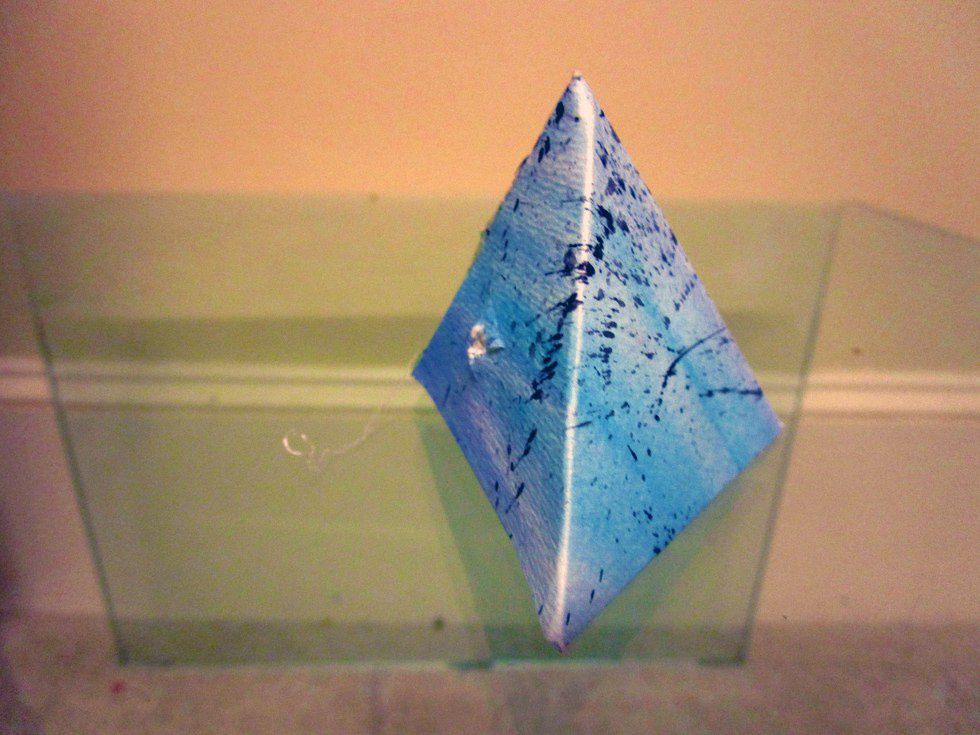
Keep pressure on it for a few seconds… and be careful not to burn yourself. If you have no already done so, take a knife or one end of the scissors and poke an X-shaped hole in one of your pyramid's faces. Make the hole small, you can always make it bigger later if you need to.
Get out your string lights.
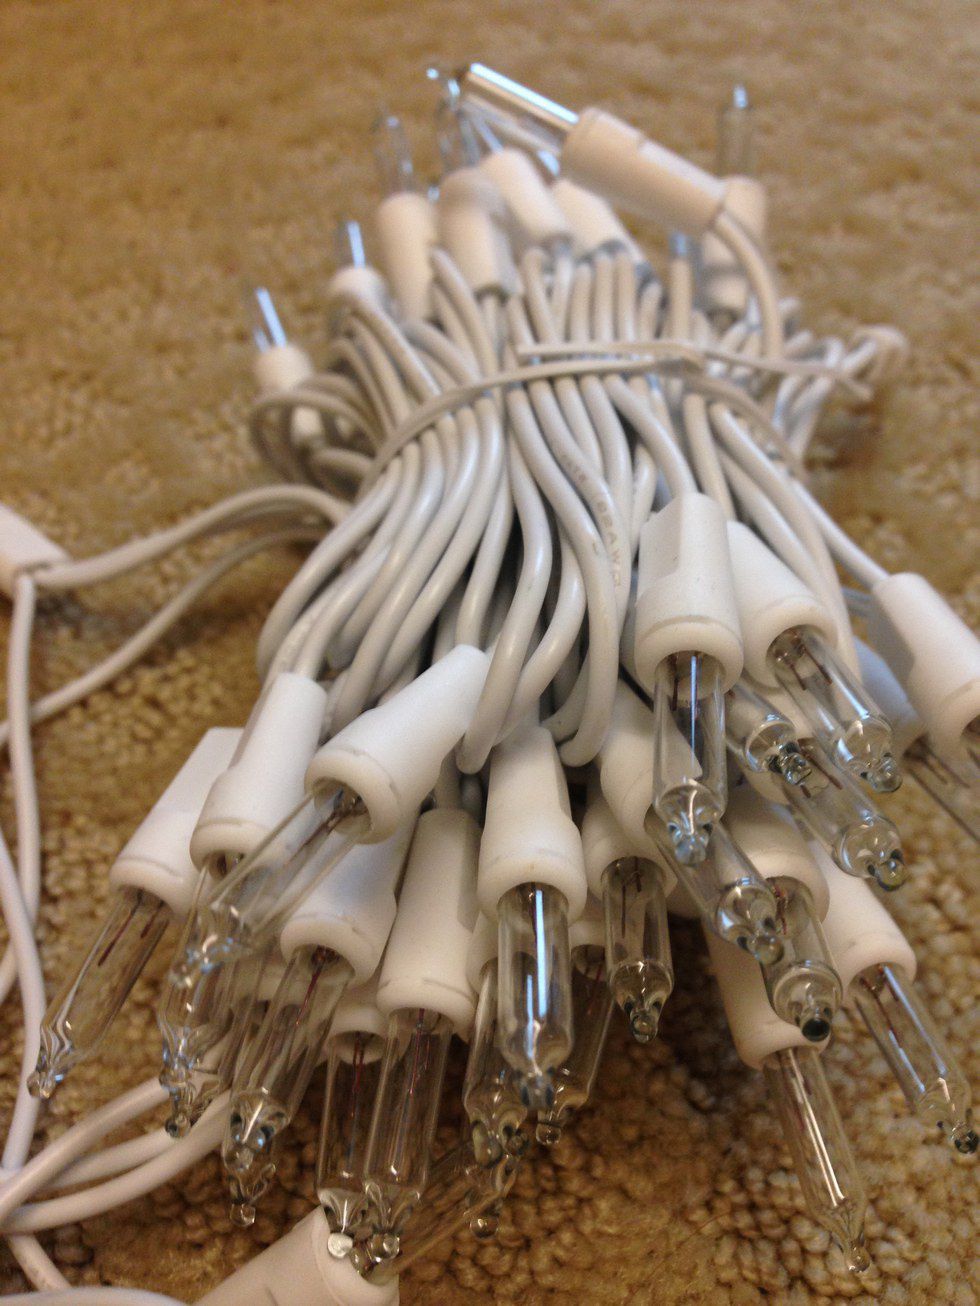
As I mentioned in the materials, it would be best to find the smallest count of lights possible, that way you don't have to make 200 lanterns! I used white lights, but it's just a personal preference.
Stick your light in and you’re good to go!
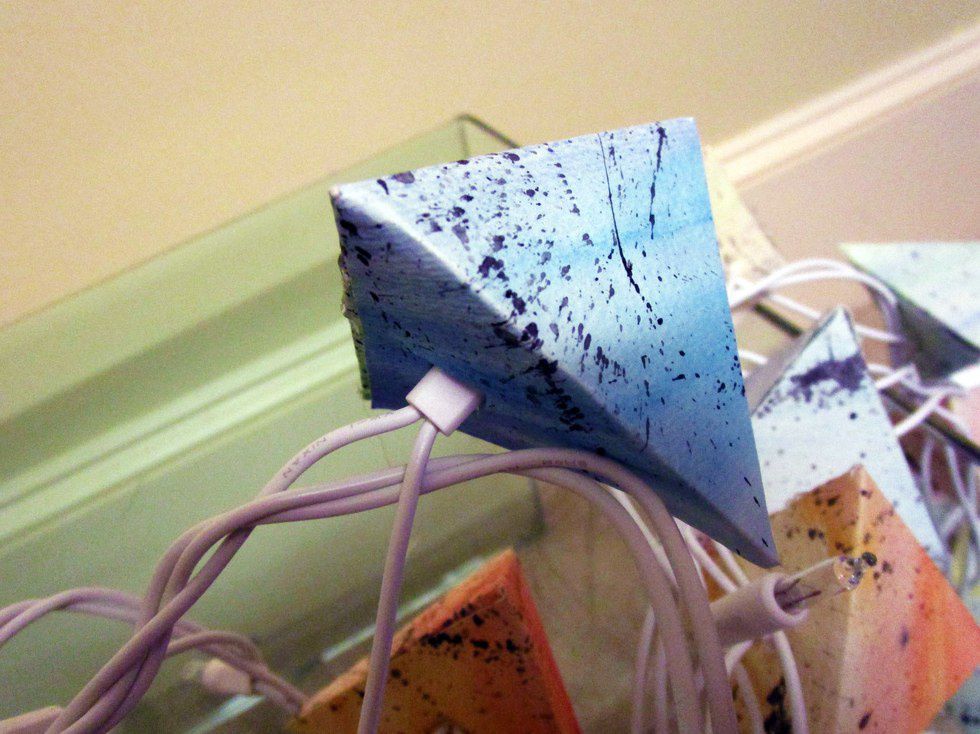
Using the X-shaped opening, stick your lanterns on your light bulbs and voila! Continue repeating the steps until you've done as many as you want. You can also choose to alternate on the string by leaving an empty bulb between each lantern.
Turn off the lights, plug them in, and hang them up!
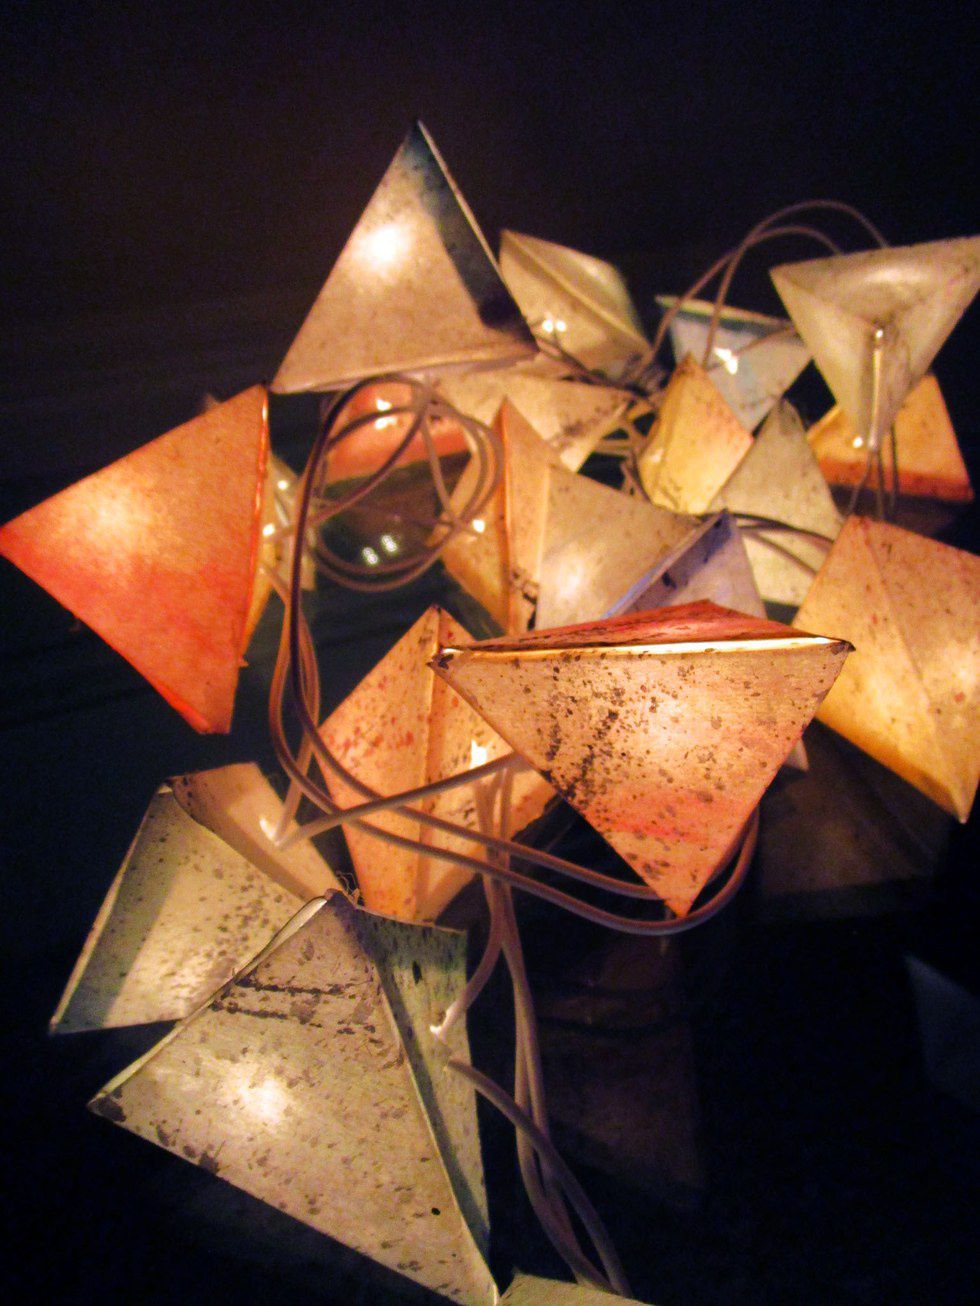
I haven't hung mine up yet, but there you have it. 10 steps to making your own string lanterns for your bedroom or apartment. Cheap, easy, and totally unique!