

We’ve all probably attempted a Pinterest DIY ("do-it-yourself") project and failed miserably. You sit there wondering how that beautifully photographed craft ended up that way, and how your sad, droopy product is so far off – especially when you followed all the directions! The process is still fun, although sometimes frustrating, and will occasionally produce a decent result that you are proud of. This list of DIY projects are easy enough for you to feel successful after every single one. Some are more difficult than others, but if you put in the effort then you will be thrilled with your result. Most of the supplies used for these can either be bought at the dollar store or some other local store for relatively cheap.
1. Terrariums.

Recommended for you


What you’ll need:
- Glass container (fish bowl, mason jar – depends on how big you want it, just make sure it has a large enough opening for the plant)
- Cactus/succulent potting soil
- Tiny succulents
- Decorative stones (gravel, stones, broken pottery)
- Sand
- Spoon
Instructions:
1. Start by placing drainage rocks at the bottom of the container.
2. Pour a layer of sand across the rocks.
3. Now add the soil and make a large enough hole for the roots of each plant (this is the thickest layer).
4. Remove the plant and brush off the soil from the roots.
5. Put the plants in the soil -- largest to smallest -- and pack the soil tightly.
---- Care----
a. Water one to two times a week (soil should remain barley moist and never bone dry).
b. Prune dead foliage to avoid rotting.
c. Terrariums love natural, indirect light.
2. Garden Markers.

What you’ll need:
- Oven bake-able polymer clay, rolled into one and a quarter-inch balls (one ball for each marker)
- Appropriate baking dish
- Rolling pin
- Butter knife
- Rubber letter stamps
- An oven
Instructions:
1. Roll each clay ball into a coil about 5 and a half inches long.
2. Flatten the coils to a quarter-inch thick with your rolling pin.
3. Use the dull side of your knife to trim the end into a point and shape the edges of each marker.
4. Transfer to your baking dish.
5. Stamp the garden markers (e.g. Basil, Mint, Cilantro – or whatever you want it to say).
6. Bake according to the package.
**Polymer isn’t always the most sturdy, so just be gentle.
3. Lettered Dinner Plates.
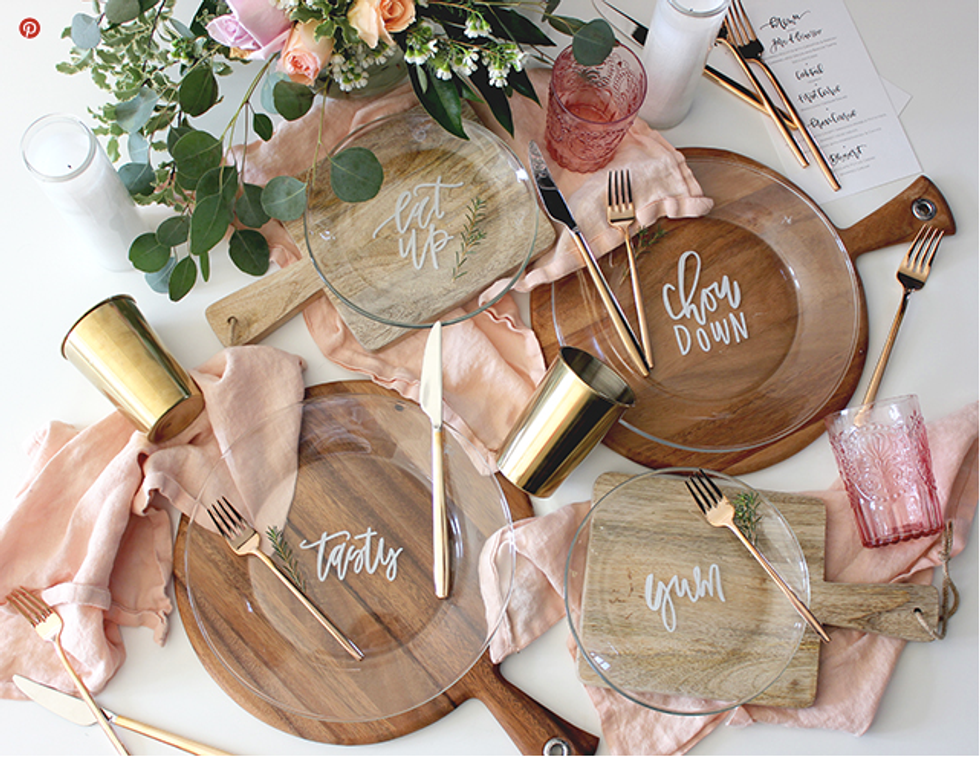
What you’ll need:
- Glass plates (easy to get at the dollar store)
- White acrylic paint pen
- Scissors
- Printer paper
- Chalk marker
- Tape
Instructions:
1. Write your word or phrase – either letter it yourself or create them digitally and print it.
2. Cut and tape the word to the bottom of your plates wherever you want the lettering to be.
3. On the front of the plate, trace over the lettering with the chalk marker.
4. Remove the template on the bottom and trace (on the bottom still) with your white acrylic paint pen.
5. Wash and you’re done!
** If you want extra protection (like a traditional plate not for a party or décor), you can tape off the front and spray the back with a few coats of polyurethane.
4. Macramé Hanging Planters.
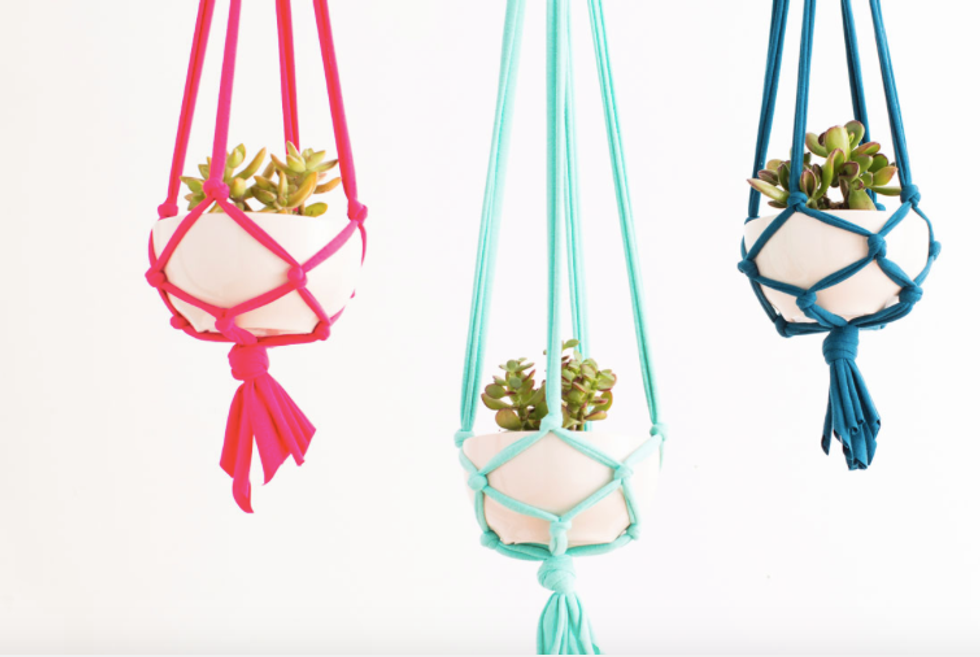
What you’ll need:
- Jersey knit fabric
- Ceramic planter (or your new terrarium)
- Tape measure/ruler
- Hook screw
- Scissors
Instructions (go to Brit+Co for detailed pictures of this DIY project):
1. Cut the fabric length-wise into eight total one and a half-inch strips.
2. Stretch each fabric strip into round cords.
3. Tie all eight cords together in one big knot, about four inches or so from the ends, and pull tight.
4. Group your cords into four sets of two and tie a knot in each set, approximately two inches away.
5. Separate these sets of two and tie them together approximately one and a half inches away.
6. Repeat for a third time and tie each new set of cords together one and a half inches away from the previous.
7. Stretch over your planter and tighten your knot to adjust.
8. Tie all eight cords together at the top to finish.
9. Hang with a hook screw.
5. Bath Bombs w/o Citric Acid.
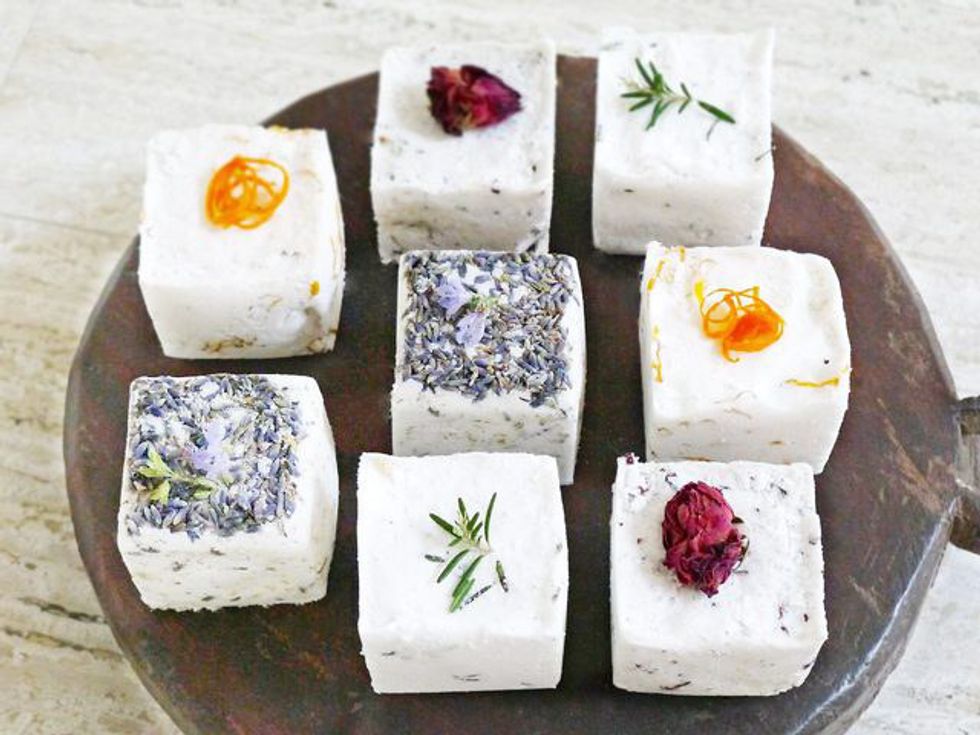
What you’ll need:
- 2 cups baking soda
- Silicone ice cube, large
- 1 cup cream of tartar
- 6 tablespoons Epsom salt
- 4 mixing bowls
- Large spoon
- 1 tablespoon each of dried lavender, chamomile, rose, calendula, and rosemary
- Essential oils in peppermint, wild orange, lavender, calendula, and rose (or preffered scent)
- Coconut or olive oil
- Spray bottle filled with water
Yields: Two-by-two inch bath bombs (can use smaller or larger molds)
Makes: Lavendar Chamomile, Calendula Orange, Rosemary Peppermint, and Rose (alter the scents that appeal most to you by changing the essential oils and leaving out the flowers)
Instructions:
1. Combine the baking soda, cream of tartar, and Epsom salt in a mixing bowl.
2. Once thoroughly mixed, separate them equally into four mixing bowls. Each bowl should contain slightly more than ¾ cup.
3. Mix a single recipe in each of the four bowls.
a. Lavender Chamomile for a calming bath. Combine 1 tablespoon dried lavender, one tablespoon dried chamomile, 20 drops of lavender essential oil, and two teaspoons of coconut or olive oil.
b. Calendula Orange for a healing bath. Combine one tablespoon dried calendula flowers with 15 drops of calendula essential oil, 10 drops of wild orange essential oil, and two teaspoons of coconut oil.
c. Rosemary Peppermint for a clearing [of sinuses] bath. Combine one tablespoon dried or fresh rosemary leaves, 15 drops peppermint essential oil, and two teaspoons coconut or olive oil.
d. Rose for a conditioning bath. Combine one tablespoon dried rose petals, 20 drops of rose essential oil, and two teaspoons coconut or olive oil.
4. Test the mixture by squeezing a small amount in your hand. If it compresses together without separating, it is ready to place in the mold. If it crumbles, add a single spray of water at a time until you can compress it into a ball – you shouldn’t have to spray more than five times.
5. Pack tightly into the molds (each one of the four mixtures will fill two cubes perfectly – filling a total of eight cubes).
6. Leave the mixture in the mold for 24 hours to dry.
7. Carefully remove from mold and allow to dry for another 24 hours, then bathe away!
6. Marble Hexagon Coasters.
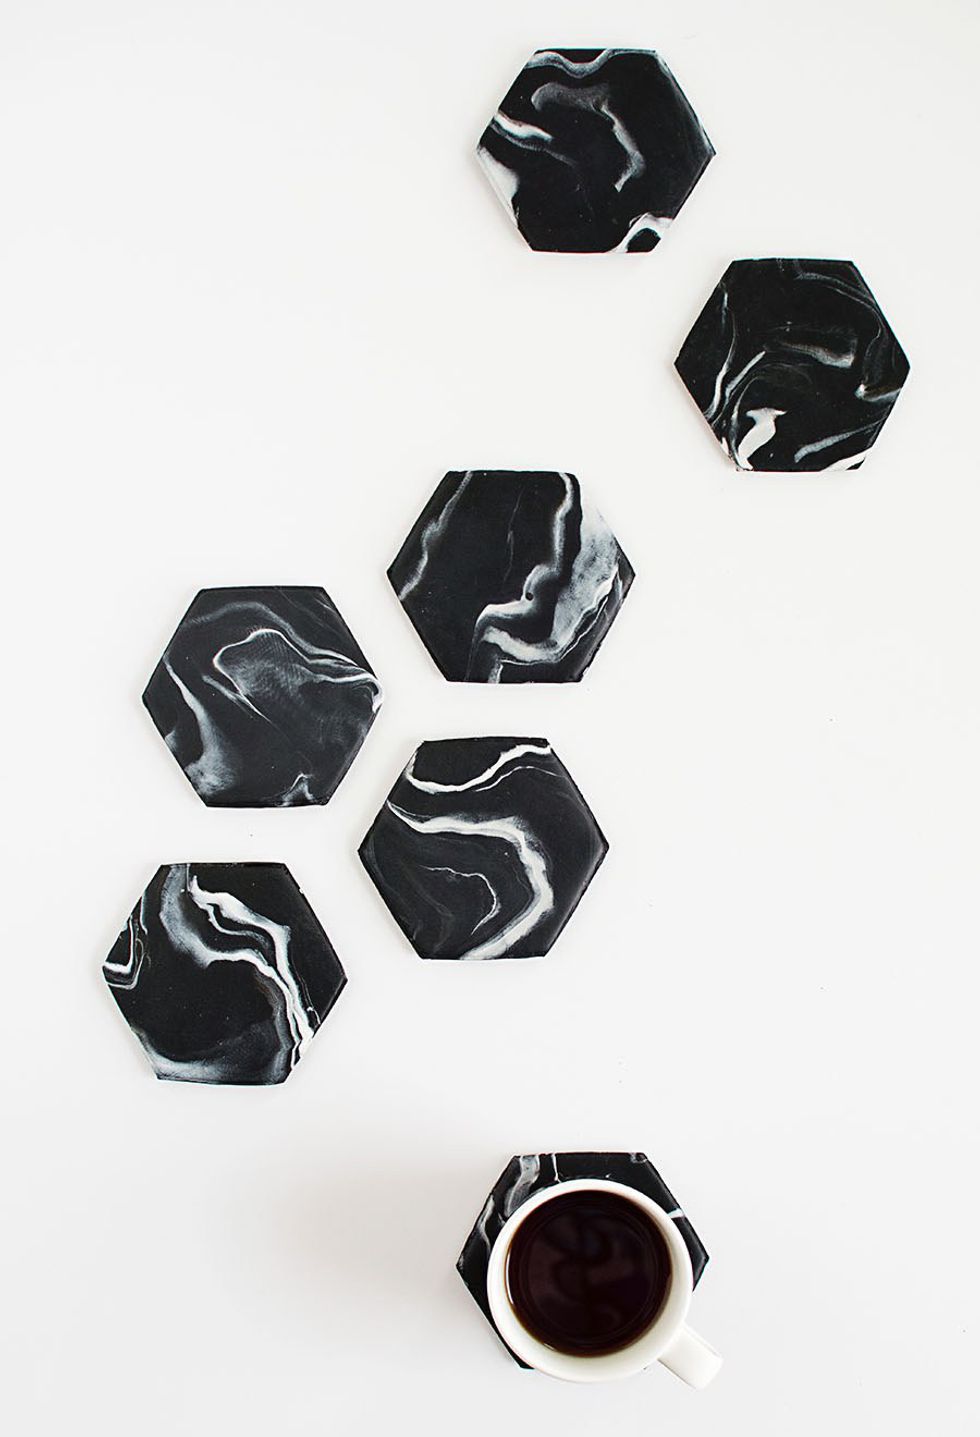
What you’ll need:
- Marbling black (one block per coaster) and white clay (less than one block total)
- Rolling pin
- Parchment paper
- Lid of hexagon box (at craft stores for a dollar)
- X-Acto knife
- Sandpaper
- Adhesive felt
- Baking sheet
- Oven
Instructions:
1. Lay down a piece of parchment paper.
2. Soften and mash up the block of black clay and randomly stick small pieces of white clay.
3. Twist the clay all over to help striate the white clay throughout (**twisting and mashing too much will cause the coaster to look grey, so be cautious).
4. Roll it into a ball and smash it down.
5. Use the rolling pin to fit the hexagon on top of it.
6. Use the X-acto knife to trace around the hexagon and cut out the shape from clay.
7. Cut around the parchment paper around the coaster and transfer both to a baking sheet.
8. Once all the coasters and parchment paper are cut and on the tray, put them in the oven at 275oF for about 25 minutes.
9. Once completely cooled, lightly sand down any rough edges.
10. Trace the adhesive felt on the back of the coaster and cut out the felt (slightly smaller than what was traced).
11. Peel off the back and stick to the bottom of the coaster.
Now that you have some fun projects to get started on, go out there and craft away! Whether it turns out exactly how you pictured, or an epic fail, hopefully you at least have fun doing it (and feel a little creative, too.) The brain needs to craft and explore in a creative way, so release those creative juices and create something beautiful (or ugly, but it's okay -- it happens to us all)!


