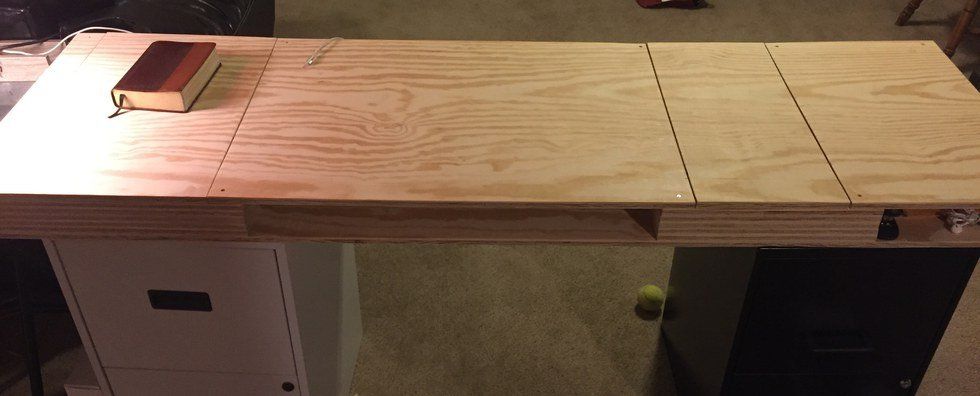
If you are like me, building your own furniture, or a useful item, is more fulfilling than going out and buying it. I find joy in the journey I find myself on every time I tackle a new project. In the past, I have built shelves, coffee tables, media centers and even a functional arcade machine. My latest build has been a very simple plywood desk. Listed below is everything you should need in order to build the desk.
- Plywood (generally a 4 ft. x 8 ft. sheet, 1 inch thick)
- Circular saw
- Sander
- Small hinges
- Wood glue (optional)
- Screws
- Drill
First, decide on how long the desk will be. Mine ended up being around five feet and six inches and the width was roughly one foot and eight inches wide. Once you have decided on the length and width, cut two pieces of these exact dimensions out from the plywood. These will serve as the top and bottom for the desk, so choose pieces that look nice and that you are happy with.
Next, with the remaining pieces of plywood, cut two-inch strips that correlate with the lengths of your desk's width, and the size you want the compartments to be. For the sake of simplicity, I will go from here using the measurements I used. If you choose to use different measurements, the following dimensions will not be of much help to you. These strips will serve as the walls to divide the inner compartments. For my desk, I cut strips that were 17 inches by two inches to be the pieces running vertically as you can see in the picture.
On the left compartment, both the pieces running vertically and horizontally are 17 inch by two-inch strips. The number of 17 by two strips totaled to 30 pieces. The compartment on the right uses 10 of those 17-inch strips running vertically and uses 13-inch strips running horizontally.
Here is where wood glue is optional. I decided to use screws to put these strips down onto one another because I wanted the desk to be able to be adaptable. If I wanted to run a computer charger out of one compartment, I might want to alter one of the strips to account for that. If you are satisfied with leaving it as it is, use wood glue to glue the pieces down to each other.
The last strips are to be put down on the far right end of the desk, which should be singular strips running the whole width of the desk. You can see it in the picture below.
Lay your top piece onto the desk and measure out where the doors will be for your compartments. Simply cut the top piece into smaller boards that fit onto the strips, like so.
In this case, the board on the far right will be screwed down while the board on the left will be attached to a hinge.
Once that is complete, it should look like this:
Once you are ready for the hinges, adjust your circular saw to the height of your hinges. Then, run the saw over and over again in the places where the hinges will be laid. This is done in order to make the desk as flat as possible by created divots where the hinge can be put.
Once that is done, attach the hinges to the board. At this point, you may decide what kind of legs you would want for your desk. It made sense for me to use file cabinets, yet for you, it might be just fine to go and buy legs to attach to it. Anything will work, so be creative! In the end, it should look roughly like this.
Sand it, stain it, and proceed however you choose!


