I was bored on a sunny day and wanted something to do besides lay out and tan, so I conjured up the idea to go to the craft store and see what I could think up.
AC Moore and Michael's were actually farther away than I anticipated traveling, so I went to Walmart across the street. I browsed the crafts aisle and left with a few bags.
Here's what I got:
x 12 canvases
x Brush set
x Big bottles of antique metallic gold + white acrylic paints
x Standard bottles of various shades of blue/teal acrylic paints
x Popsicle sticks
x Plastic/solo cups
x Plain dish soap
x Newspapers or disposable tablecloth
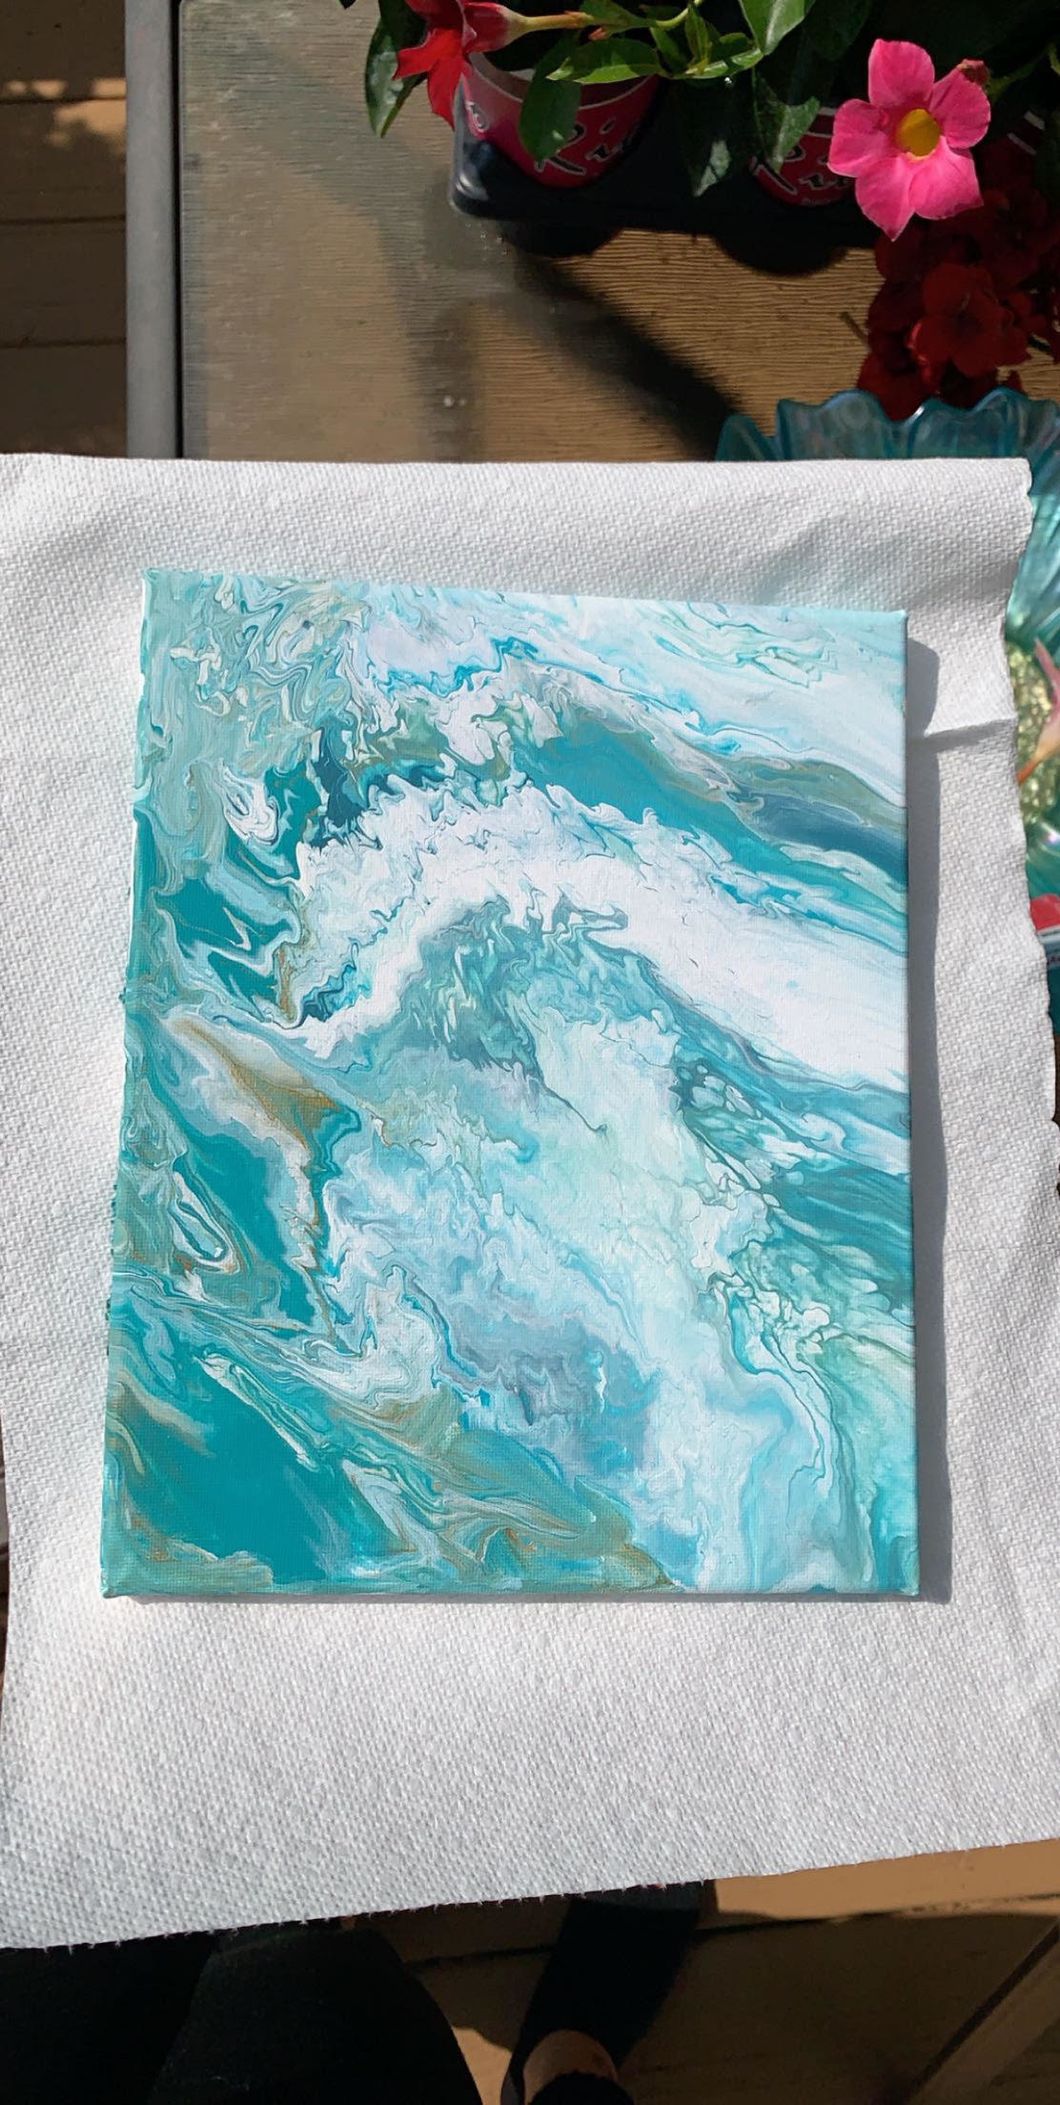
When I got home, I started right away. It was peaceful doing this on my deck in the sun with my dog.
1. Fill one solo cup till about the second line with water.
2. Add a couple squirts of dish soap. Mix with spoon.
3. Pour paints in separate cups till about the first line, depending on canvas size and color usage. (I filled my gold and white cups higher)
4. Pour 2-4 tablespoons of dish soap mixture into each paint cup. Stir with separate Popsicle sticks.
5. Pour various amounts of the paint mixtures into a clean solo cup. Don't stir or shake the cup! And don't worry about how the paint sits in the cup or anything, just let it do its thang~ (Since I wanted 3 different canvases with the same oil slick effect, I used three separate CLEAN solo cups and varied the pouring order/amounts.)
6. Lay a sheet of protection down (newspaper/tablecloth). I placed a solo cup upside down onto my newspaper and put my canvas on top, but you can also hold the canvas in your hand.
7. Quickly flip the cup of paint so it's upside down on the canvas.
8. With the cup still ON the canvas, move around to spread the paint.
9. Lift the cup quickly but carefully and start tilting the canvas downwards so the paint flows towards one of the corners. ***I recommend keeping the cup to catch the runoff paint from all the corners. That way, if there are any uncovered spots, you can pour the same mixture of paint onto the canvas and repeat the titling process until the canvas is covered.
10. Put the canvas on something to dry. I just laid mine on paper towels and waited overnight.
Finally... your project is done! It turned out to be wayyyy simpler than I thought it'd be!! I LOVE the way mine turned out. They all have the same color scheme but, of course, different oil slick effects. They will compliment my dorm next year ;)
Just a quick tip, if you want to add a little ~*pizzazz*~ to your paintings, you can:
x Paint calligraphy on top of the slick design
x Add small strokes of gold or another highlight color to some swirls of the slick design for emphasis/marble cuteness.


