

With spring break just around the corner and the winter season coming to a close, tanning beds become our best preparation tool for summer. We have all had those incidents where we think we know our body or we just want a little warmth, and come out of the tanning bed strawberry red! Here are six tips and guidelines for the beginners and those who want to know more about some proper tanning techniques.
Process of Tanning
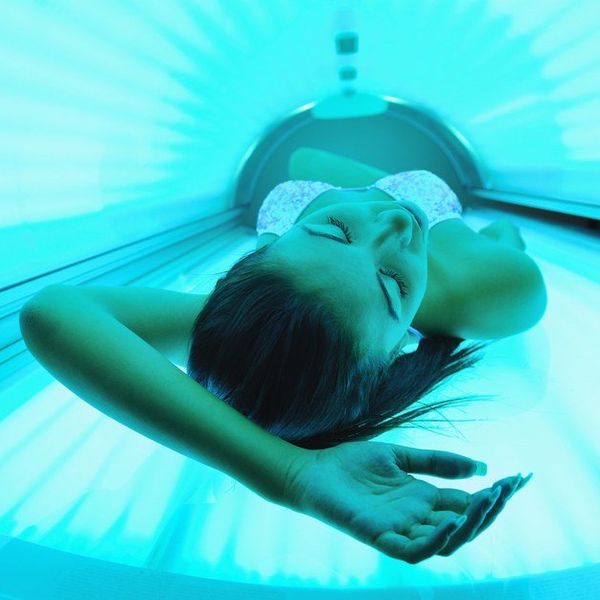
Tanning beds are designed to act like the sun through the emitted ultraviolet rays. Our body reacts to the UV rays by stimulating melanocytes within our skin to give us the ideal brown or caramelized glow. But how do you get that beautiful glow?
Tip One: Apply Aloe Before Lotion
Aloe Vera is a natural moisturizer and protectant from developing a sunburn. Applying Aloe before any tanning lotion, or lotion in general, will furnish the body with the proper nutrition and moisture before laying inside of the tanning bed. Aloe can also be used post-tanning for any signs of a burn. Aloe will begin adding moisture to the body, and cooling the body from the excess heat absorbed through your tanning session.
Tip Two: Remove Any Deodorant and/or Make up
Deodorant and Make-up act like sun block. Most deodorants and foundations carry a low grade of SPF (sun protectant), causing the UV rays to not fully reach the skin to tan. By removing all make up and deodorant you can ensure a plush tan on your face and armpit areas.
Tip Three: Choose Your Lotion
Choosing a lotion is very important in the tanning process. There are two common types of lotions—accelerator and bronzer. The accelerator is explained just as it sounds, the lotion gives the tanning process a jump-start. Whereas the bronzer provides the body with a “painted-on” tan, while acting as an accelerator. When applying the bronzer, apply it evenly all over your body to get the full spray tan effect. Be very cautions around your cracks and crevices of the skin, bronzer will build up fast in the folds and crevices in the skin, causing either no effect or super effect. WARNING: wash your hand directly after applying the bronzer. If you leave the bronzer on long enough, your hands will be darker than the rest of your body.
Tip Four: Time Is Precious
After completing steps one through three, you are ready to begin your tanning session! Start out slow with your times, if you are a beginner only go for about five minutes to build up to the [common] 20 minutes. We all understand the feeling of “Who would want to go for such a short time?!”, but building up to the 20 minutes will be effective, avoid burning, and builds up the tan properly instead of a rapid burn-tan.
Tip Five: Expose Certain Areas Slowly
We all know some parts of our body either never or rarely sees the light of day, but we still want to maintain the caramel glow all throughout our body. Exposing those certain areas need to happen slowly, you don’t want to walk around with a burnt sensitive area. To slowly expose these areas, you can cover up the area(s) for the first half of your tanning minutes. You may want to cover up for the first few session to build up the tolerance, to avoid a rapid burn-tan.
Tip Six: Don’t Immediately Wash Off Lotion and Aloe
To ensure you will have a long lasting, beautiful caramel glow, don’t wash your tanning lotion or Aloe Vera off immediately after tanning. Once you roll out of the tanning bed, your body is still processing the “tan effect” from the UV rays. Keeping the Aloe and lotion on as long as you can, will also allow the skin to replenish itself from the UV rays suddenly drying out the melanocytes from tanning.
I hope these six tips can be found useful in your next tanning session!