

Have you ever wondered what a perfect and versatile party snack is? Or an appetizer that would please every guest? Well welcome to the world of charcuterie boards (basically a fancy name for a meat and cheese platter).
Charcuterie boards are actually super easy and fun to put together and involve minimal cooking, if any at all. The boards are an excellent choice to share at any event you may be hosting or show off at a party.
Here's my step-by-step recipe to making my favorite charcuterie board.
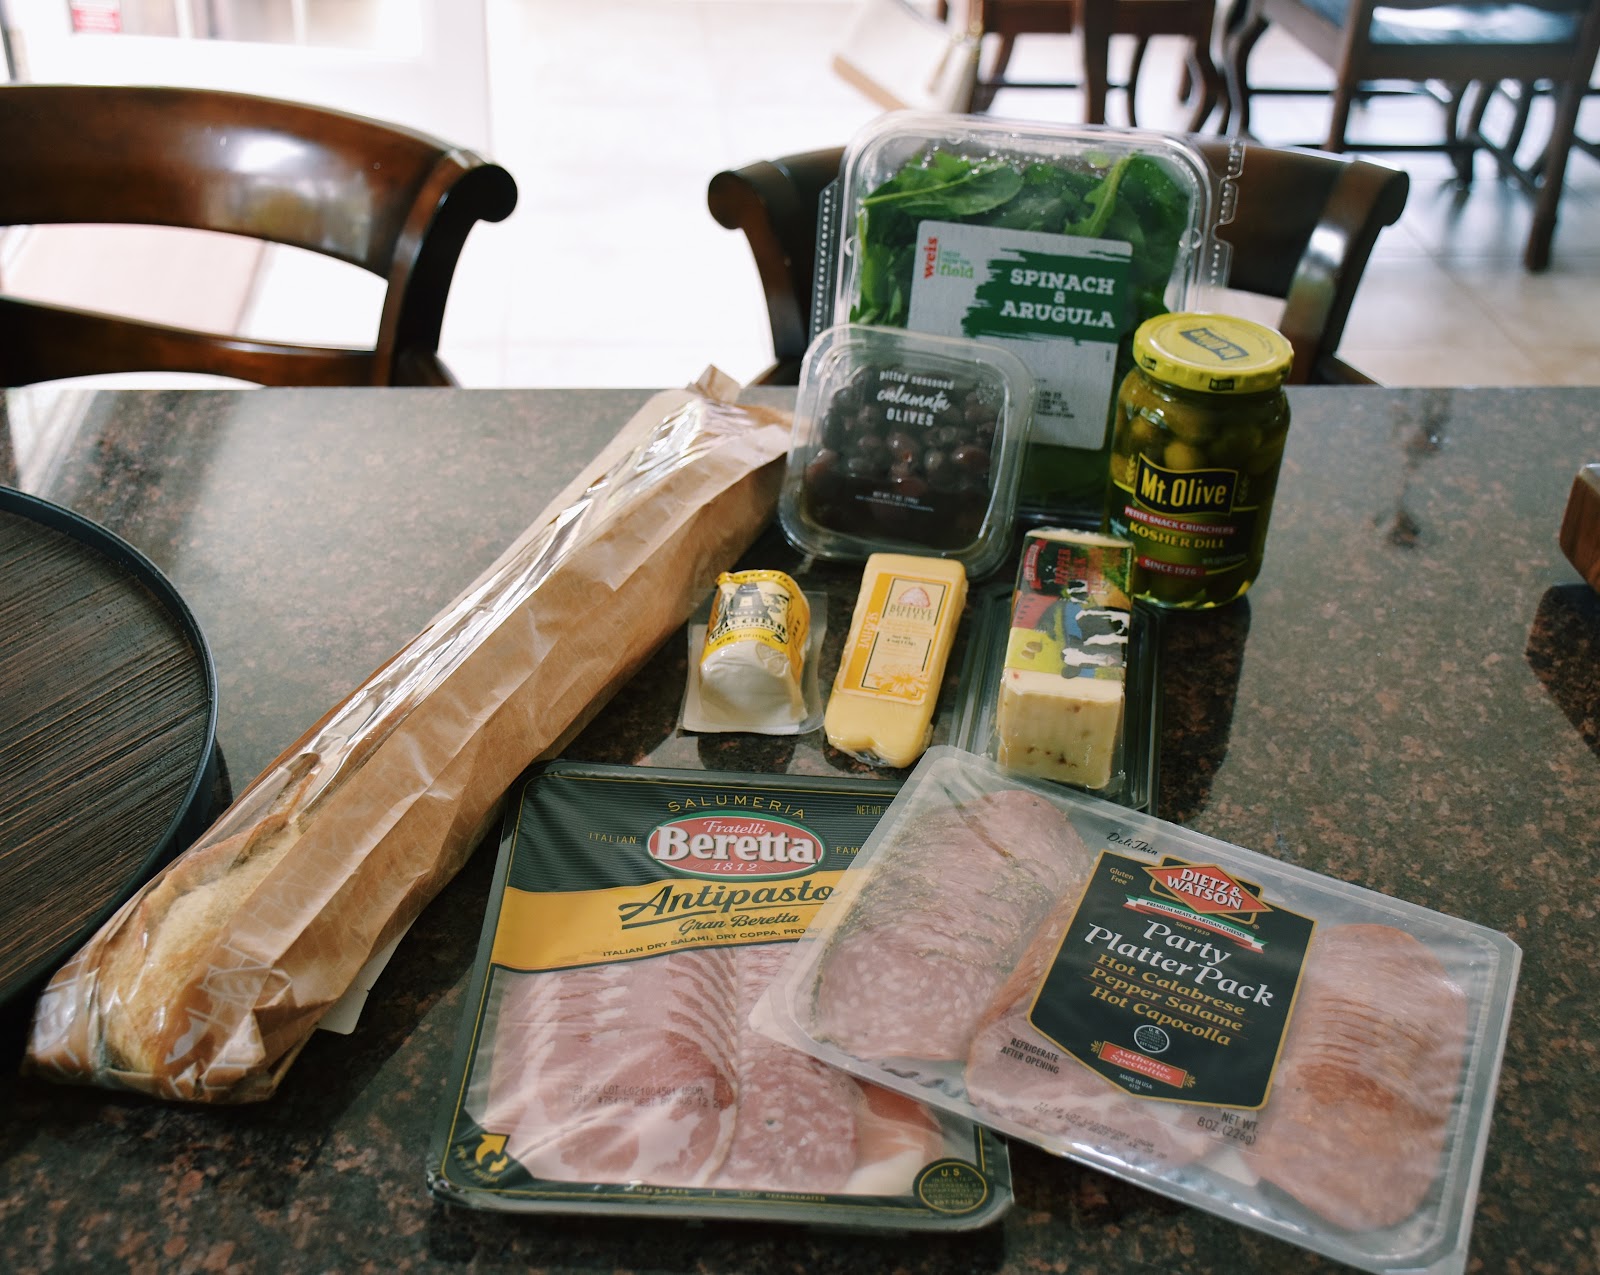
First stop: the grocery store
Once you're at your local grocery store, you're going to want to head to the deli and cheese section. Here, you can pick up packages of pre-sliced meats and cheeses. You can also pick up blocks of cheese if you wish to slice them yourself. I usually choose an assortment of prosciutto, salami, and capicola. For the cheeses, I stick to something simple that I know everyone will enjoy, such as sharp cheddar or pepper jack. I then venture out into the more foreign cheeses, and choose goat cheese with honey.
Moving past the meat and cheese section, it's important to head to the veggie section to add some color to your platter. I use arugula, spinach, pickles, and olives to spice my board up. After picking up the veggies, I head to the bread aisle to grab a nice baguette of sourdough bread. And that's it! Of course you have full control over what you wish to add to your board, but with just a couple of ingredients, we're ready to create our board.
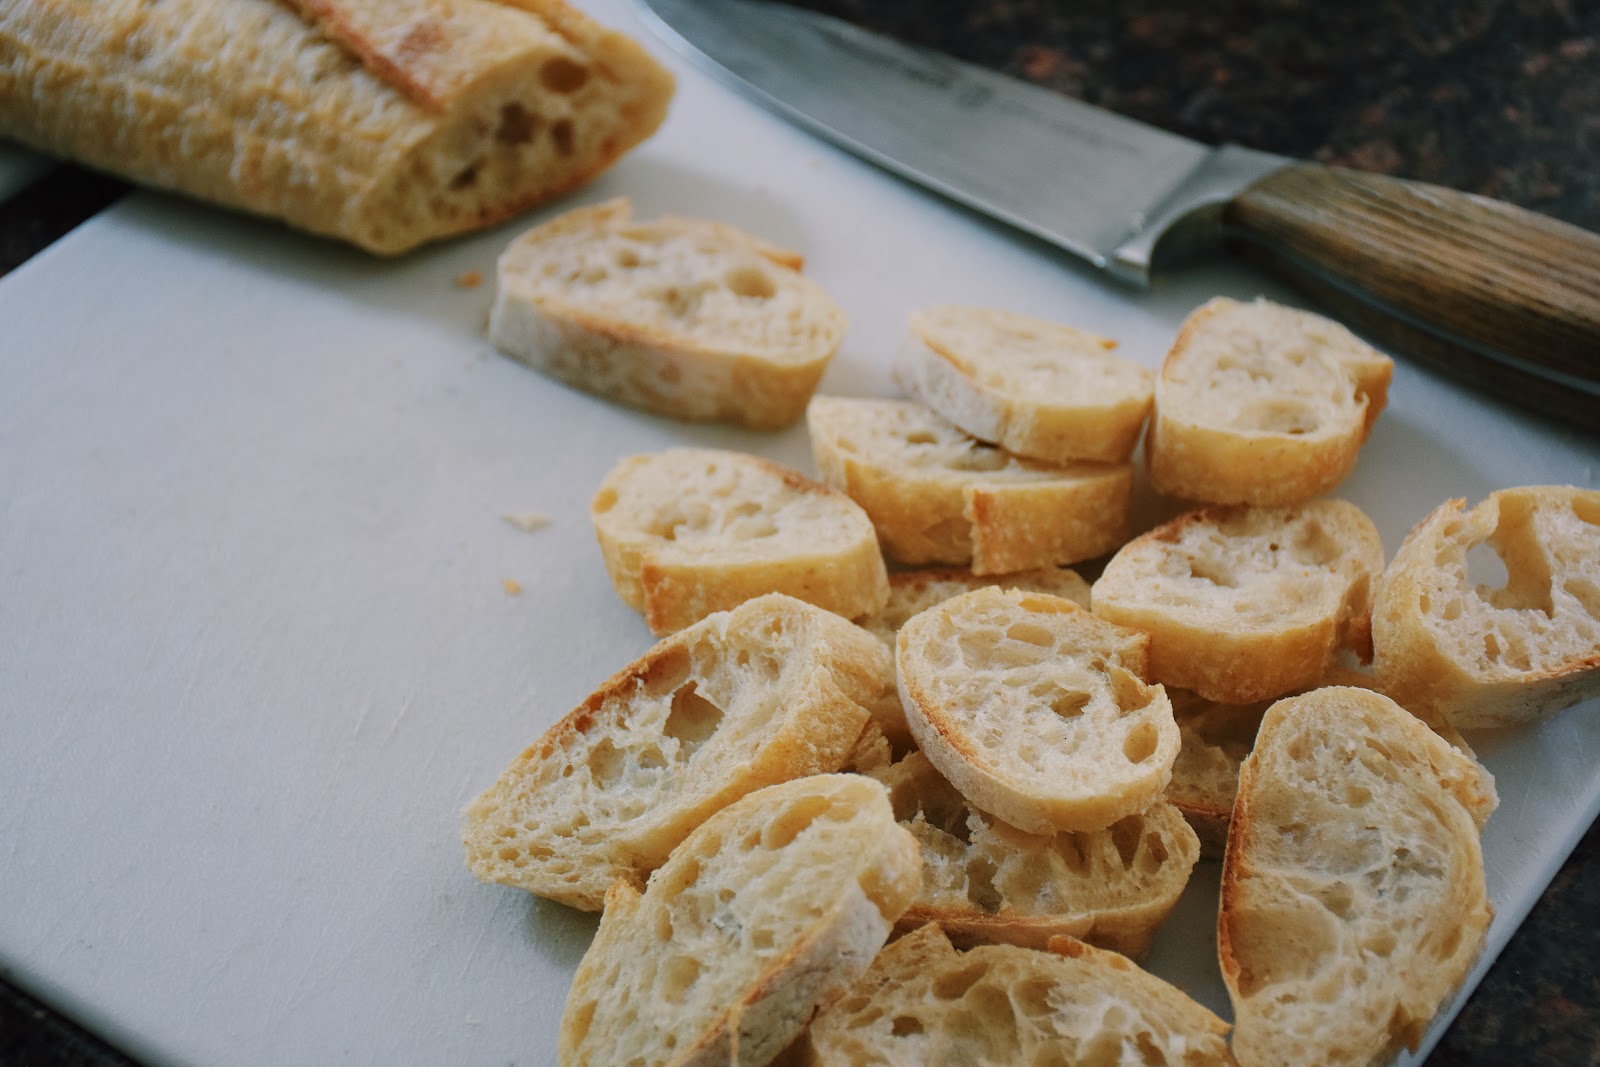
Time to slice and prepare
After you've unloaded all your ingredients from the store, now is the best time to get out the board you'll be using for the platter and simply wipe it down with a wet paper towel.
Next, take that beautiful baguette and slice it into bite sized pieces. The bread will act as the base for the small snacks your guests will create from the board. Having a really tasty and fresh bread is super critical in creating the maximum amount of flavor from the charcuterie board.
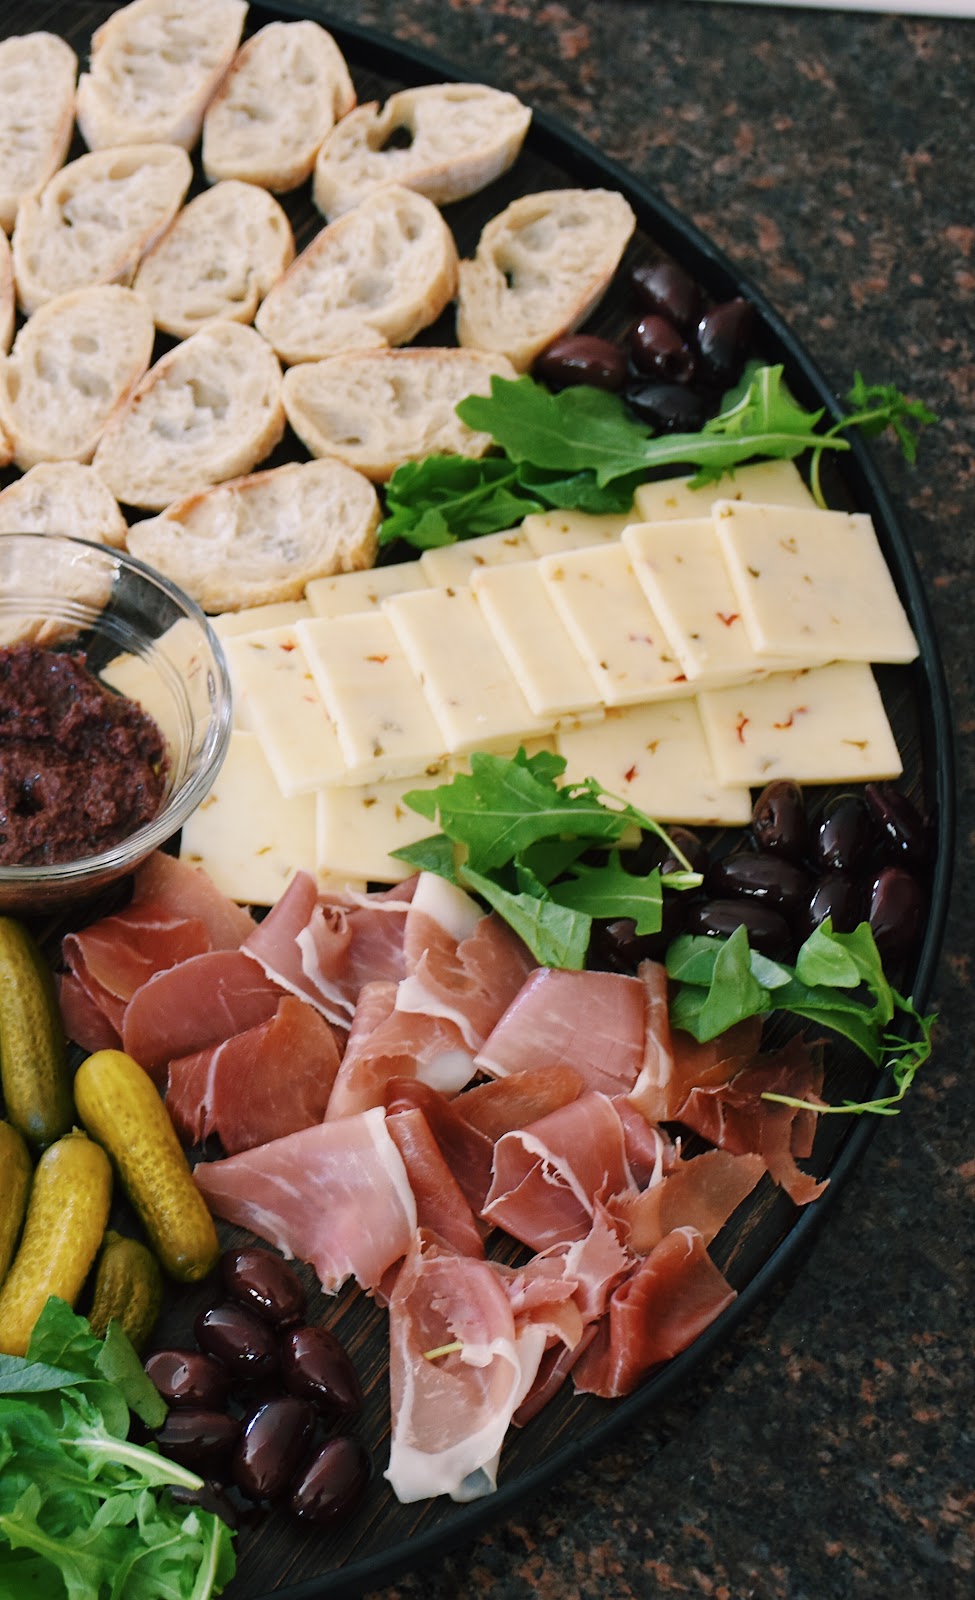
Unpack it and make it pretty
The next important step in unpacking the meats. With the pre sliced meats, it's super easy to make them look really nice on the board. By laying them flat overlapping each other, this creates the illusion that there is more meat than there actually is, and also takes up more space on the board to avoid an empty look. You can also fold the meats in half or into quarters if you want a bulkier looking board.
With the cheese, I've found that the overlapping method works best for me. An easy pattern to create involves putting a small circular dish in the middle of the board to designate as the center. In the dish, I usually put an olive tapenade or basil pesto, but any dip will work. From the middle, take the folded meats and cheese and layer them from the inside towards the edge of the board.
If you're finding empty spaces within the board, this is the perfect way to incorporate those colorful veggies. Place some of the pickles, olives, arugula, and spinach in those gaps. These ingredients on the board are not main ingredients, so it's okay to use them as fillers or decor.
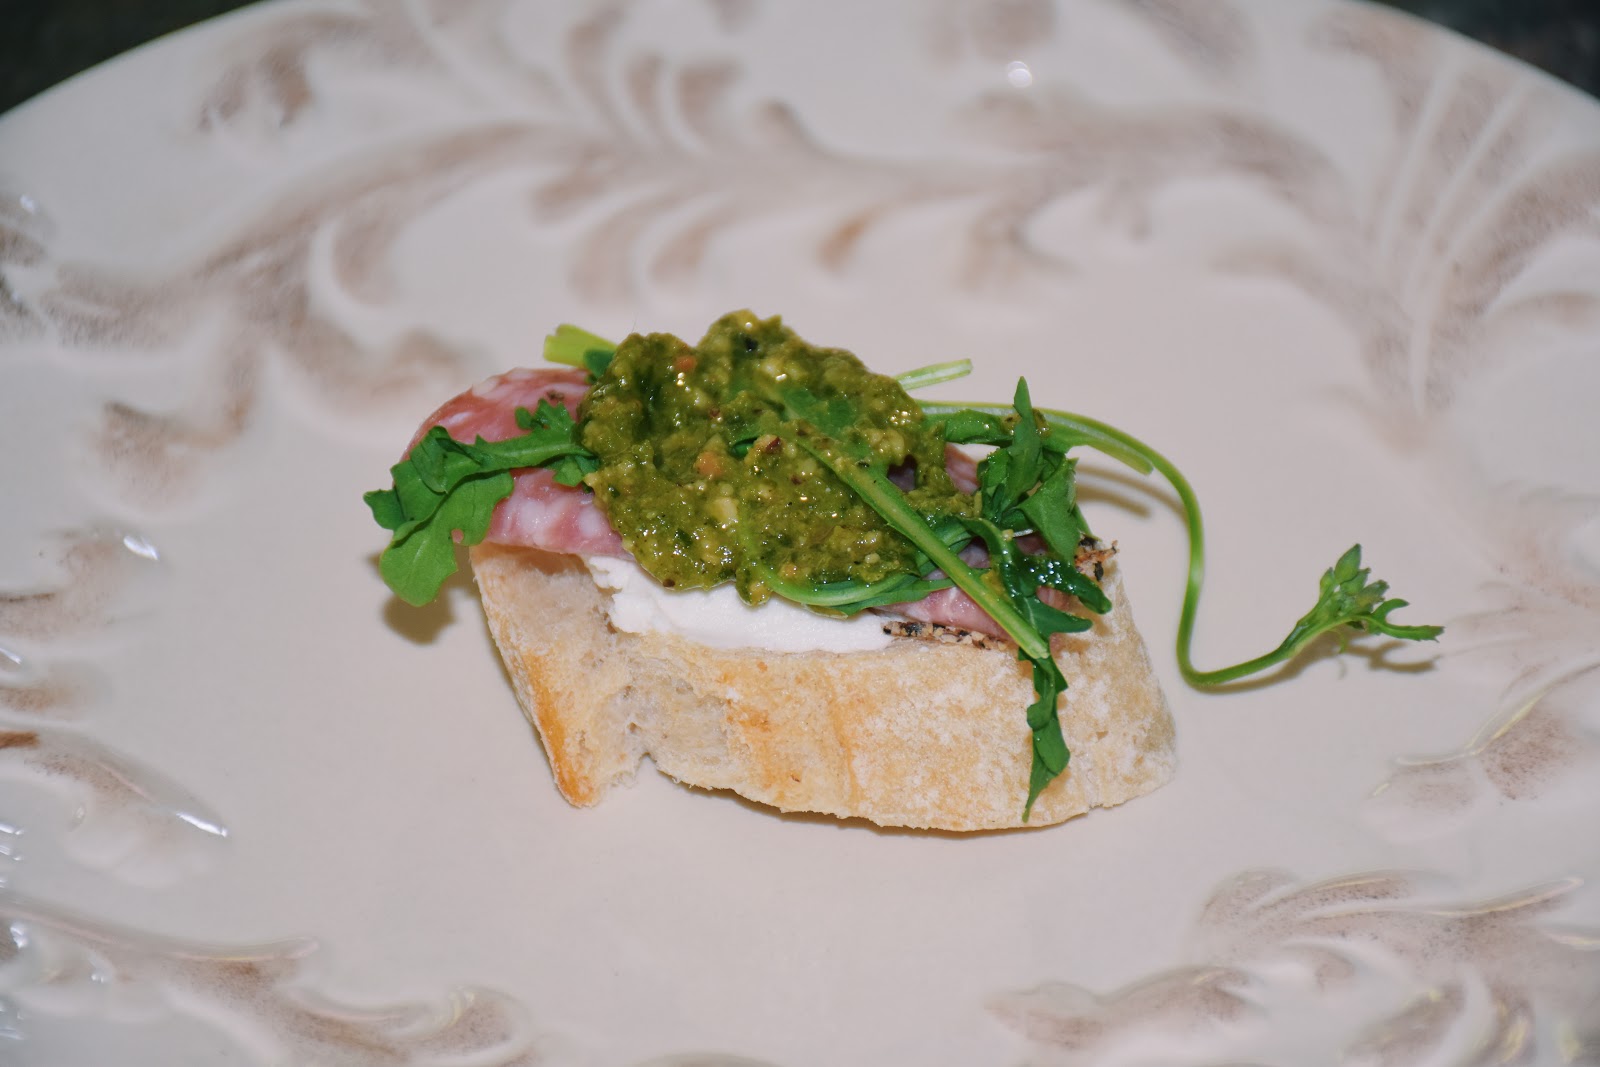
Piecing it all together
With your board looking fabulous and full, it's time to share with guests. The final touch of a charcuterie board is knowing how to pair certain ingredients together. My favorite combination is bread for the base, goat cheese as a spread on top of the bread, salami folded on top of the cheese, a couple pieces of arugula, and a dash of basil pesto to top it all off. Delicious and bite size!
The final product
Making a charcuterie board is a great way to have fun while preparing to host an event. They're simple and customizable for everyone to enjoy. Plus, they're super tasty and pretty to look at, which is always a bonus.


 The minimum wage is not a living wage.
StableDiffusion
The minimum wage is not a living wage.
StableDiffusion
 influential nations
StableDiffusion
influential nations
StableDiffusion


