As college students, most dread when winter break ends, but the best part of the year ending is an all new and exciting year full of fresh new looks and new styles. And with the new semester beginning in the next few weeks, having the time to redecorate your room with a new look can be limited. And what better way to start the new year off than to do some cute, cheap and affordable renovations to your dorm room. Living on a budget can sometimes deter people from straying from the normal, however here are some easy and affordable ideas that can help spruce up your living space.
1) DIY Coat Rack
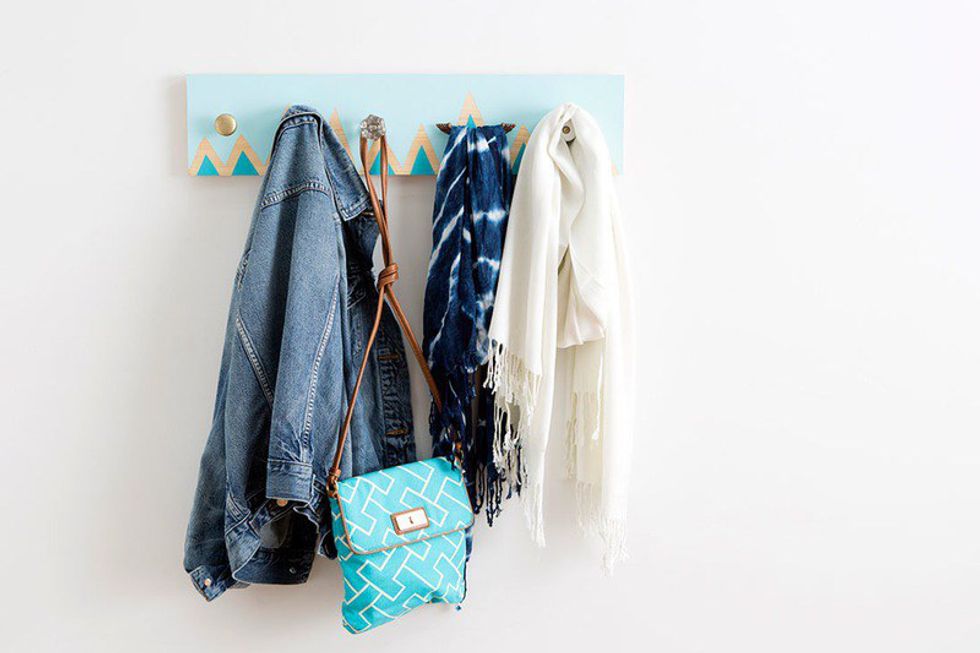
The key to a clean room is to make sure everything is off the floor! An easy and cheap way of keeping the small space neat and organize is a coat rack, which can be used for various items such as keys, coats/jackets, backpacks, umbrellas, bathrobes, towels, and hats. You can make it in no less than 15 minutes! Here is how. The materials you will need include: wood (5/8 inch thick), Black Mat Square Knob, Gold Knob, Clear Crystal Knob, Bronze Handle, paint, tape, paint brushes, scissors, drill and a Philips head screw driver. How to make: First, measure the space you want your coat rack and cut your wood to size. The hardware store can do this for you if you want an exact measurement, or you can just buy a small wood plank. I’d recommend the wood be about 5/8 inch thick. Second, tape on a design and paint the wood. Third, after the paint is dry layout your knobs and handles, drill holes in your wood board and then screw in your knobs and handles. And lastly, hang your rack on the wall and you are good to go. Please note that you are more than welcome to pick out your own knobs!!
2) State your corks
Show off your home state pride with this awesome cork project! Don’t worry, you don’t have to drink all that wine. You can buy bags of corks at any craft store. Plus, you could even pin things to this artsy craft board. Here is what you will need: wood or cardboard to create the template, printable state template (Go Indiana!), lots of corks, paint, wood glue, hot glue sticks, painters tape, hot glue gun, xacto knife, box cutter, circle-shaped foam paint brush, and a jar. How to make: First, Create your state template. You can use either wood or cardboard, I recommend cardboard because it is a lot easier. Assemble your state. If you had to cut out more than one piece, glue your pieces together using wood glue and secure with painter’s tape while the glue dries. Second, this step is an easy one, plug in your hot glue gun and start gluing those corks onto your template. Third, if you have any empty spaces use a box cutter and/or an xacto knife and cut some corks in half to fill in empty spaces. Next, squirt some paint into a jar, dip your foam brush into water and apply on the lower half of your state. To get the perfect ombré look, dilute your paint with more and more water as you move to the top. For a fun extra, paint your favorite city red! Lastly, hang it up and show some pride!
3) Vertical Garden
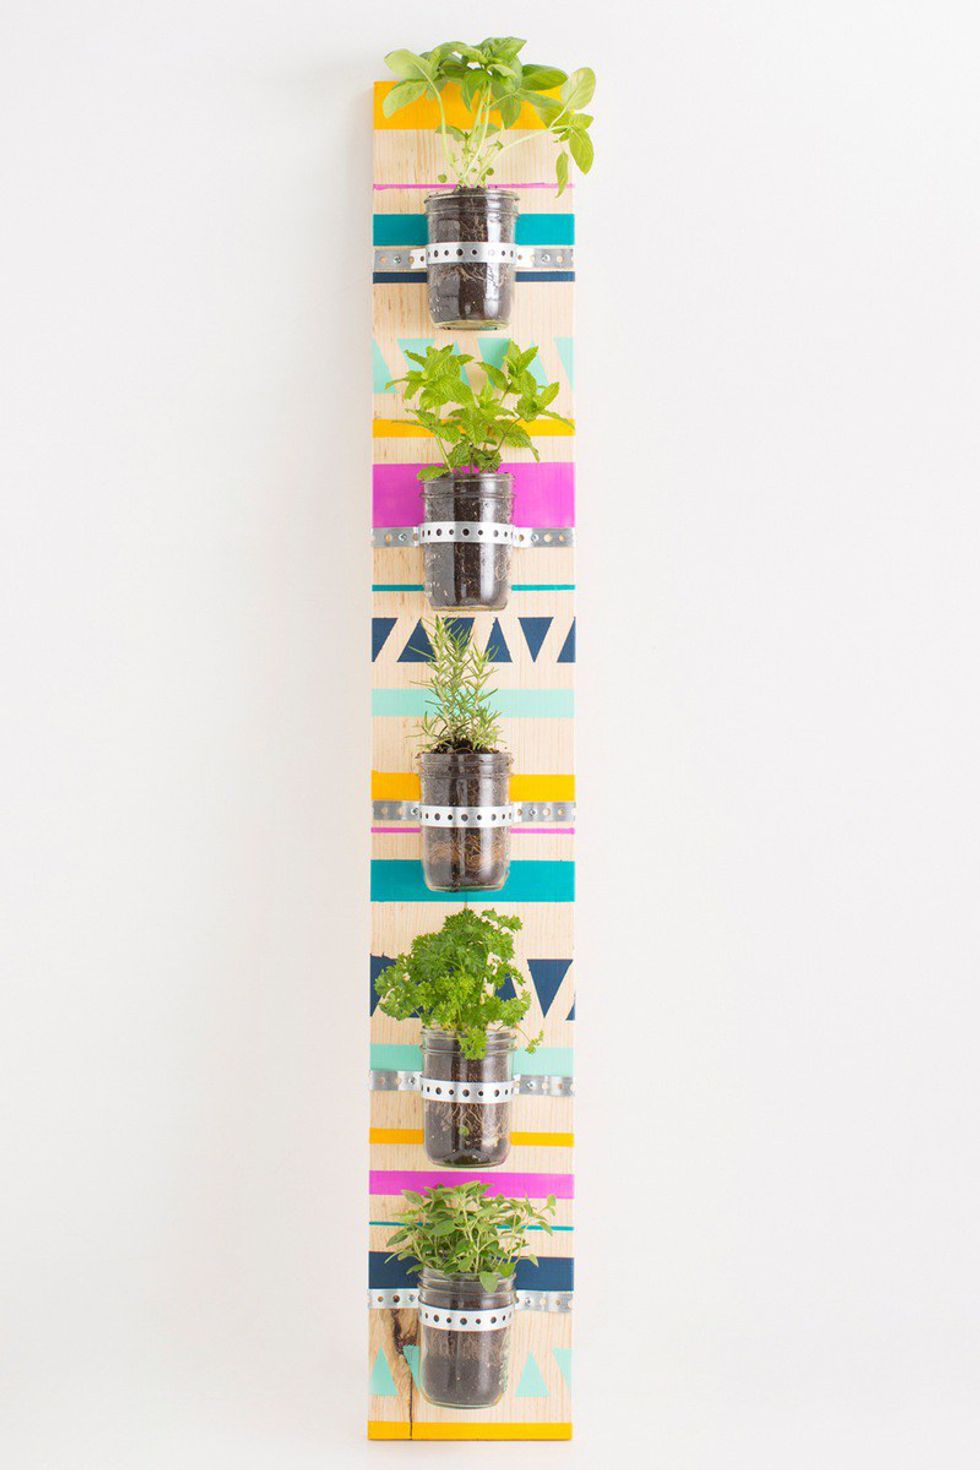
The one thing you may miss living in a dorm is not having the luxury of keeping a garden. Well, don’t worry, there is a quick and easy way to get some earthy greens in your room. All you need is: wood approximately 4 feet x 6 inches, paint, painters tap (3 different widths), screws, galvanized metal tape, 5 mason jars,5 different type of fresh herbs, electric screw driver, a hammer, a wire cutter, paint brushes and a yard stick. Here is how to create your wonderful, homey garden: First, using three different widths of painter’s tape, create a pattern on your wood. Second, paint and let dry. Wait about an hour before peeling off the tape. Third, it’s time to create some holders for your plants! Wrap the galvanized metal tape around your mason jar, leaving room for tabs to attach to the wood. Using a wire cutter, cut the metal and then bend. Our piece measured about 12 inches — 2 inches per tab plus 8 inches for the circumference. Then measure about 4-5 inches from the top of your wood. This will be where the top edge of your first planter will lay. Place the mason jar centered on the wood and lay the metal piece on top. Using the holes, mark the spot where you will need to place a screw. Create these marks on the wood for all five mason jar planters. Each top edge of the jar should be placed 4-5 inches from the bottom edge of the previous jar. Fourth, remember those screw marks? Time to secure one edge of your metal tape. Place the mason jar under the metal tape and secure the opposite side to the wood. The jar should fit snugly but should still be removable. And lastly, it’s time to plant! You can plant some basil, oregano, mint, parsley, or rosemary. Add some extra planting soil in your mason jars with the fresh herbs. And hang it up and there you go!
I hope these DIY projects helps spruce up your living space. Enjoy!


