Spring has finally settled in, and with this season comes ideas of refreshing your space, weddings, Easter, parties, and other fun activities or social events that call for celebration.
Here's my list of some easy DIY projects that are perfect for yourself or to give as a gift!
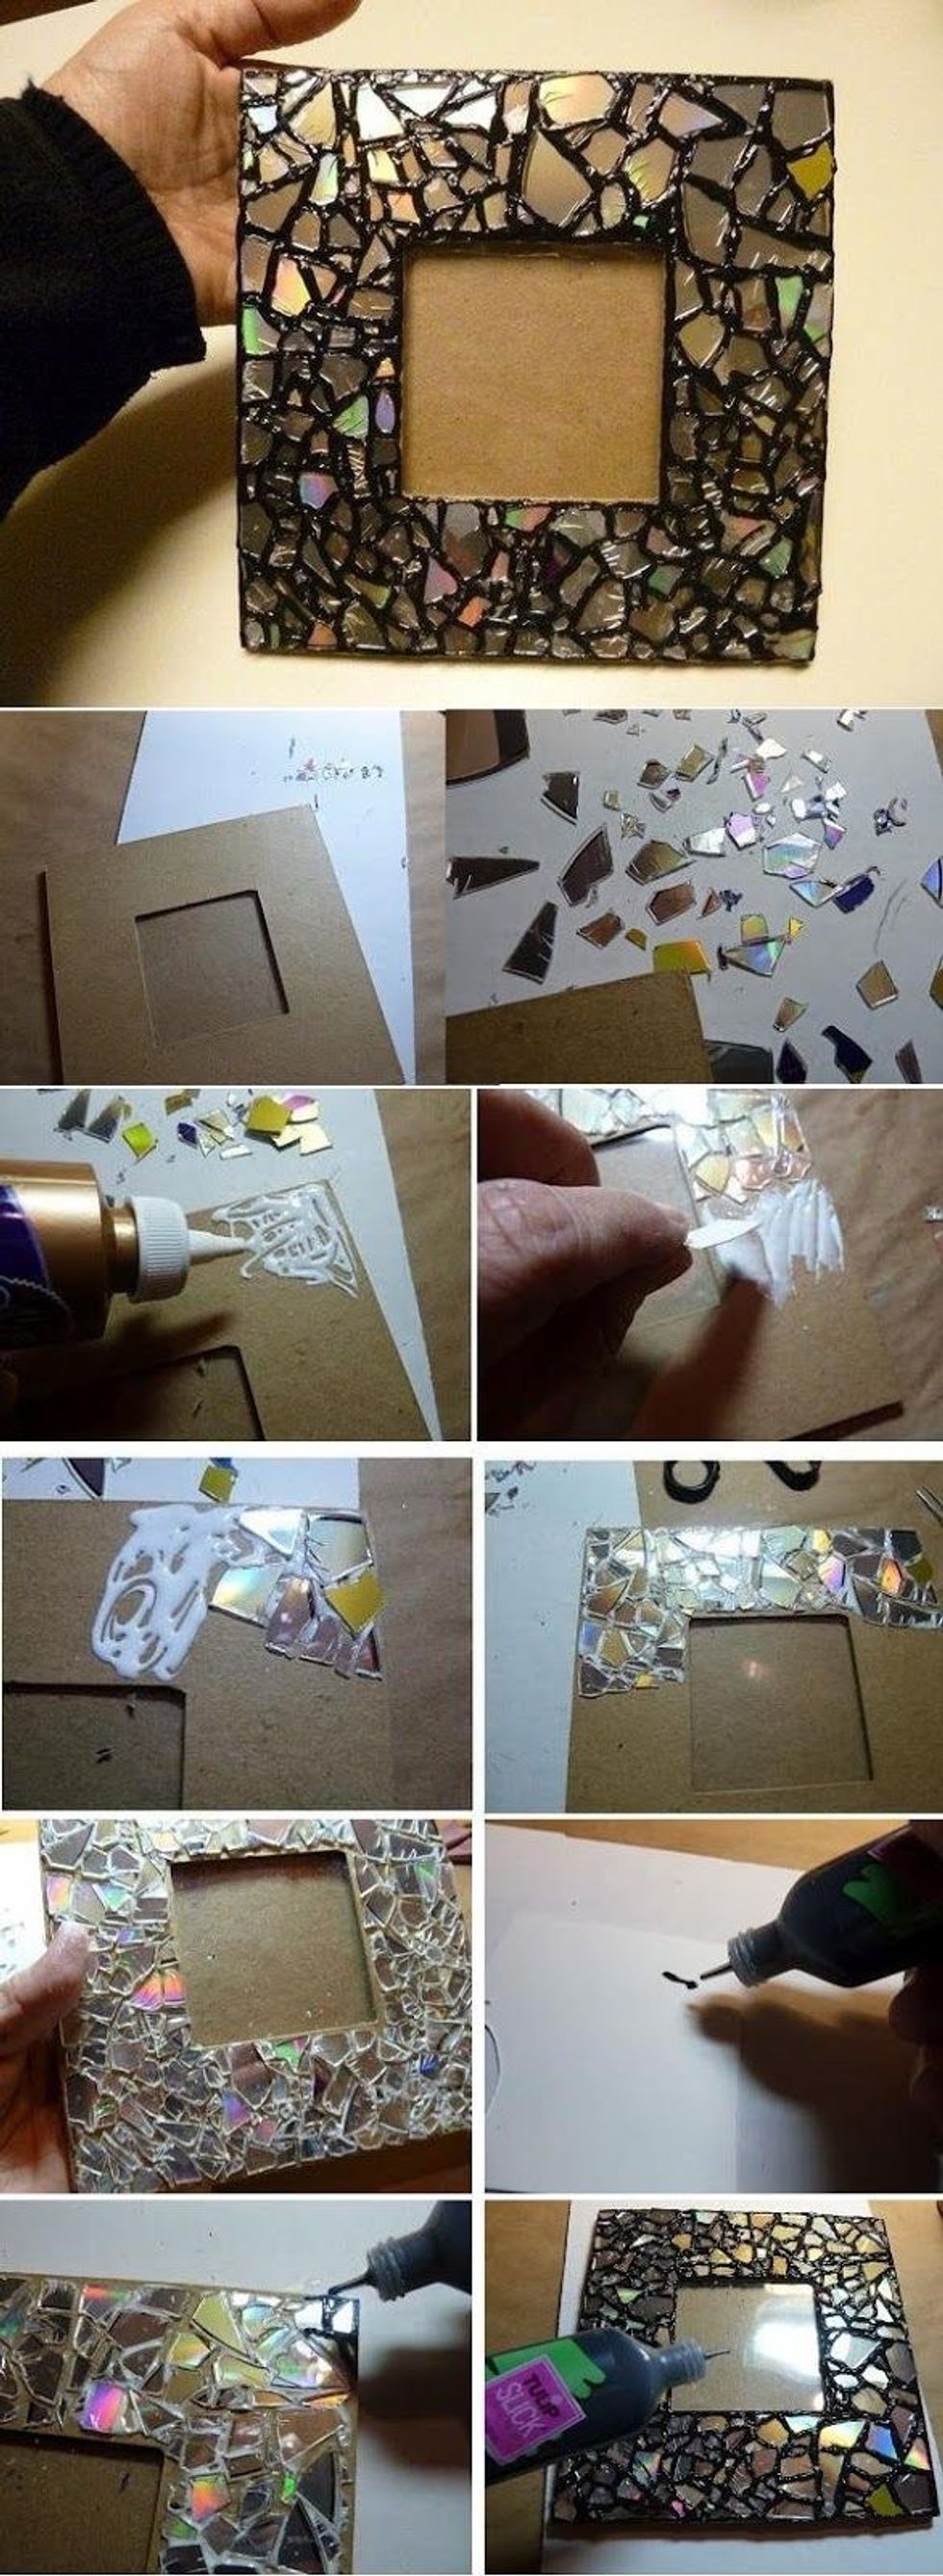
1. CD Mosaic Picture Frame
If you have tons of scratched up, old mix CD's from your middle school days like me, instead of tossing them out why not go outside and break some with a hammer (Note: Please try to wear some kind of protective eyewear)!
All you need for this funky project is:
- Cheap picture frame
- Old cd's
- Hammer
- Tacky glue
And if you want to not have anything showing in the background, just take some Puffy Paint (t-shirt paint) like seen in the bottom tutorial or spray paint or use acryllic paint to paint the border before gluing on the CD shards.
2. Sharpie Sneakers
You know how Converse and Vans charge upwards of $50 for a pair of shoes similar to these? You could make your own for under $30 (depending on the brand of white shoes you buy).
Supplies needed:
- white shoes (You can find decent ones at Wal-Mart or Fred's, and, depending on your shoes size, for women, if you look up online women's shoe sizes compared to children's you could save more that way. For example, I'm a size 8 in women's and can fit into a child's 6 in shoes.)
- Sharpies
- rubbing alcohol
- a dropper or cotton ball
3. Melted Crayon Art
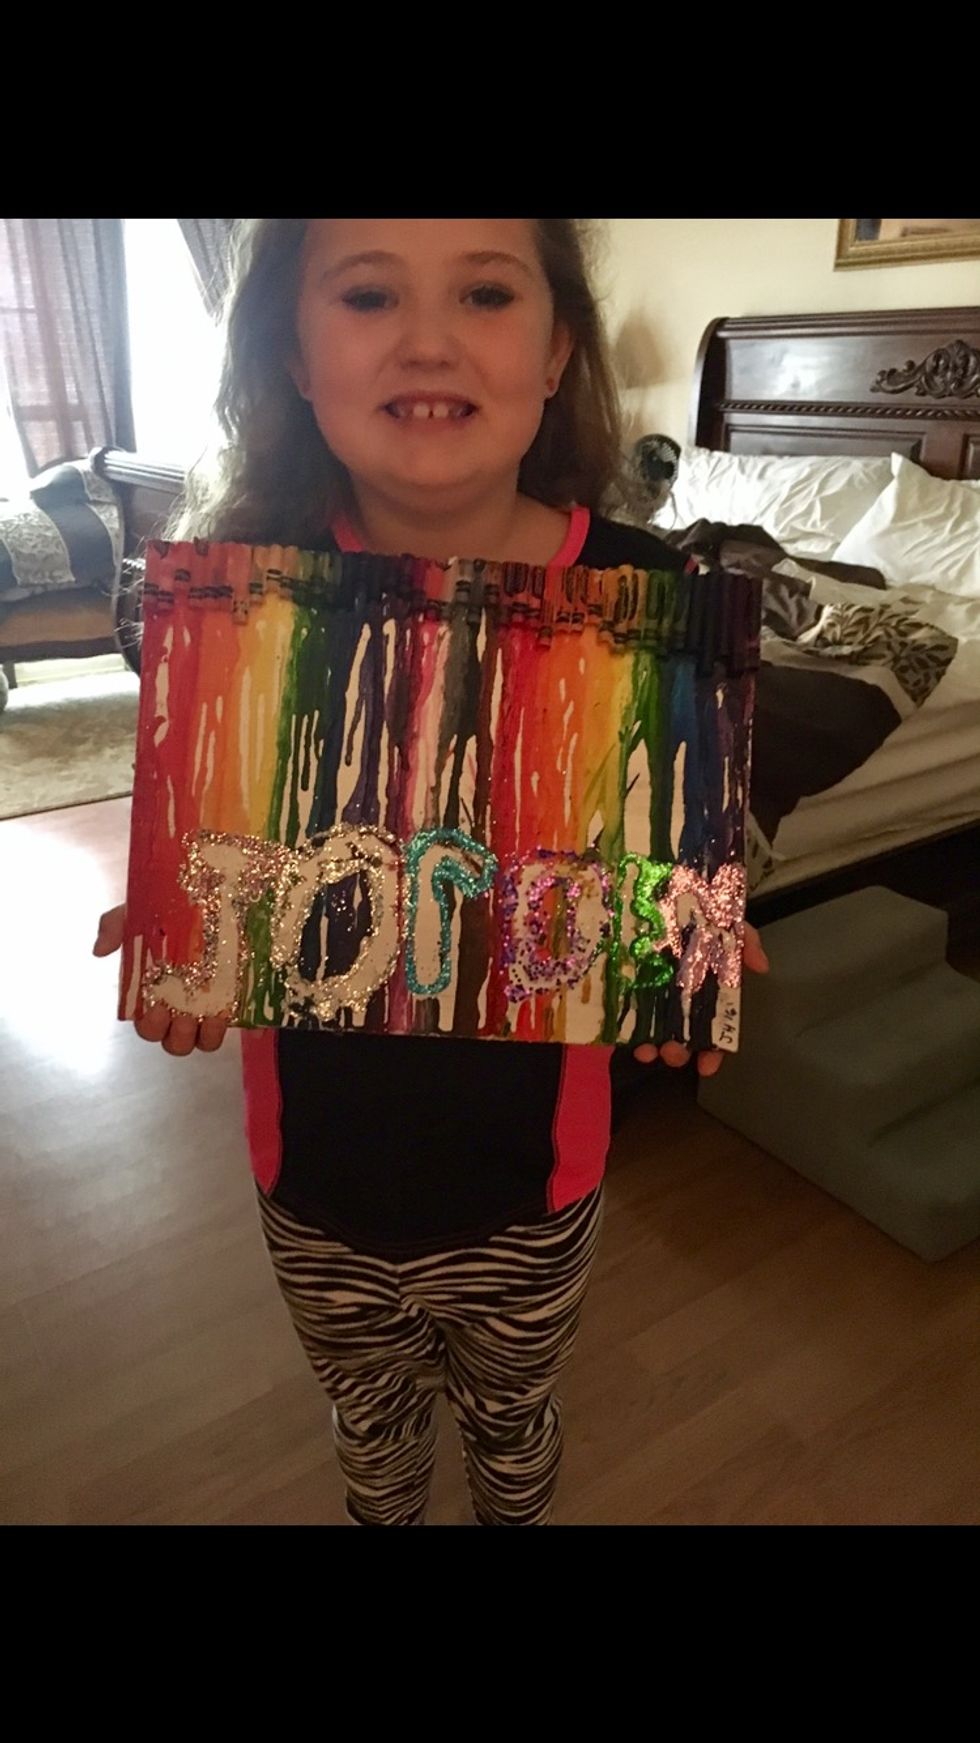
This is also a really fun art activity to do and, it's kid-friendly as you can see in the photo below of my niece, Jorden!
IT'S SUPER SIMPLE!
All you do is arrange your broken pieces of crayons on the canvas how you want it and start gluing. Allow about 5 minutes for the glue to dry, and then make sure you have a trash bag and some newspaper or some kind of sheet to lay down. Then, turn the hairdryer on and point it at the crayons to get it melting, boom! You're done!
Supplies needed:
- any size canvas
- crayons
- hot glue gun
- hair dryer
To create space where the wax wouldn't spill over so it'd reveal her name we put masking tape down on the canvas in the shape of the letters. For glitter embellishment, take off the tape and outline with elmer's glue and then shake glitter onto it.
4. Wooden Initial Photo Collage
This idea is a great way to de-clutter if you don't have much space for picture frames or to give as a gift and that can be admired every time they walk in the room!
Supplies needed:
- wooden letter
- pictures
- mod podge
- glue
5. Spray-Drip Art
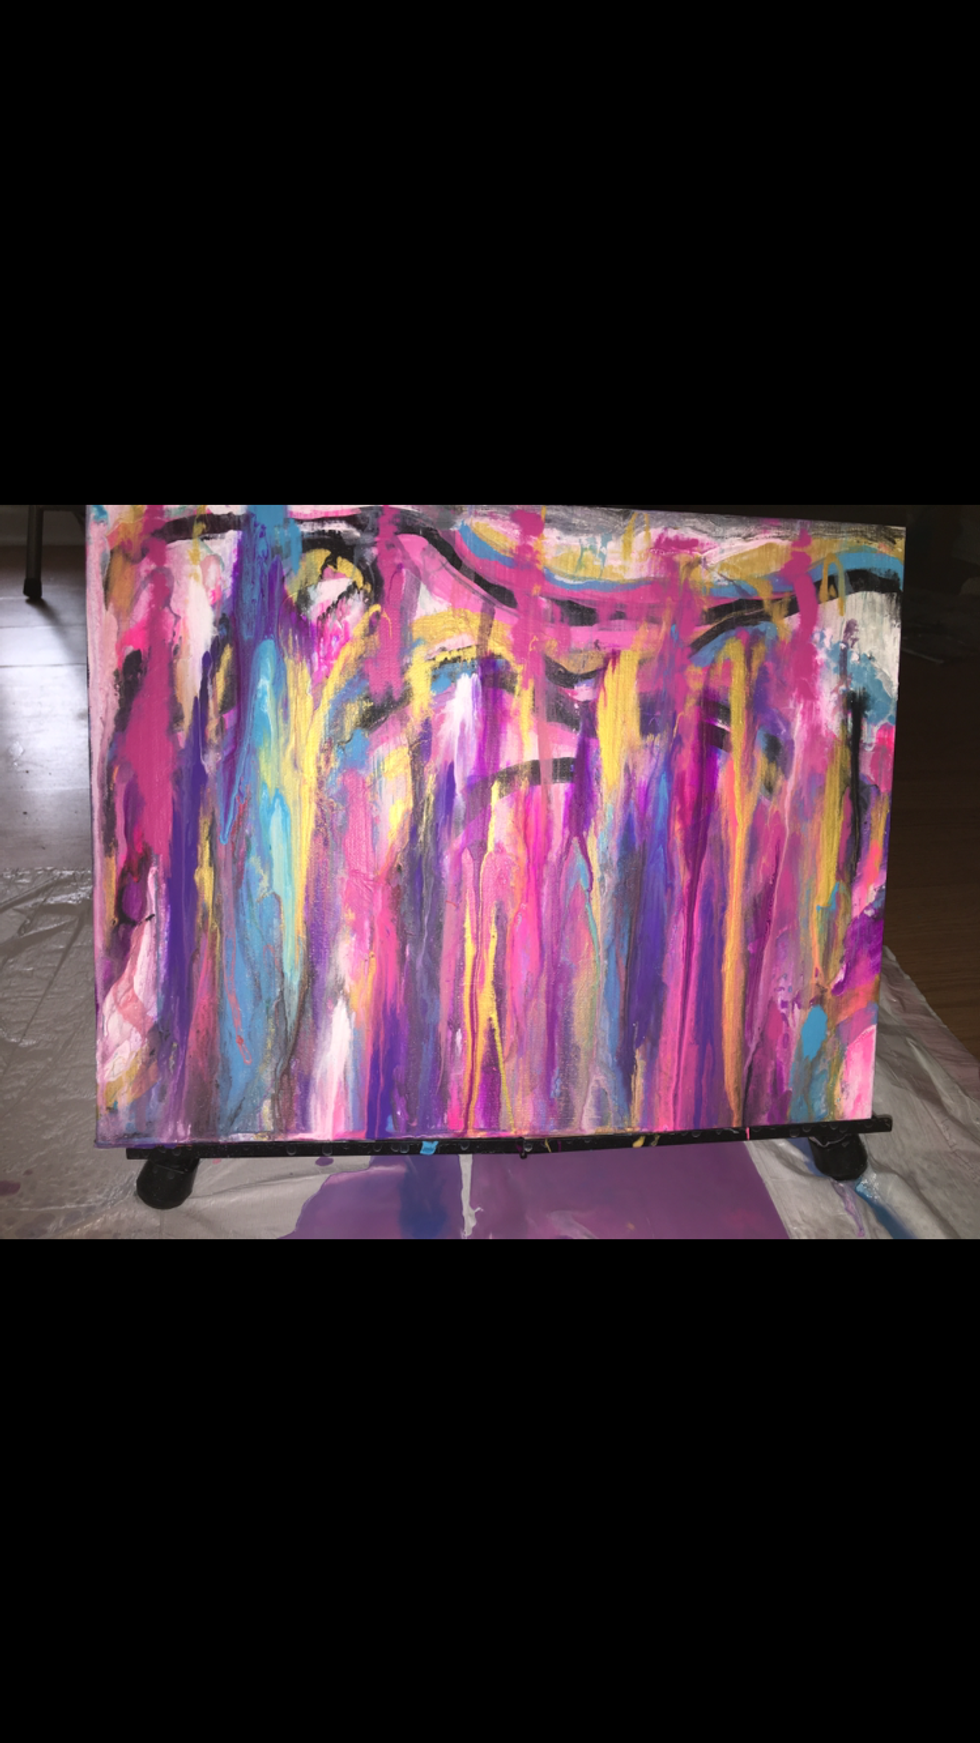
If you're really into painting, like I am, you like to go outside your bounds and experiment with other art styles and paint application from time to time. One that I've been practicing lately is spray-drip art.
To create your own one-of-a-kind masterpiece, you need to pick several colors that match well with each other. For mine, I kind of played around with analogous and neutral colors, alternating between neon, matte, and metallic paints. Next, create a blended design and spray it letting the paint drip. You can also squirt paint in varying lines to create more contrast and it also spreads easier. To finish, keep applying paint and spraying until you get the desired look.
Supplies needed:
- acrylic paint (I used Folk Art & CraftsSmart)
- canvas
- spray bottle
- something to put down so the paint won't drip on the floor/table
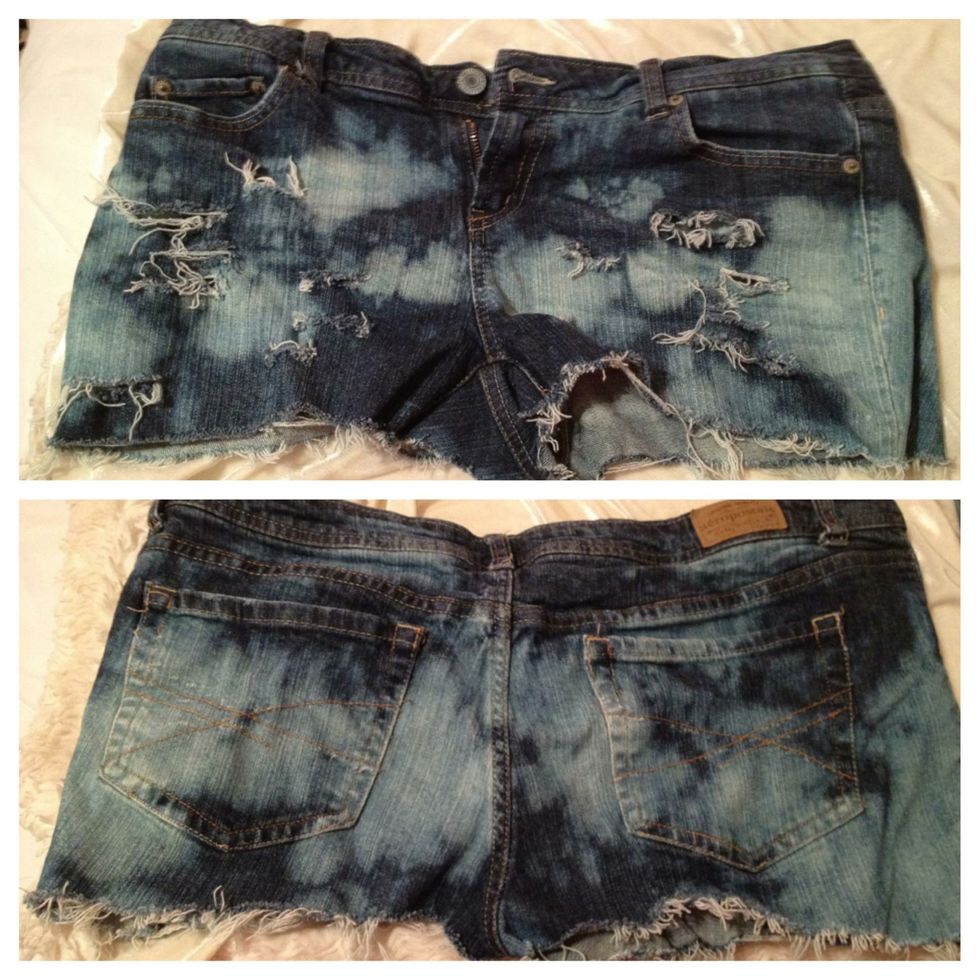
6. Distressed & Bleached Cut-Offs
Spring is in full swing, so it's time to start trading out your pants for shorts and skirts! If you wanna save some money and make those blue jeans holding up space in your closet into some shorts it's super easy!
Supplies:
- old jeans (If you don't have any already, a lot of people who have re-created this trend go to Goodwill.)
- bleach
- fabric scissors (You can use regular scissors, but that's just my preference.)
- razor (This gives the shorts a more distressed look.)
Try on your jeans first and mark with a pencil where you want to cut them at & then distress with holes and scrape with the razor, then go outside or put your shorts in the tub. Then, using a paint brush or the Bleach cap splatter it onto the shorts, throw them in the washer and dryer, and you're done!
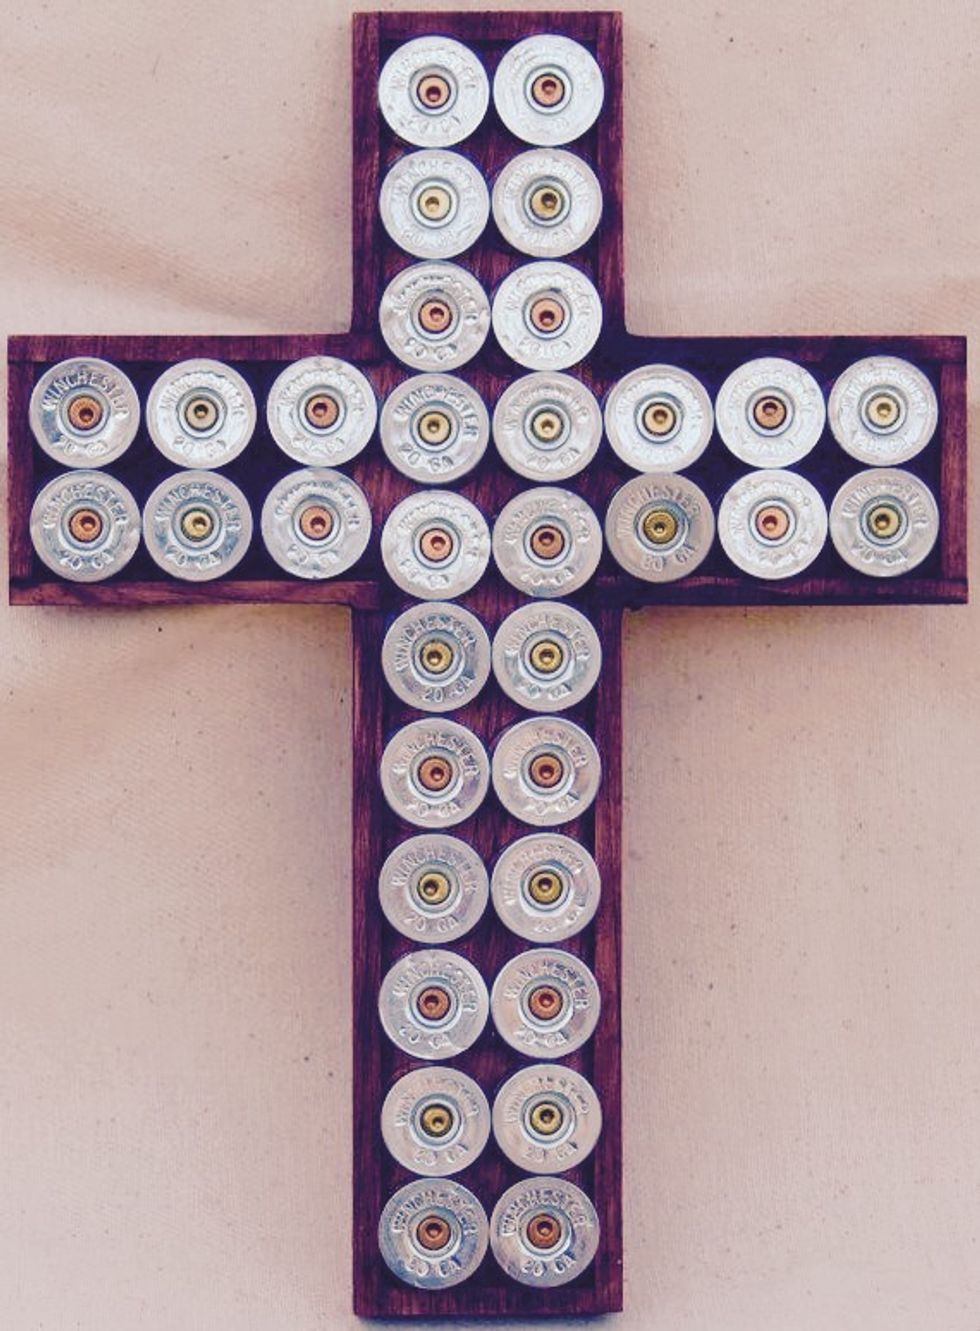
7. Shotgun Shell Cross
A good way to show off your country side and re-use some empty shotgun shells is to put 'em on a cross! I made one similar with a less than $10 wooden cross from Wal-Mart, some gold spray paint, shells, and a hot glue gun, and then mod podge to give it a matte finish!
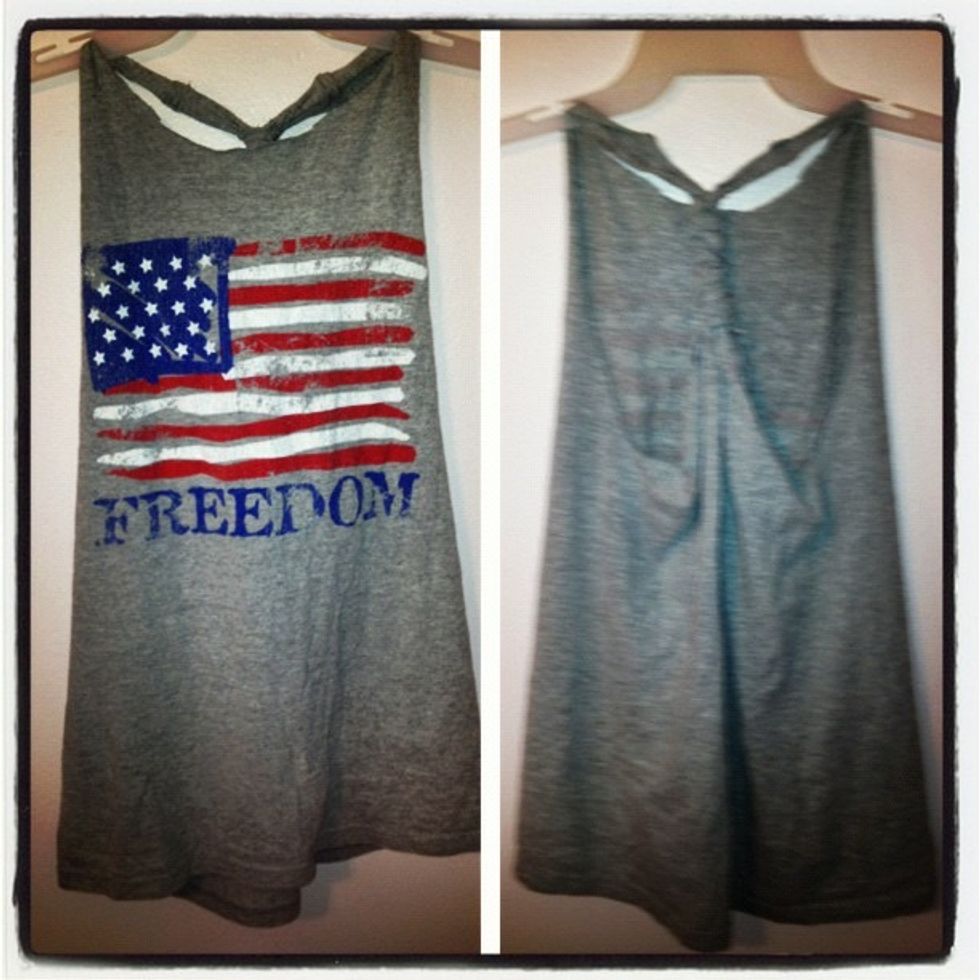
8. T-Shirt Tank
If you want to avoid throwing out a favorite old t-shirt and you're in need of a tank for a holiday or even a new workout top, why not turn it in to a tank for the summer? All you need to do is cut the sleeves off, cut a small semi-circle cut around the front and back collar of the shirt. Using the pieces you cut off, cut those again into strips and start tying at the lowest part of the back of the shirt till your DIY racer-back tank fits as desired!
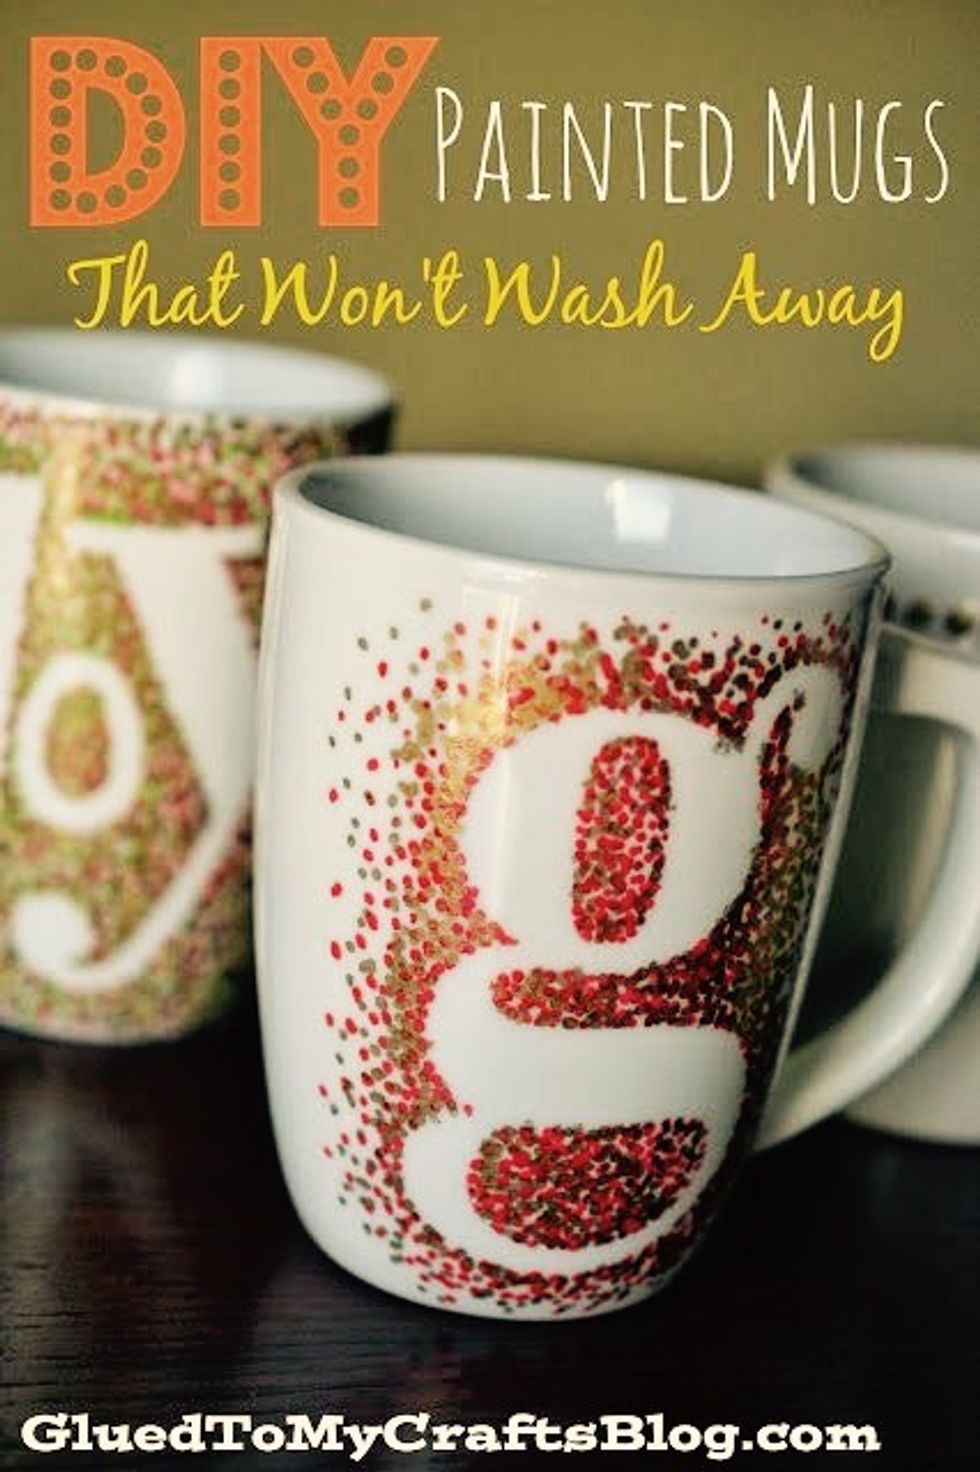
9. DIY Painted Mugs
This cute and personalized idea can be done within a couple of hours and just requires a cheap ceramic mug, sharpies, and scrapbook letters. After you have the design looking the way you want, just place it in your oven for 30 minutes on 350 degrees, and then you're finished!
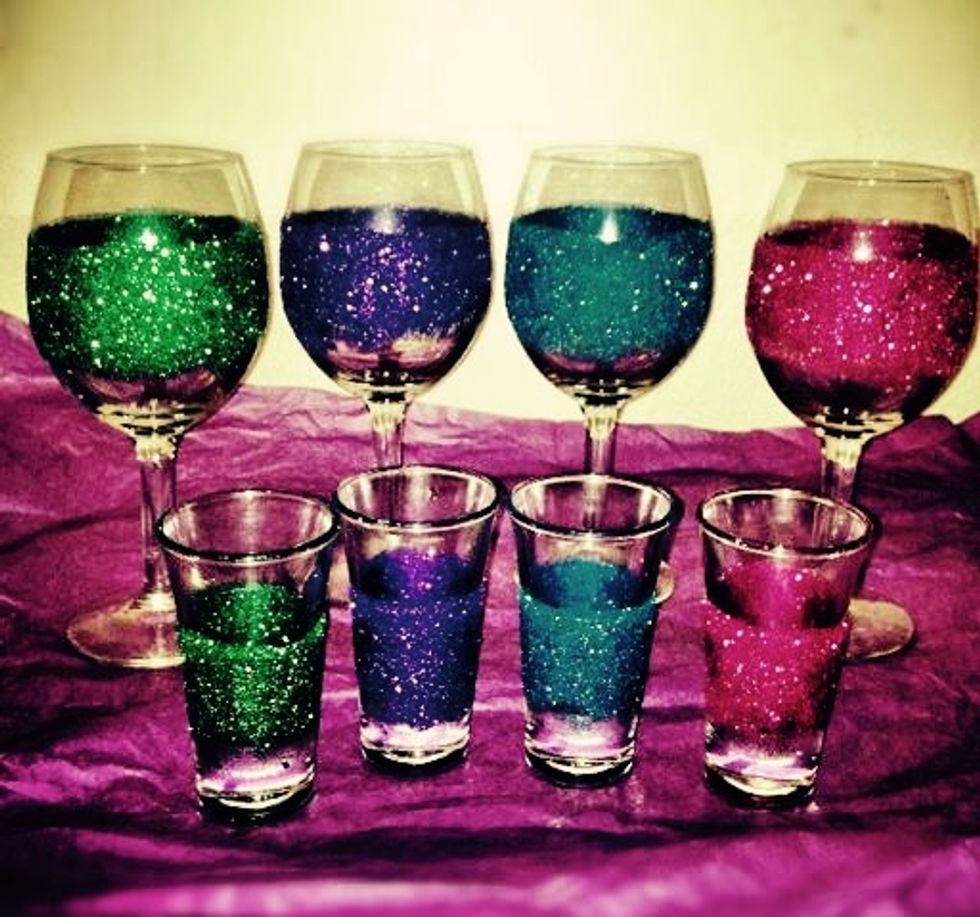
10. Glitter Glasses
I received one like the wine glasses for my birthday one year and thought it was an adorable idea that makes a plain wine glass go from blah to glam!
Supplies needed:
- drinking glass of choice
- glitter
- Elmer's glue
- mod podge (allow to sit before applying mod podge)
*Do not put in dishwasher or the glitter will come off!*
These are perfect projects if you want to spice up and re-purpose some older items you have lying around or cost-effective present ideas that anyone would love to receive!
Here's a link to my DIY board on Pinterest for other awesome ideas and inspiration on how to personalize what you already may own!
Happy crafting!

